- Login with credentials and click on the file browser.
- Then we get folders and files list, select the required report using search bar option.
- Now, we need to right click(or double click ) on our report. We can see options like Open, Open in New Window, Delete, Rename, Share & Properties.
- Click “Open” to open the report in the same browser as shown below.
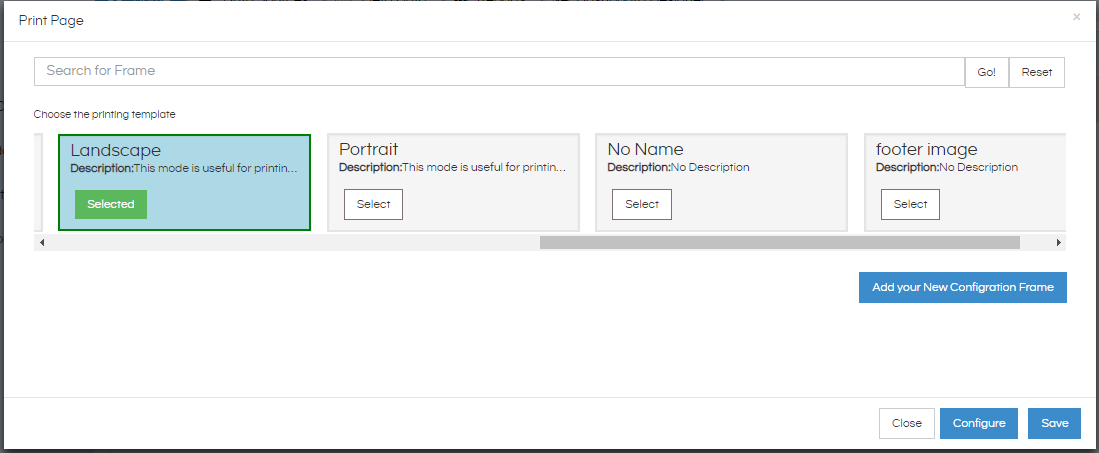
- Now click on “Export Icon” then select “Options” from the drop-down. It will show print page window in that default selection is “Landscape”. Here we need to click Add Your “New Configuration Frame” button.
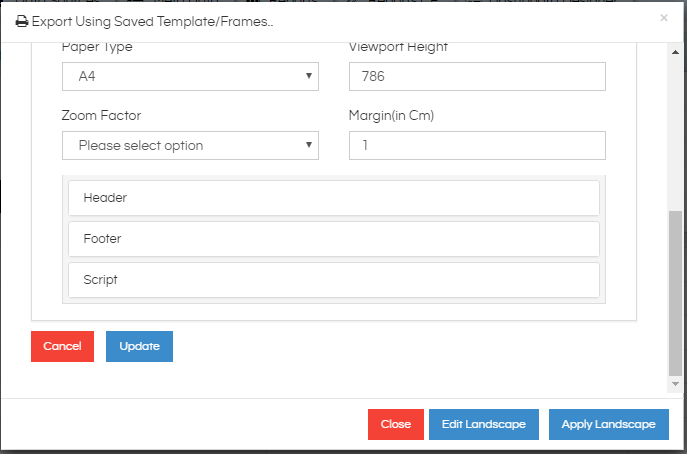
- Fill all the fields.
- After filling all fields save the details. Then it will generate one JSON file along with this we need to create one js file(manually) and (json and js file names should be same).
- After generating JSON file with required fields, it will show code like
- Now, we have to create .js file in that we need to use doExcute() function like below
- Now, we can export PDF format using our own customized print template.


{
    "head": {
        "title": "Envision",
        "description": "This mode is useful for printing dashboard reports in Envision PDF format.",
        "image-name": "Image Path"
    },
    "body": {
        "viewPortWidth": 670,
        "viewPortHeight": 1024,
        "layout": "portrait",
        "paperSize": "A4",
        "hasScript": true,
		"scaling":"1",
	}
}
function doExecute() {
var message = reportPage.evaluate(function () {
//  write code here.

 });
}
- From the above steps, we have designed our own customized print template. Now to export the report in that customized print template format.
- Repeat 1 to 5 steps, in the print page window we can see our own customized print template(Here customized print template name is “Envision”), we have to simply select that template and save.
- Now click on the export icon then click on PDF. The report will get exported in our customized PDF format.

NOTE: After implementing redirection at your webserver level it might happen that the exporting might not work. In case if it does not work please try these steps. The reason for exporting not working might be that redirection uses some differnt port and then exporting method will not be able to communicate on that redirected URL. In order to solve this add HTTP connector port inside server.xml file of Apahce Tomcat’s conf folder. You can add this below text at the line number 60
< Connector port="8080" protocol="HTTP/1.1"
               connectionTimeout="20000"
               redirectPort="8443"  relaxedQueryChars='^{}[]|"' />
Here port 8080 should be changed to whatever port number which is not being used at any other place.
After the above step, open the file setting.xml present at ‘..hi-repository/System/Admin” and search for baseURL tag. Change it from its previous value to http://localhost:8080/hi-ee/hi.html
We have put 8080 since in the previous step we had used 8080 port only. In case if you had used some other port number like 7080 at server.xml then here also please use 7080 only.
Restart the server and then test.
In case if you have any queries please get us at support@helicalinsight.com
