In this blog, we will learn how to use date filter and the various kind of functions which are available on this kind of data. With version 5.0 onwards, Helical Insight is providing a lot of prebuilt date/date time functions for quick filtering along with a new UI for user selection.
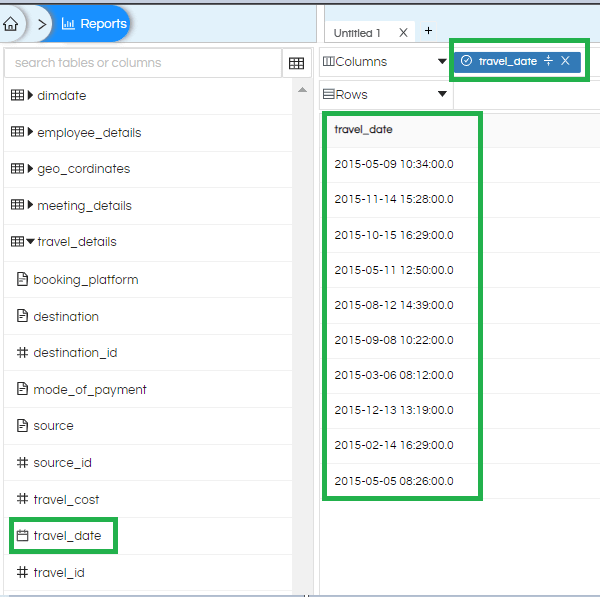
- Below you can see we are having a date in the format “YYYY:MM: DD HH:MM: SS”. Now we are adding the same column as filter also. You can either directly drag the column in the filtering section from the metadata visible area or click on the dragged dimension measure and in the dropdown you will get an option of adding as a filter.
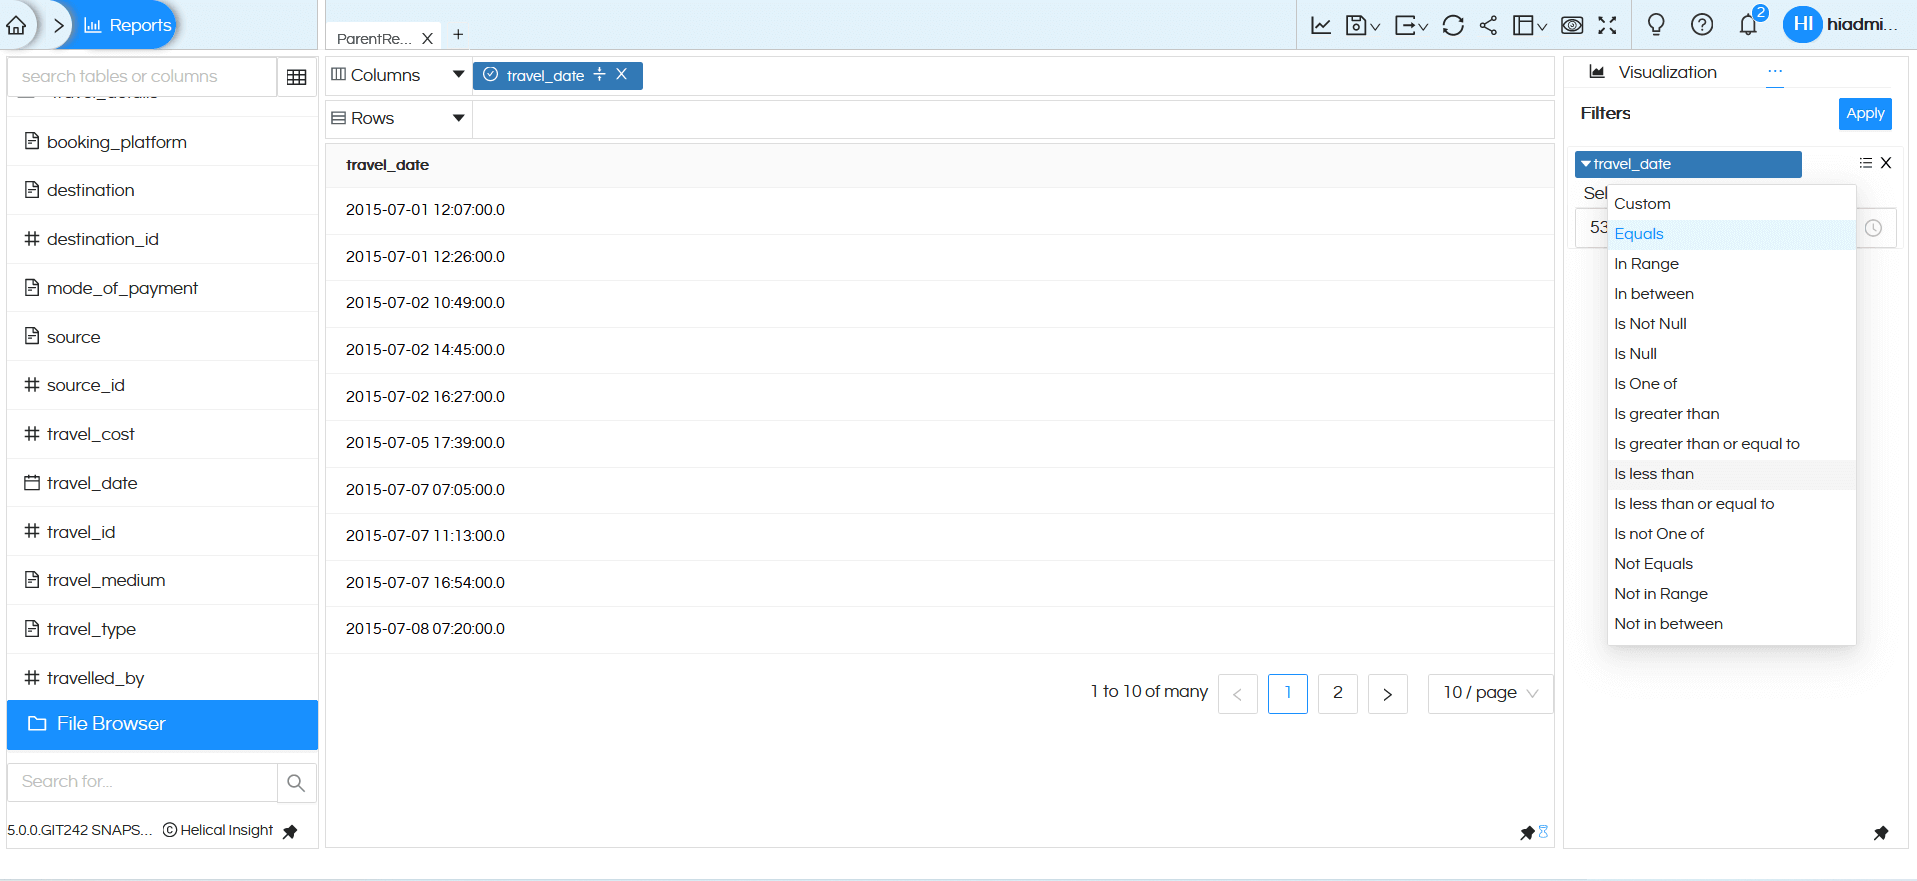
- Once the column is added as filter the first thing is you can specify the filtering condition like single select, multi select, date range, not in range, greater than, less than etc.
- You can click on fx and a lot of quick functions can be applied for selecting the values which we are elaborating below. The first one is “Date”. Now that we have selected the condition (to select the date), in order to select the value, we can either use the “Select” which will show a list of all the options as a drop down or a date picker.
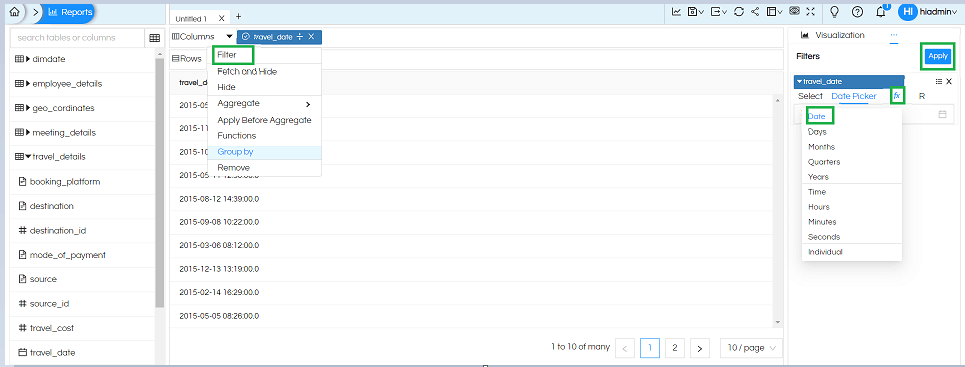
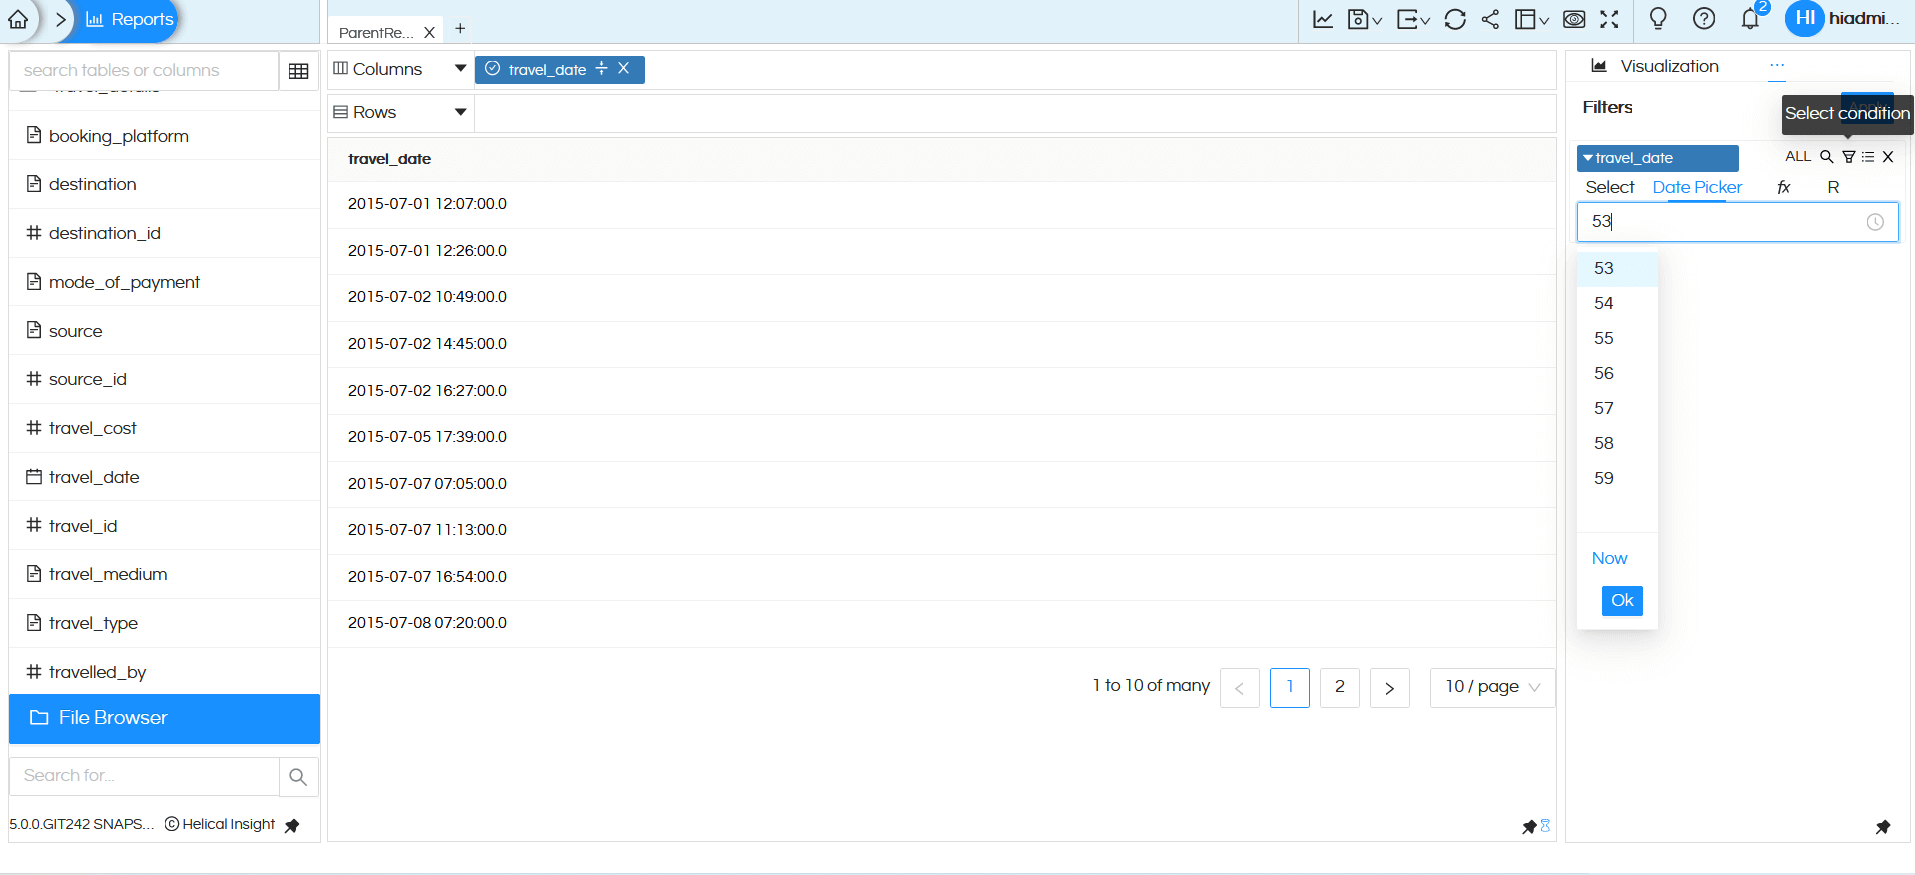
When we used “Select” option as you can see below it is showing list of all the values present from which a person can select the value.

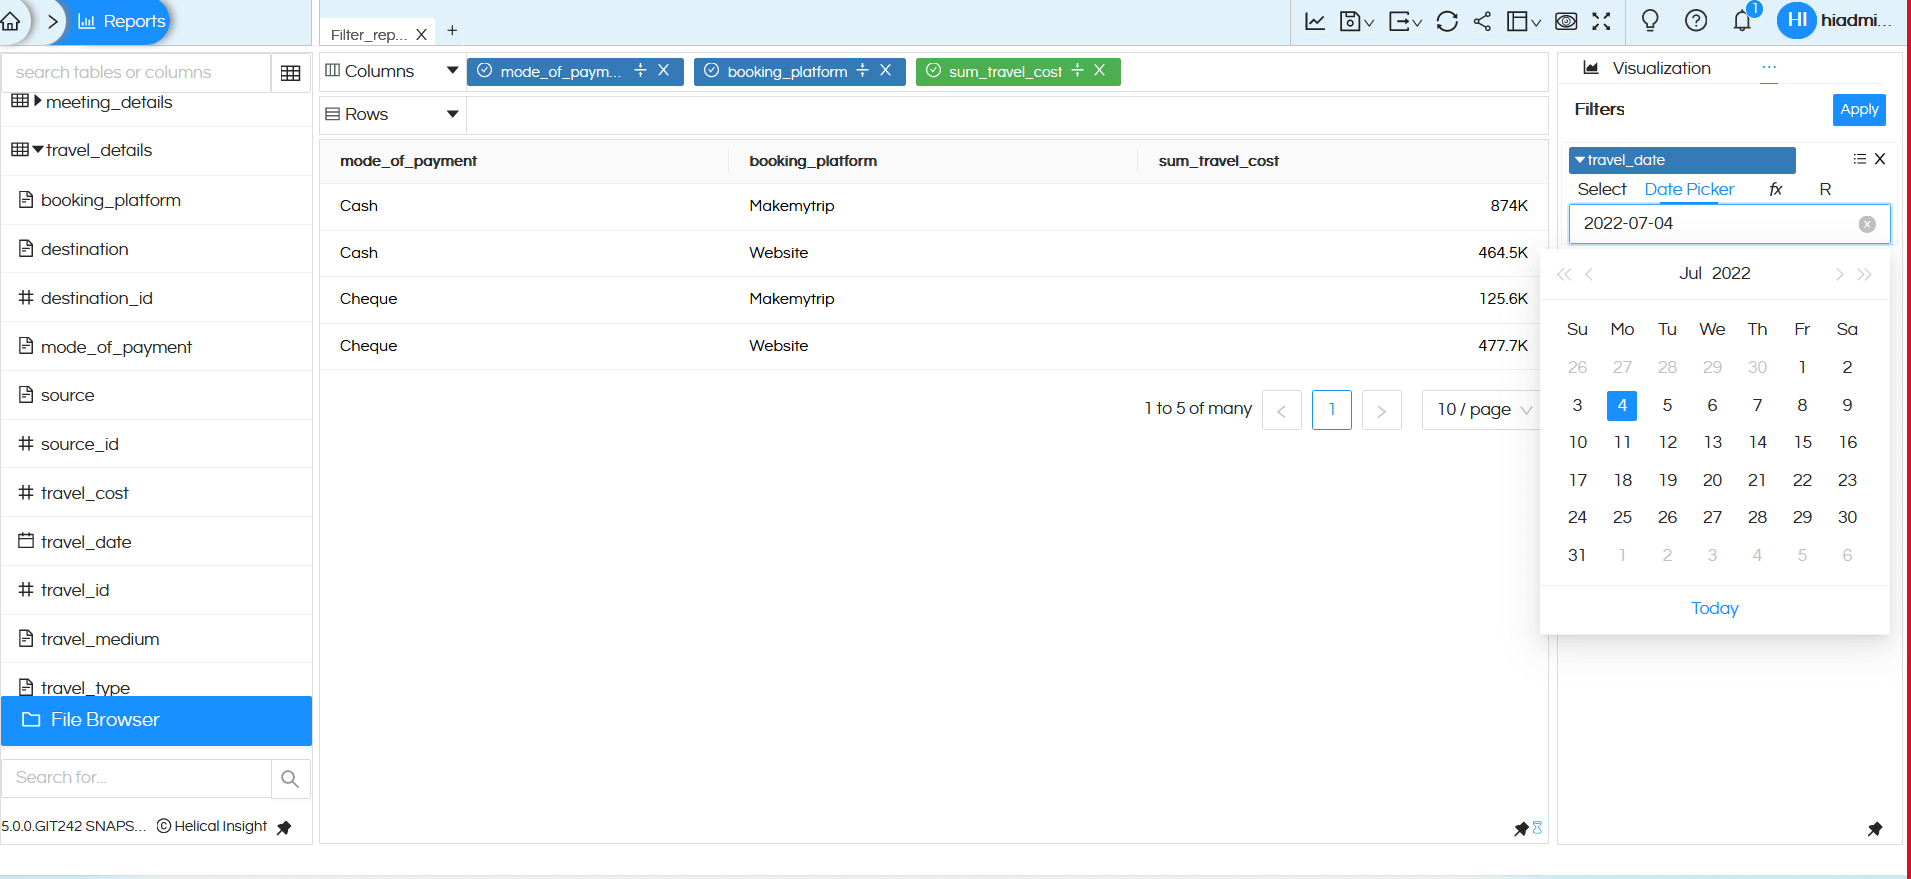
When we use “Date Picker” option it will allow to select the exact date using a calendar kind of menu.
- Second option in the fx is Day filter as shown in the below image.
In this when “Select” is used it is giving list of all the dates options available.
Whereas when we use Date picker we get option like below
- Third option in the fx is Months filter as shown in the below Image.
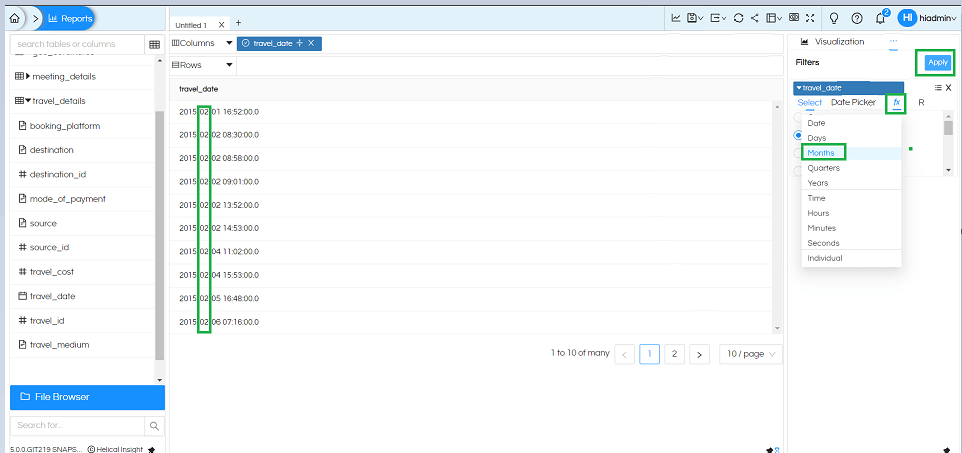
The “Select” option will allow to select the month. You can select Month number and apply.

When we use Date Picker option from the UI a month can be selected. Note that this will only pass the month and not the year.
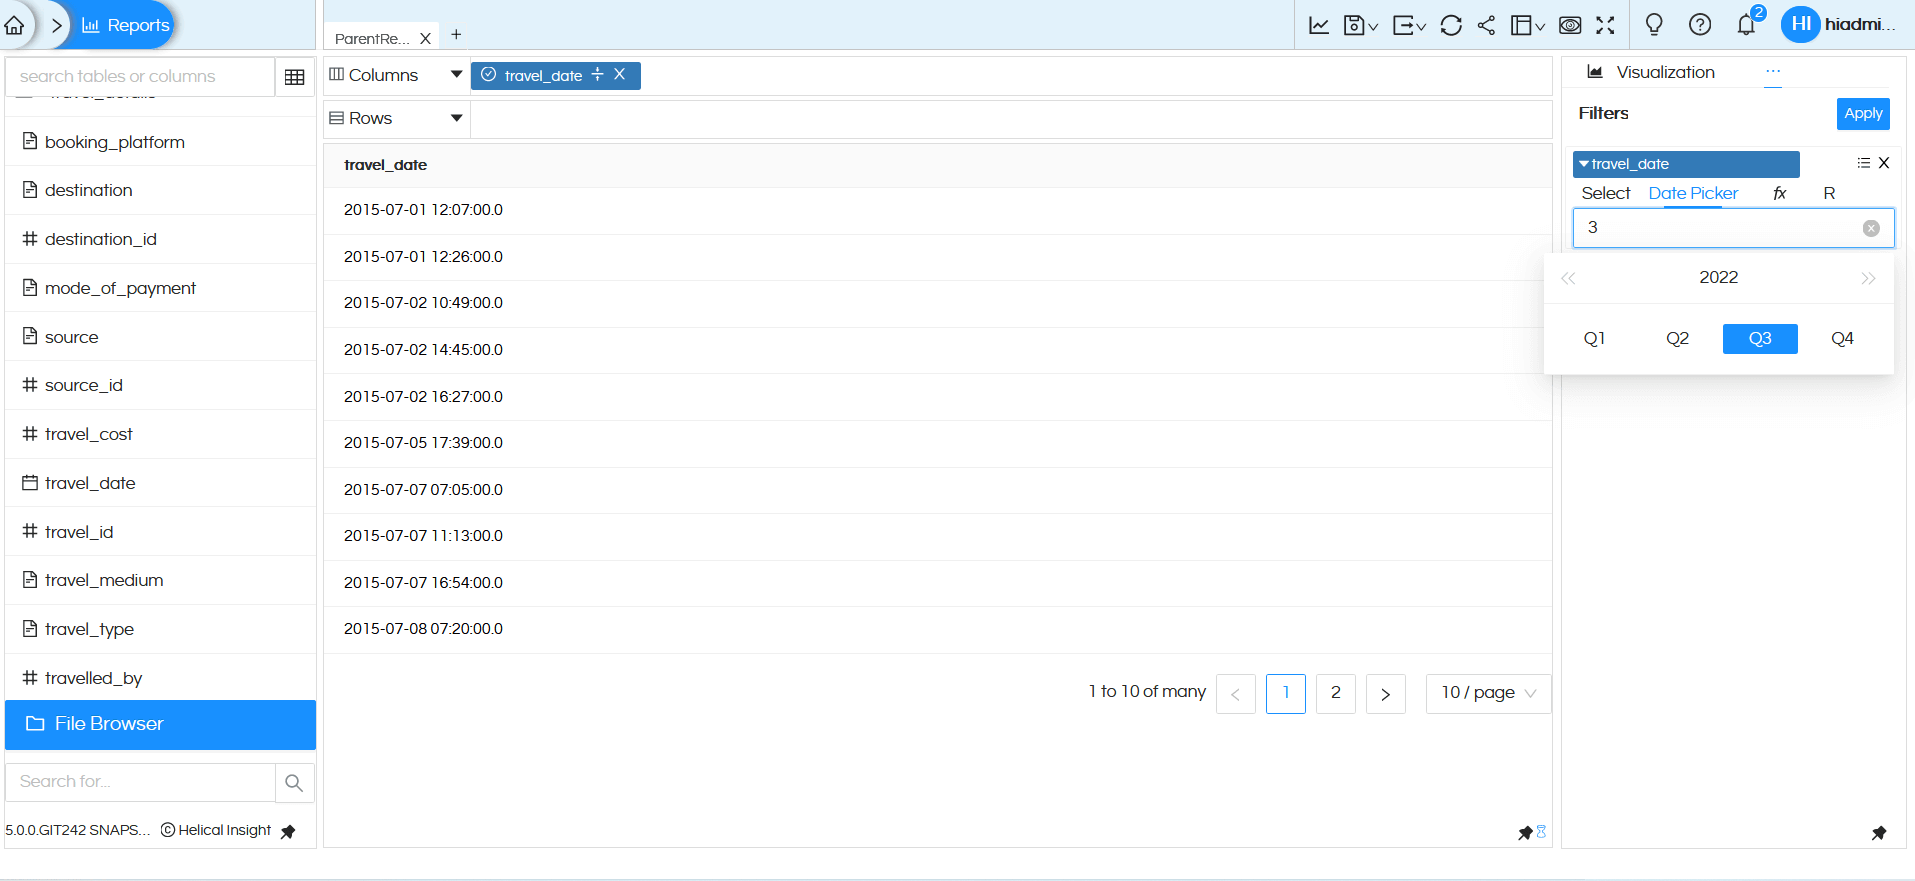
- Fourth option in the fx is Quarters filter as shown in the below Image.
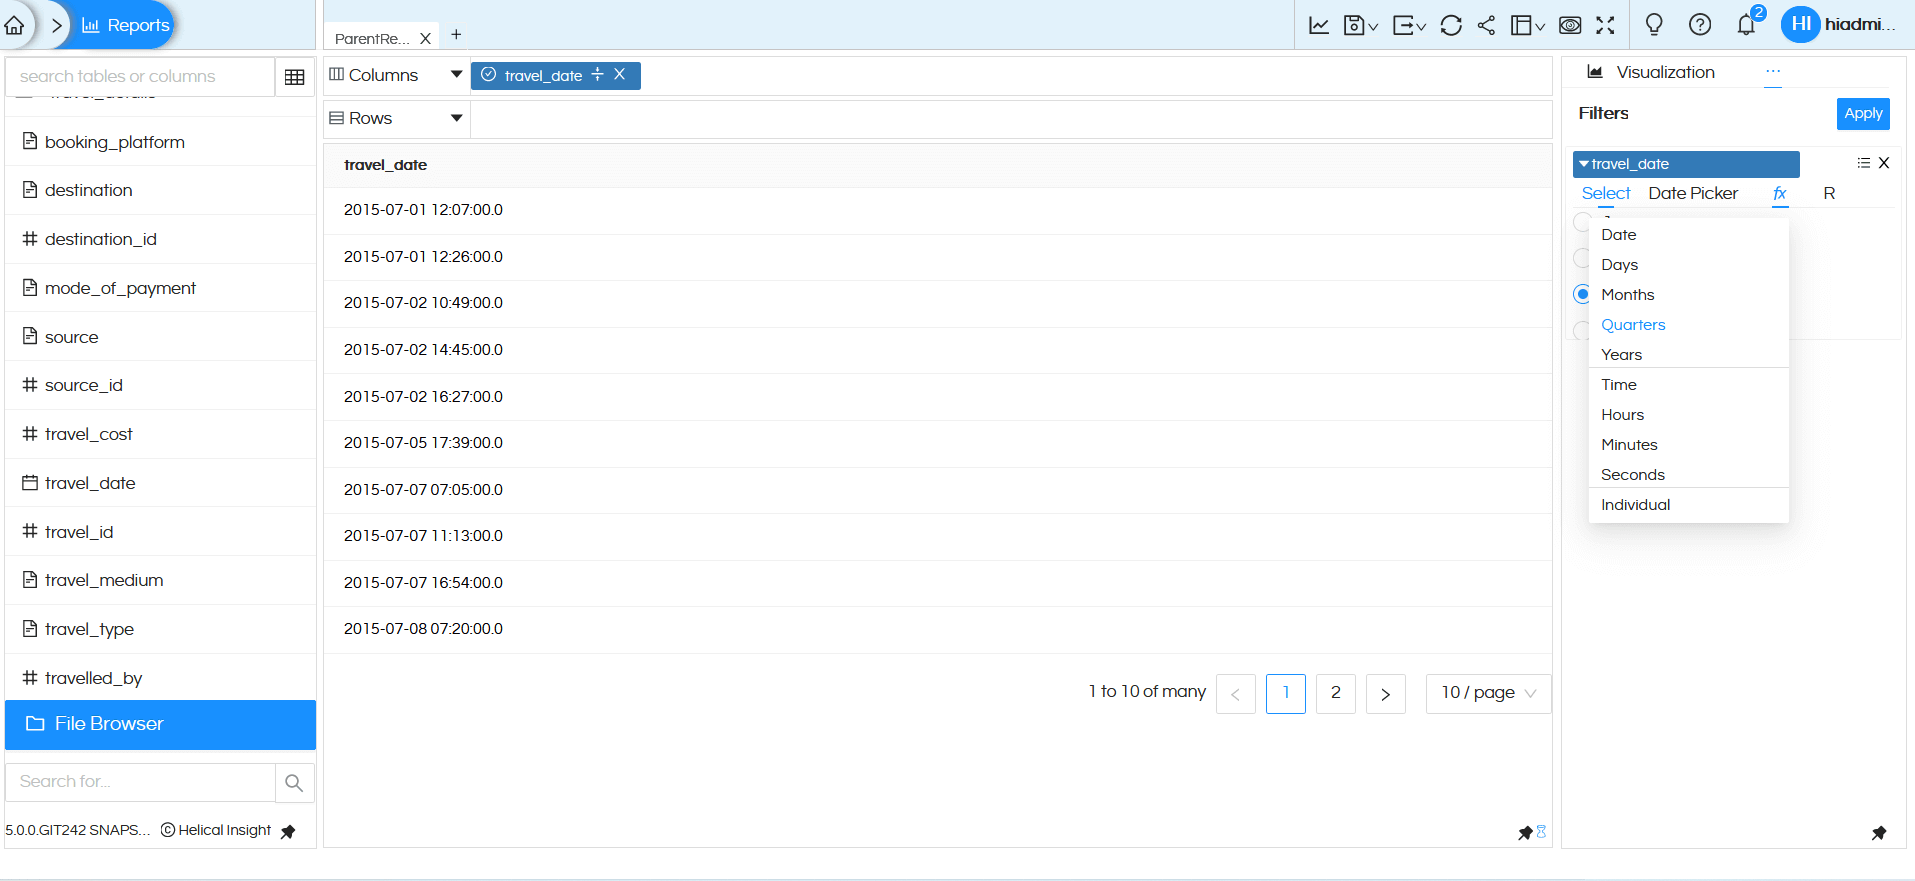
The “Select” option will allow to select the quarter. You can select quarter number and apply, now you can see the result all data are now in 3rd quarter.
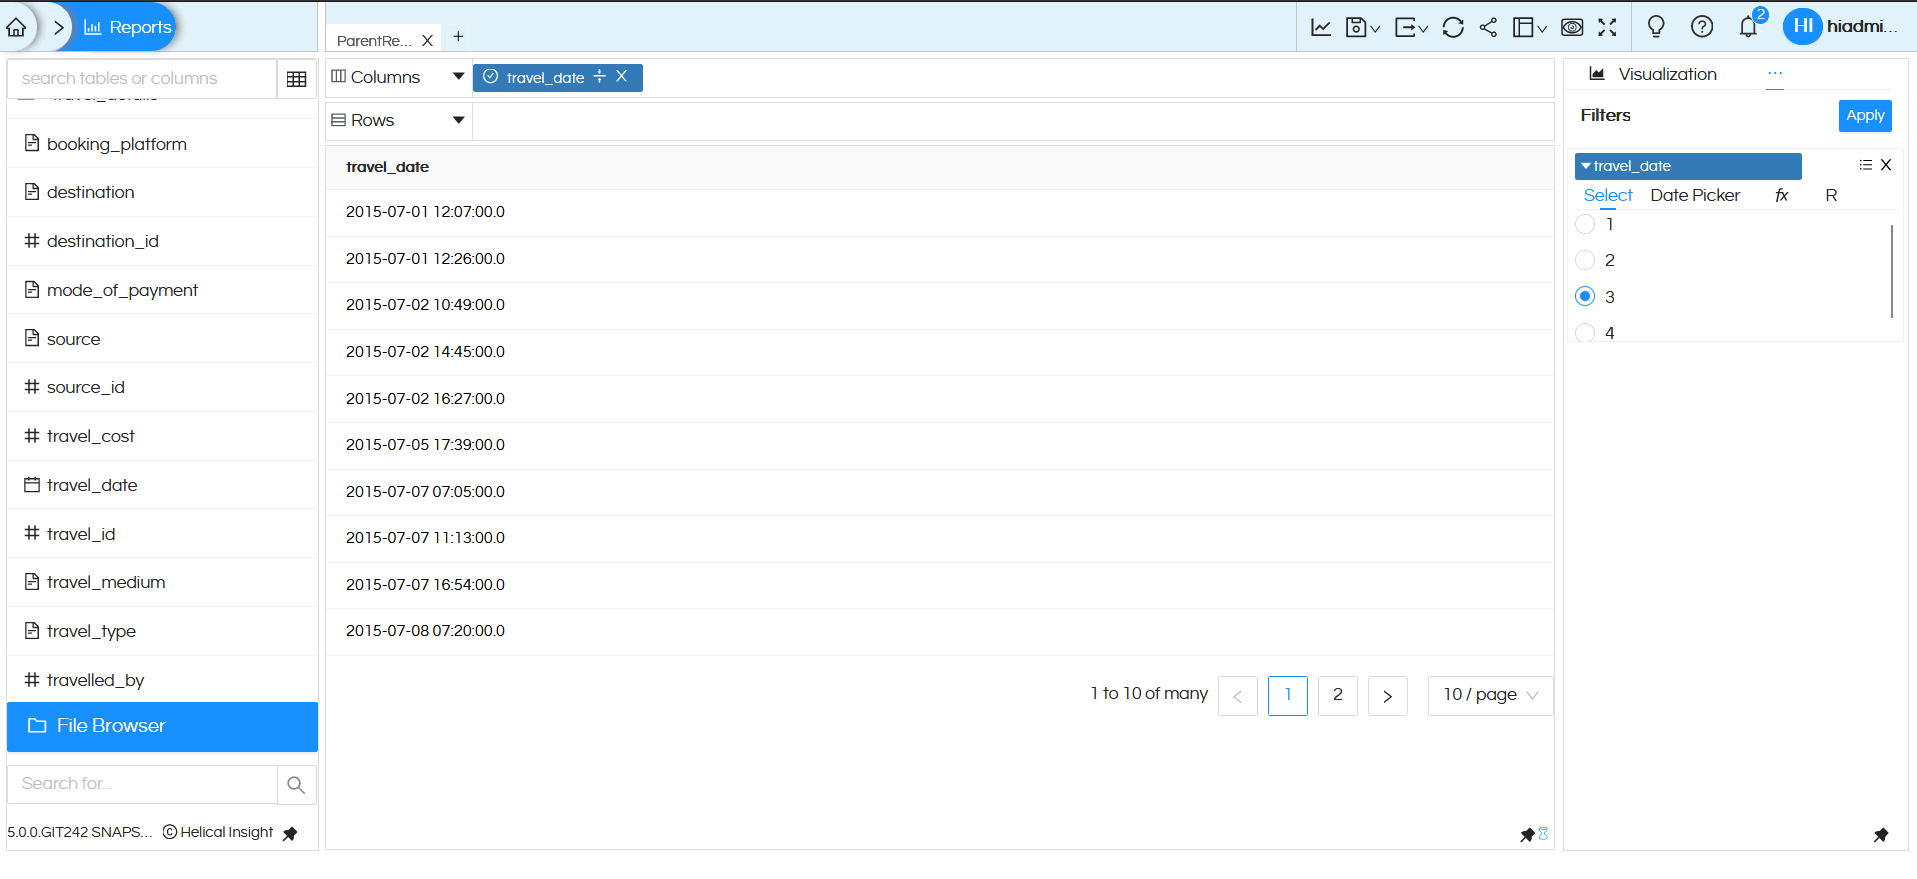
When we use Date Picker option from the UI a quarter can be selected. Note that this will only pass the quarter and not the year.
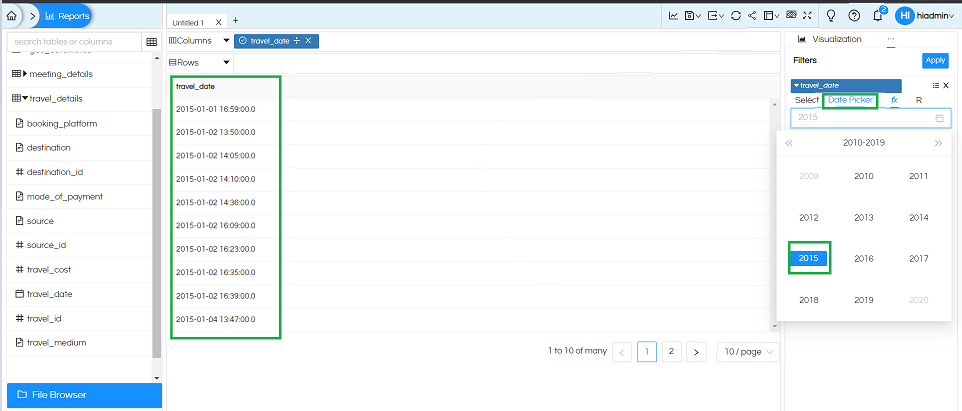
- Next option in fx is Years on filter which will allow to select the year
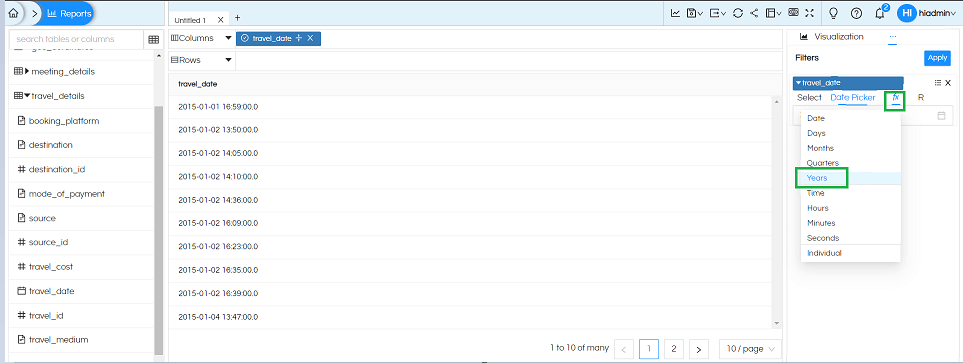
When we use Select option it will show the list of all the years present in the data as dropdown to select.

Whereas when we use Date Picker option it will allow to select the year from a calendar kind of menu like shown below.
- Next available option in fx is Time
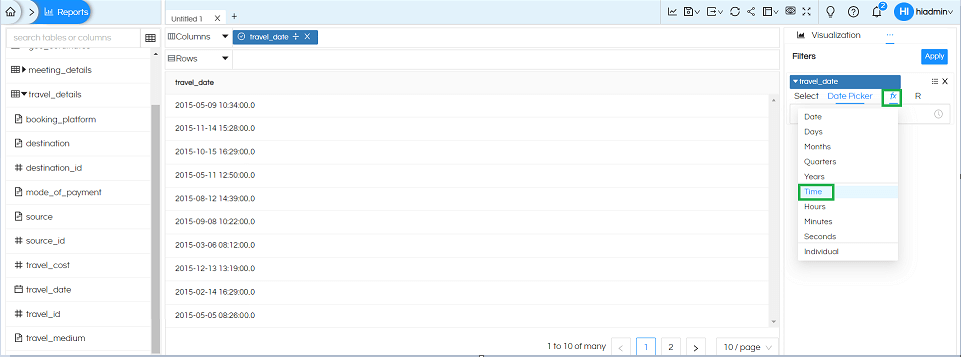
When we use Select
option it will allow to select the time
When use Date Picker option via a below kind of menu it will allow to select the time
- Next available option which can be used Hours on filter
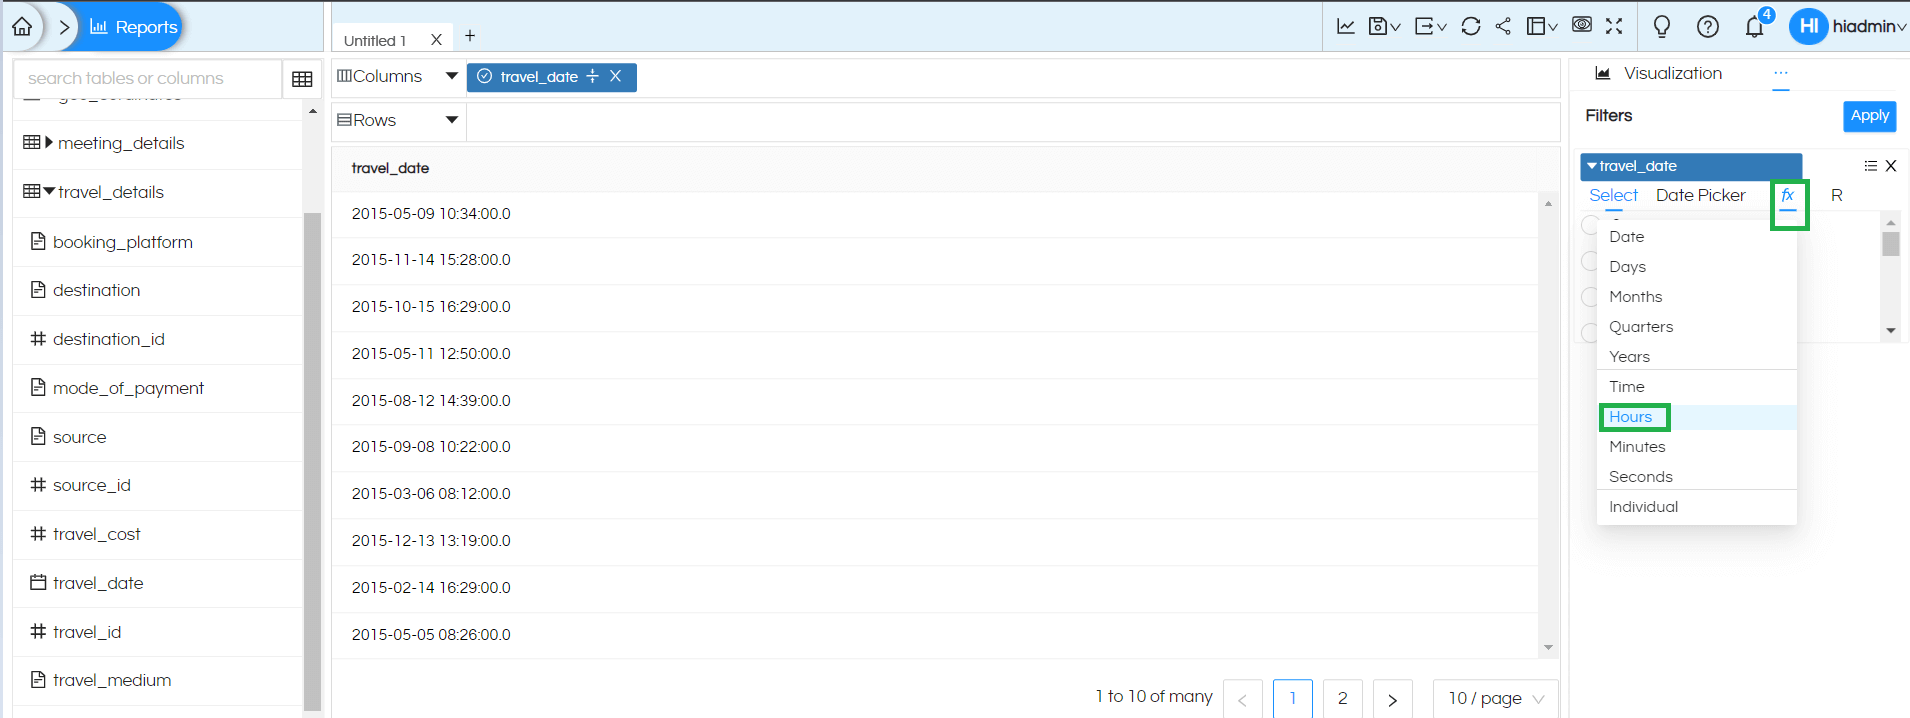
When we use Select option we can select hour from the drop down
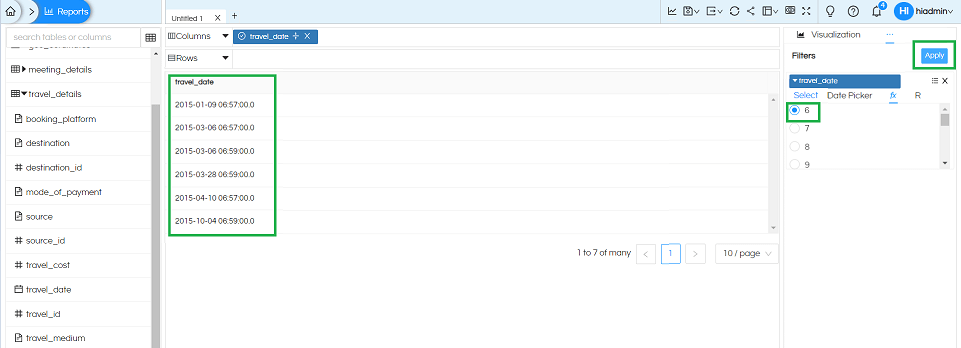
When we use Date Picker option we get an UI like the below
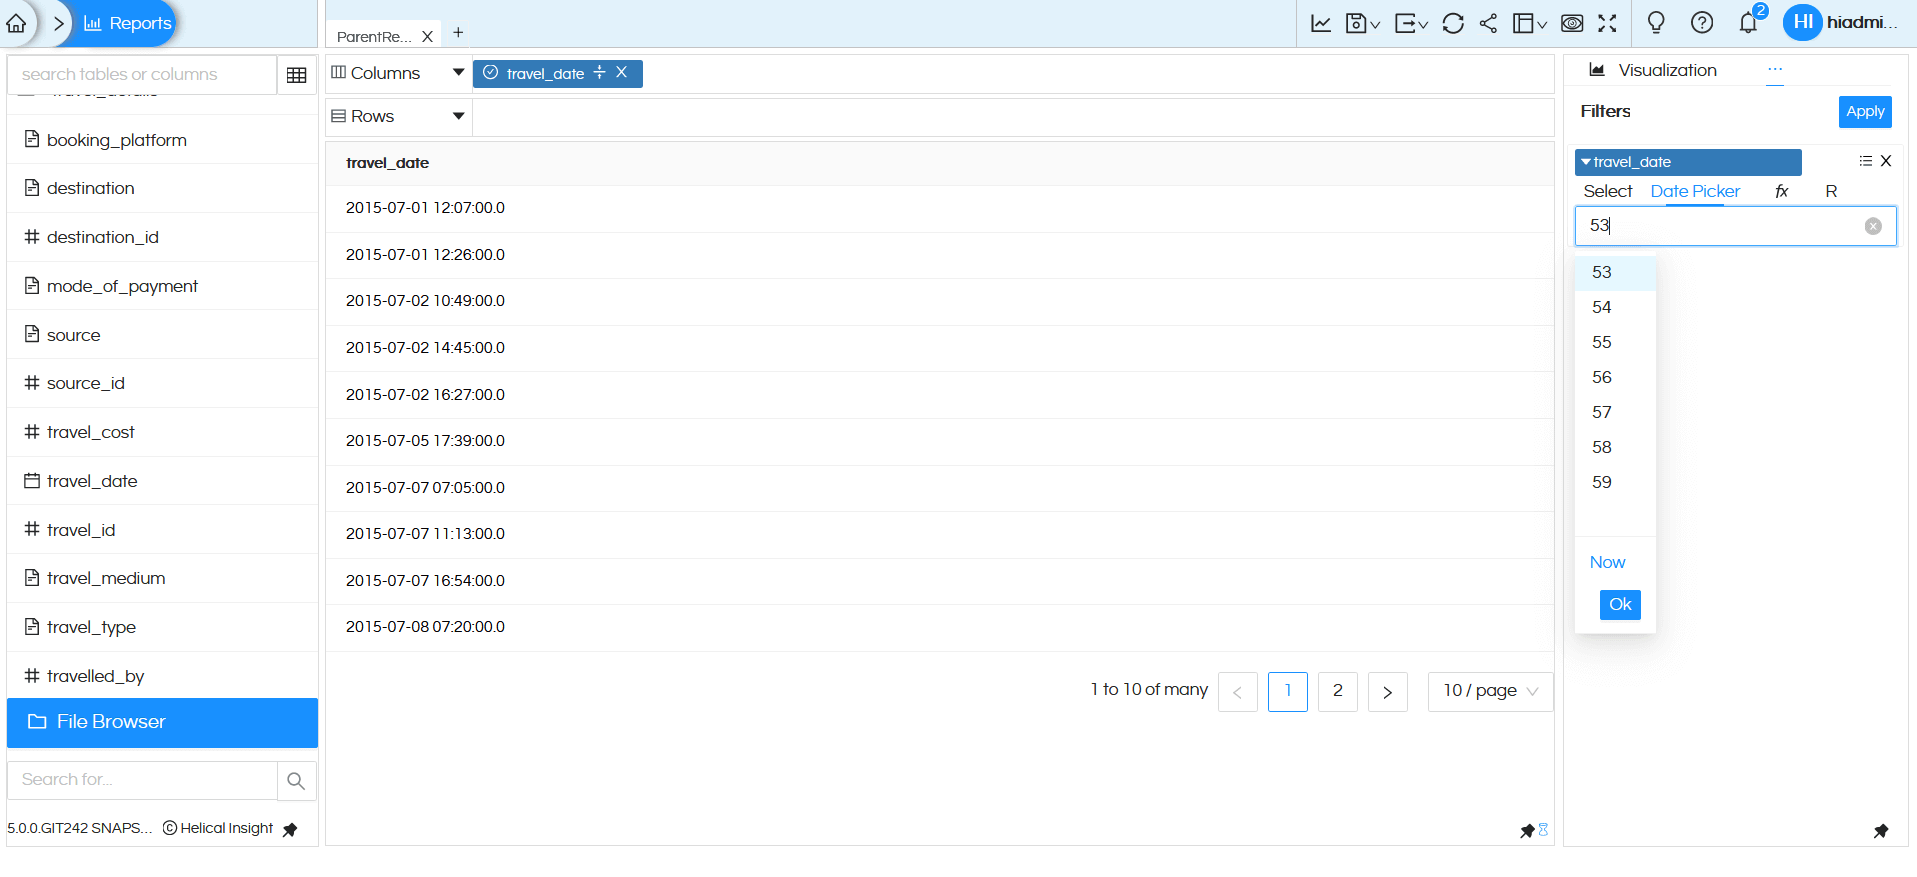
- Next option present is Minute.

When we use Select option, we can select Minutes from the dropdown.
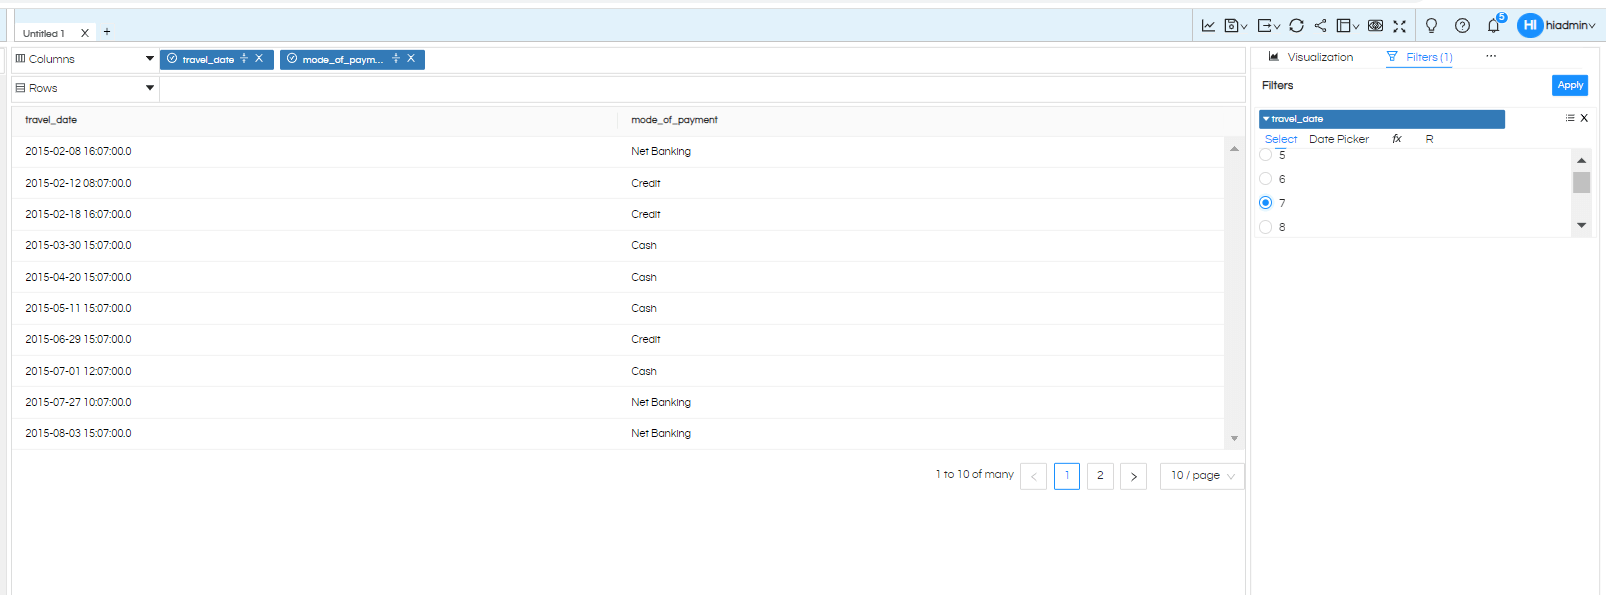
And with Date Picker we get an UI like the below
- If we want to use Individual values from the actual data on filter, click on column as per given Image
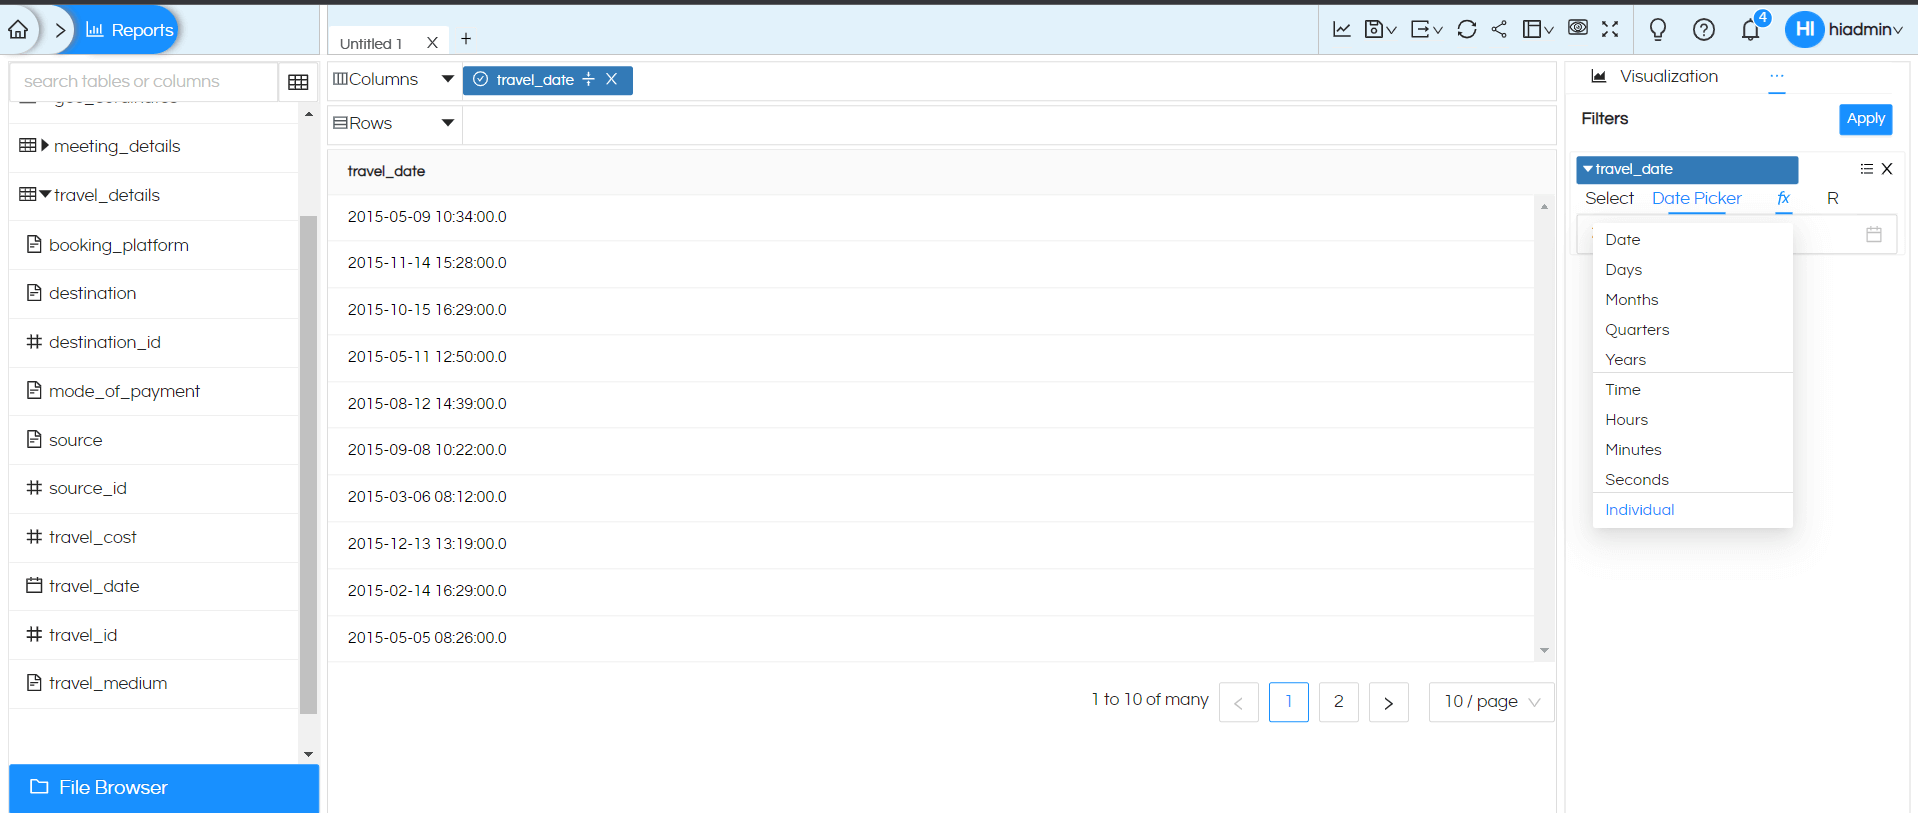
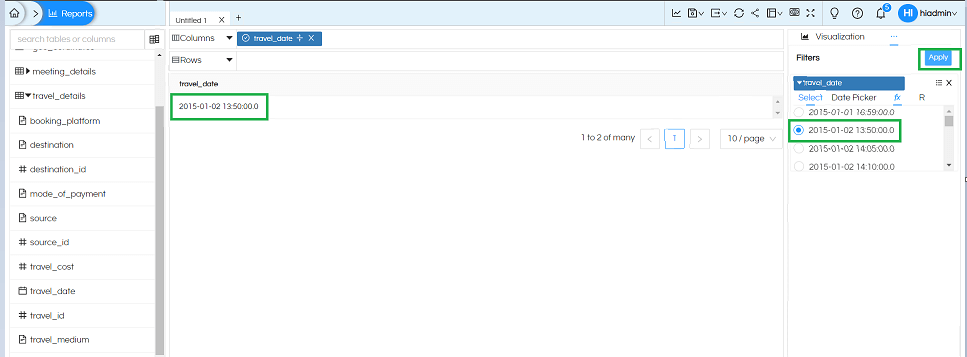
Here you can see when you click on “Select” it will be showing list of data as per Data so now here you can select the individual date value as your choice click on that value and apply, you will see the one value as per the selection.
When we use Date Picker option it will show option like below. In case if your data is different (for example it does not have time option) then the time portion will not be visible.
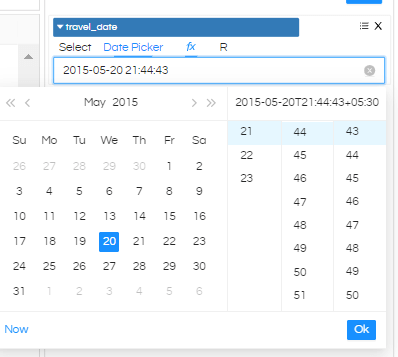
You can use a different method here for applying a date range.




Range Selection Option:
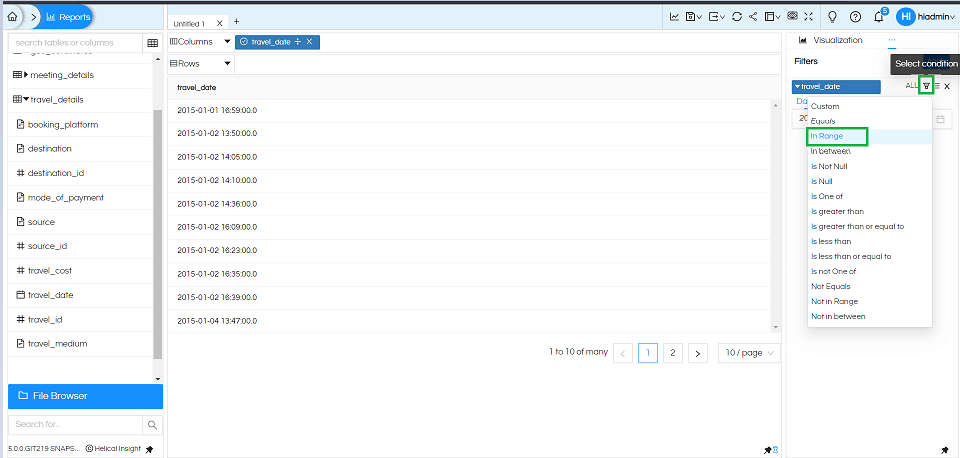
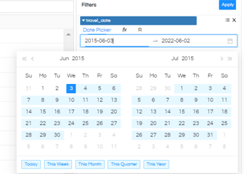
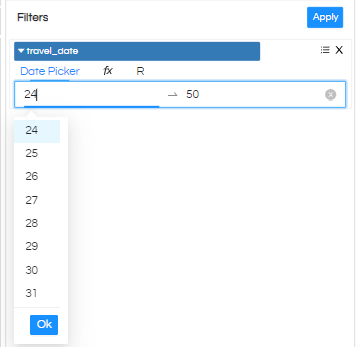
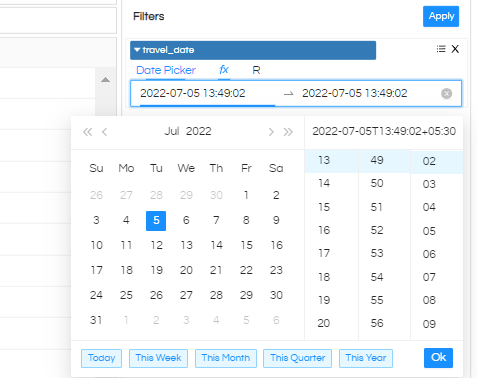
The above kind of UI options (especially for the date picker) are applicable when we are selecting individual values. Whereas when are using range filter kind of options like In Range, In Between, Not In Range, Not In Between the UI is slightly different like shown below.
When we use the above options, in order to select the values it only shows the date picker option. Again, these date picker options are also dependent on the function fx which has been chosen as explained below.
- The first one is “Date”. Now that we have selected the condition

When we use “Date Picker” option it will allow to select the exact date range using a calendar kind of menu.
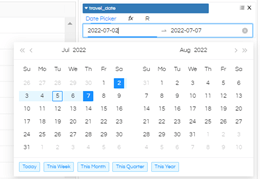
- Second option in the fx is Days filter as shown in the below image based upon Range
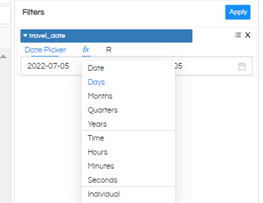
Whereas when we use Date picker, we get option like below
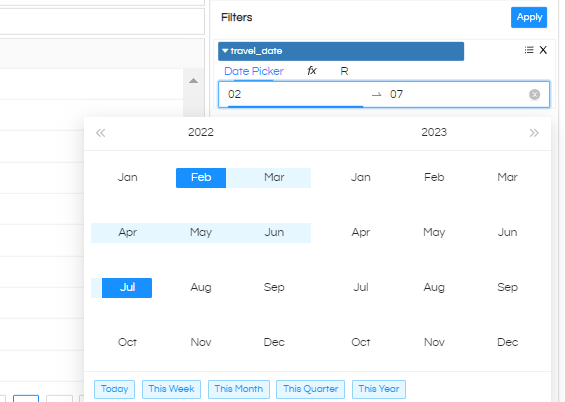
- Third option in the fx is Months filter as shown in the below Image based upon Range

When we use Date Picker option from the UI a Month can be selected. Note that this will only pass the month and not the year.
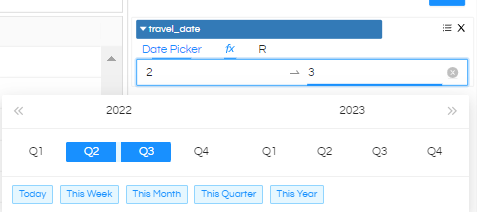
- Next option in the fx is Quarters filter as shown in the below Image based upon Range
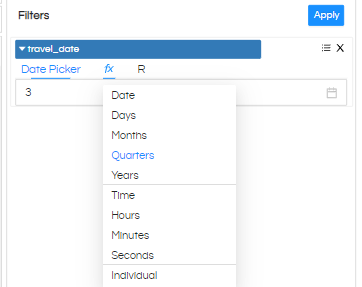
When we use Date Picker option from the UI a quarter can be selected. Note that this will only pass the quarter and not the year.
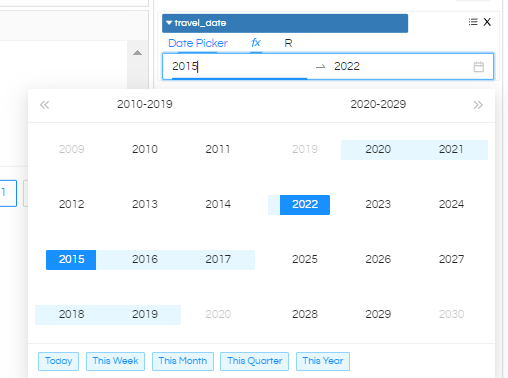
- Next option in fx is Years on filter which will allow to select the year based upon Range
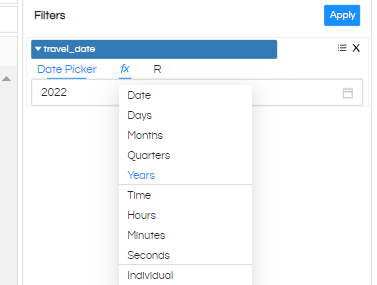
Whereas when we use Date Picker option it will allow to select the year from a calendar kind of menu like shown below.
- Next available option in fx is Time which will allow to select the Time based upon Range
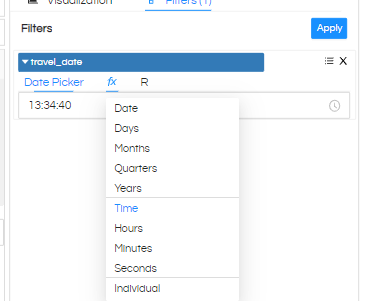
When use Date Picker option via a below kind of menu it will allow to select the time
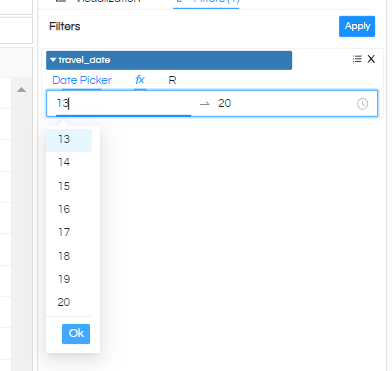
- Next available option which can be used Hours on filter based upon Range
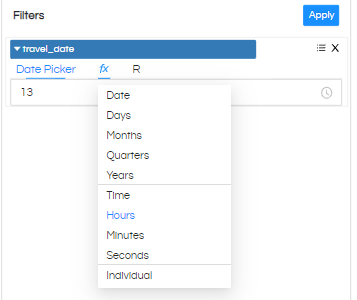
When we use Date Picker option, we get an UI like the below
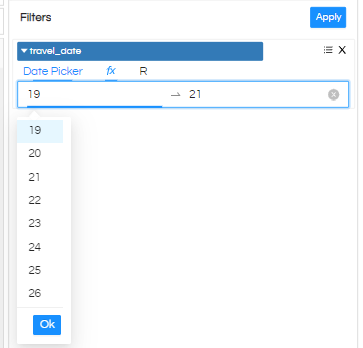
- Next option present is Minute you can select the Minute based upon Range
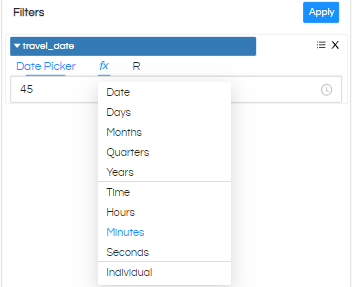
And with Date Picker we get an UI like the below.
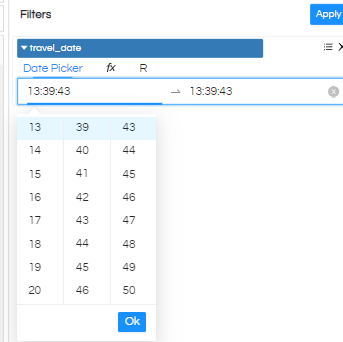
- Next option present is Second you can select the Second based upon Range
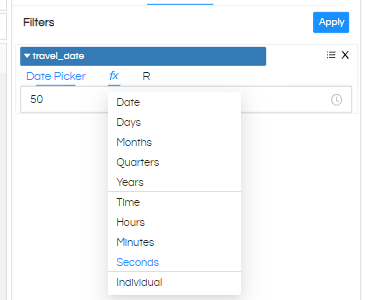
And with Date Picker we get an UI like the below.
- If we want to use Individual values from the actual data on filter, click on column as per given Image
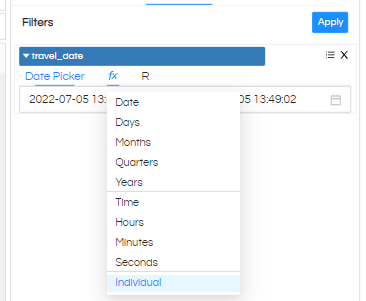
When we use Date Picker option it will show option like below. In case if your data is different (for example it does not have time option) then the time portion will not be visible.
Changing the formatting of date/date time in the selection Box:
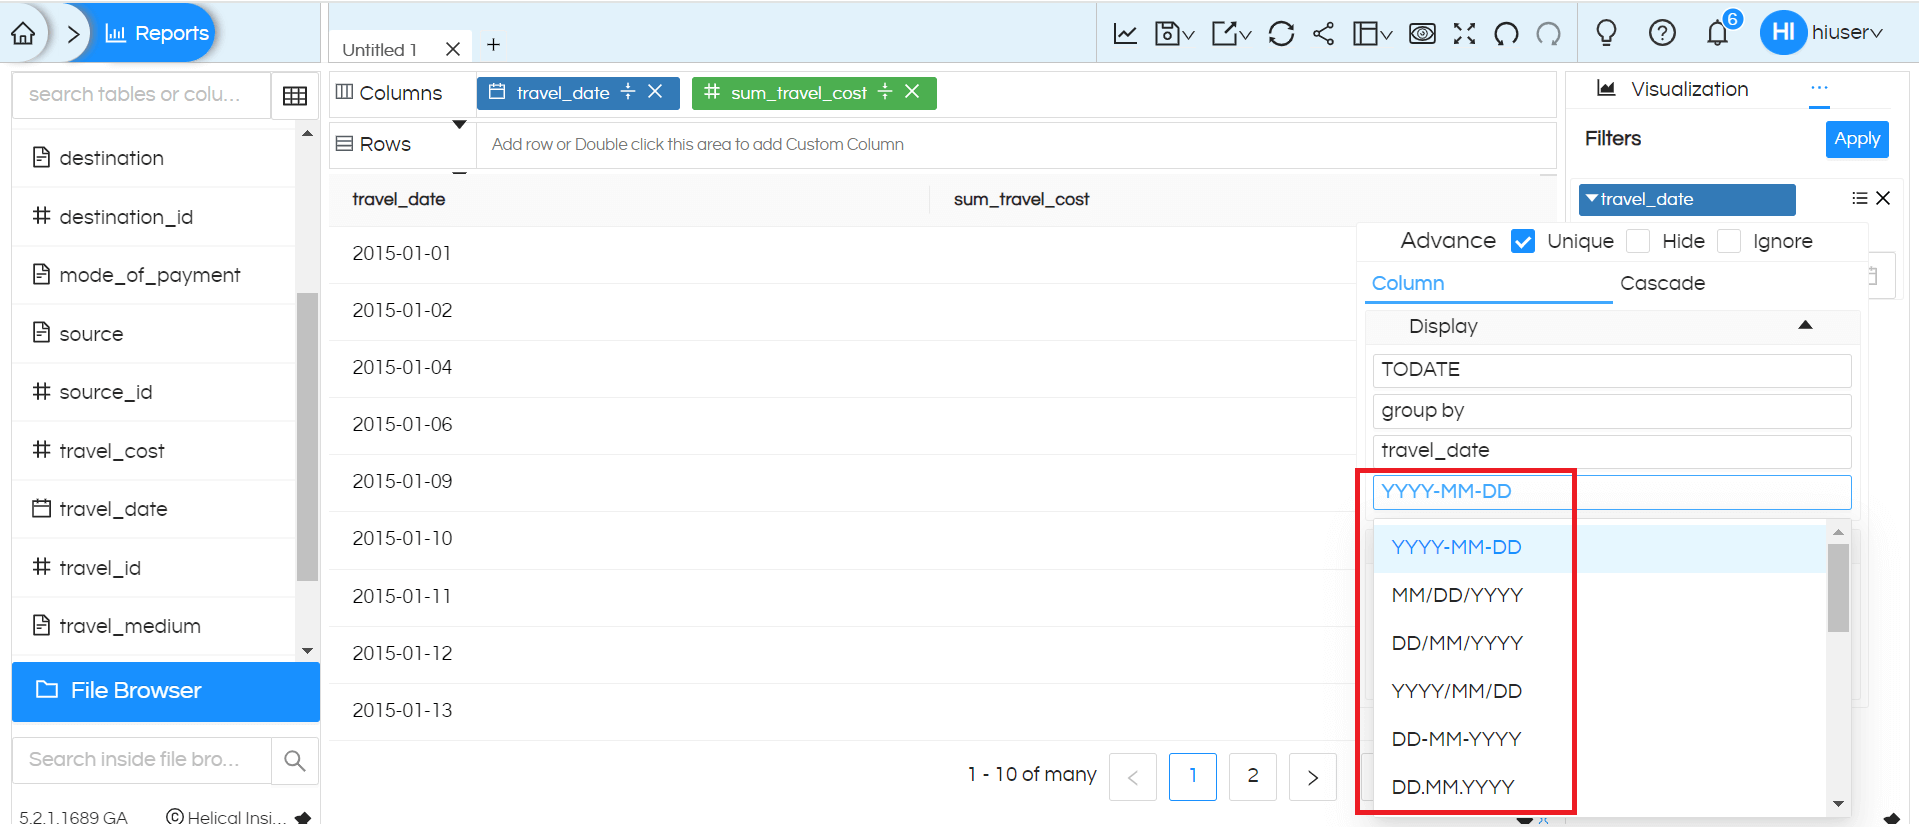
When working with date and date-time filters, users may want to see different formatting in the filters, even if the data is in a different format. This feature is available from Helical 5.2.1 onwards
In such cases, we can change the date filter formatting by following the steps below:
Add the required date/date-time field as a filter.
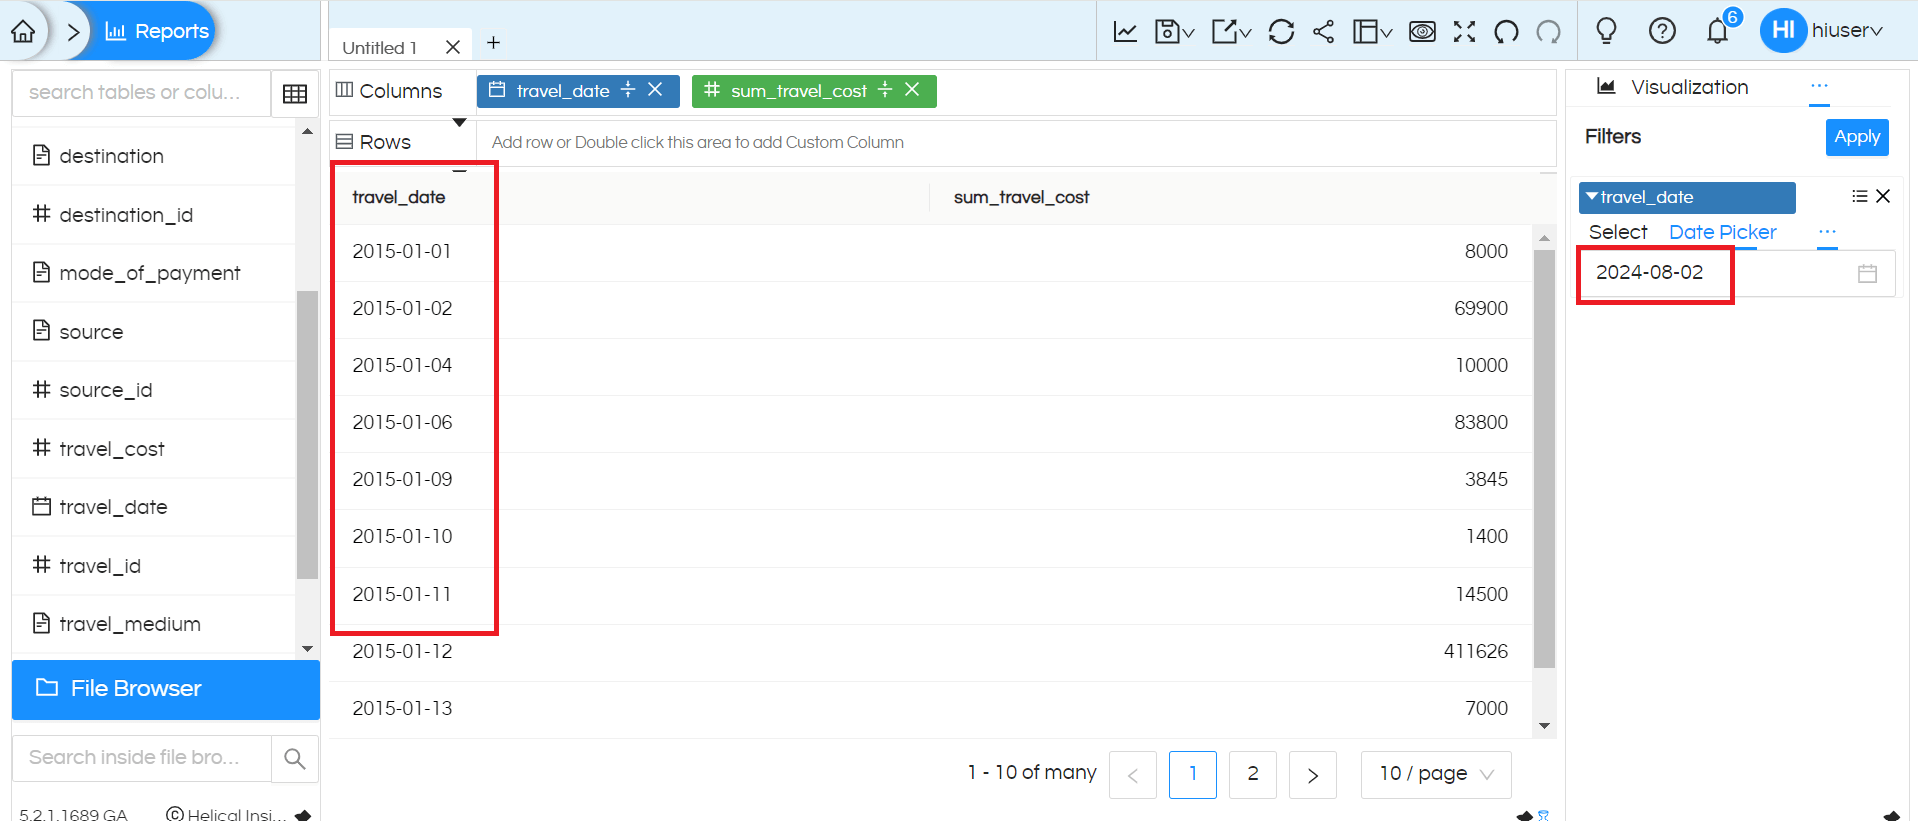
Click on filter Advance mode option
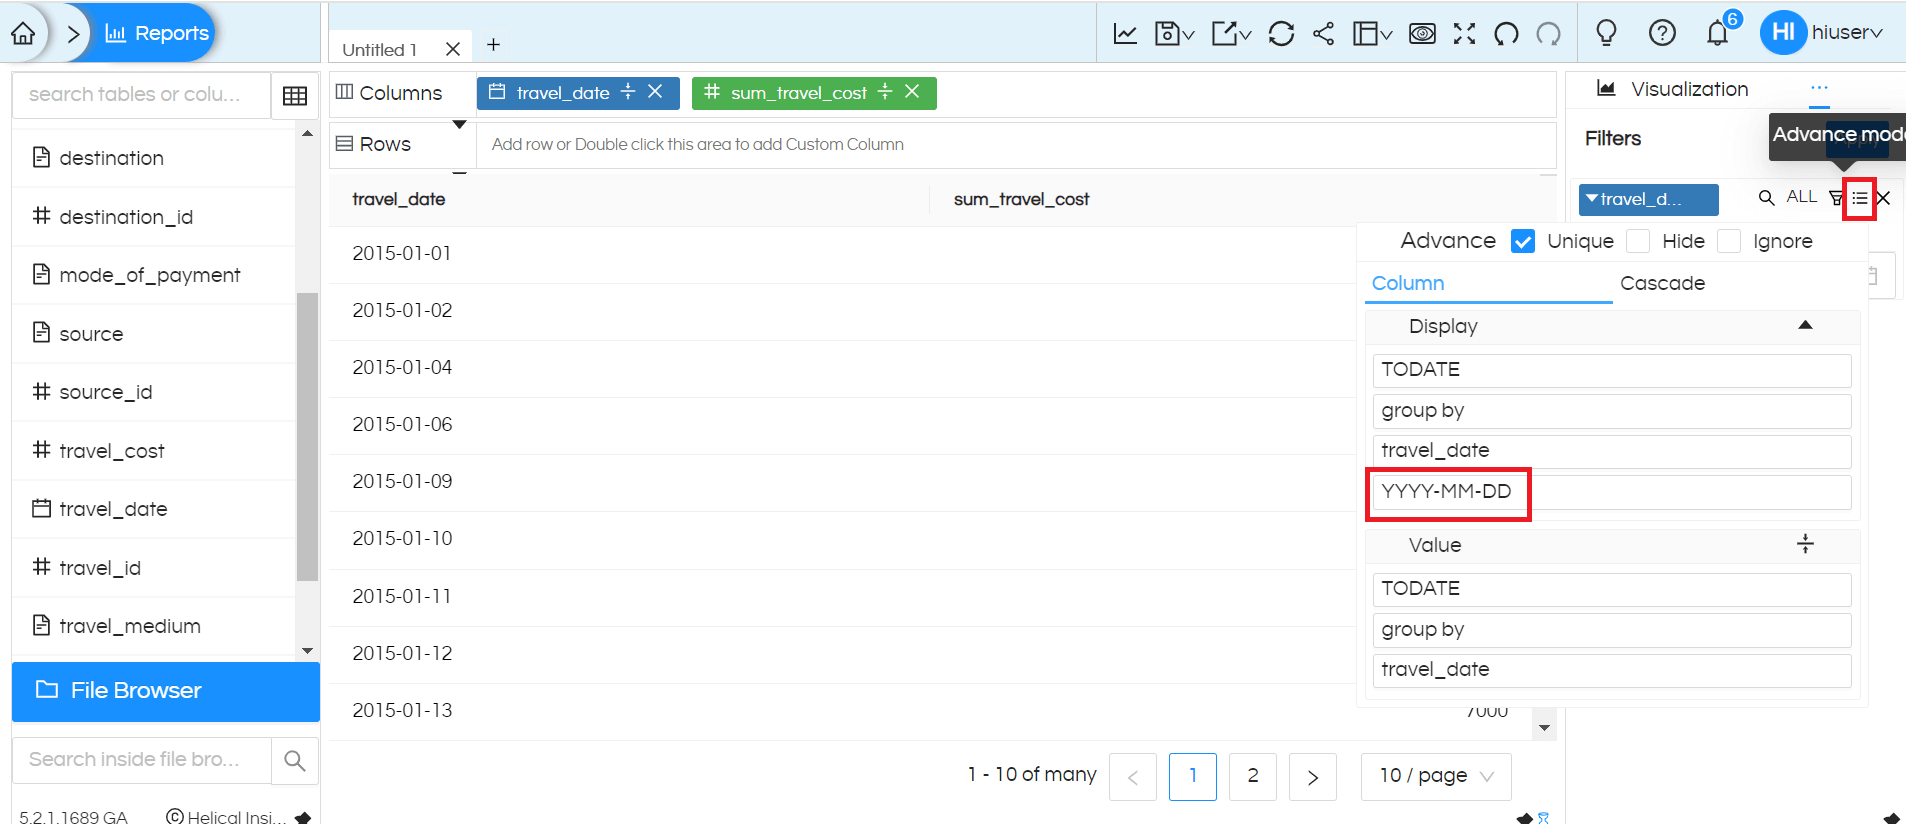
When you click on formatting, it shows a list that we can select from according to our requirements
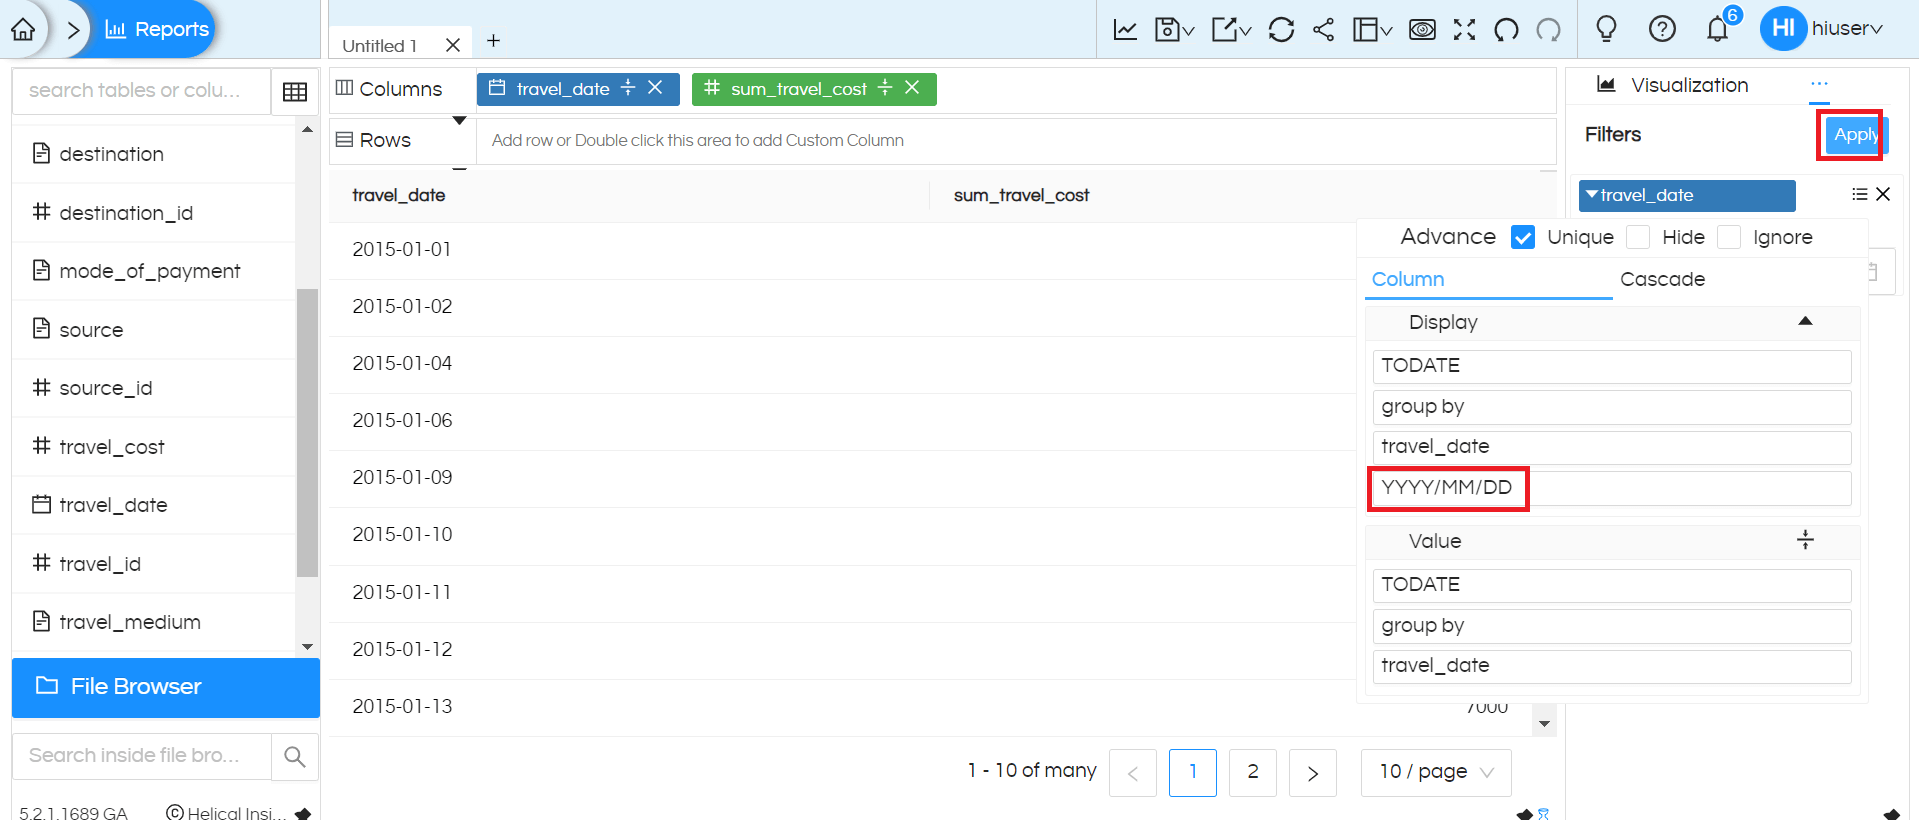
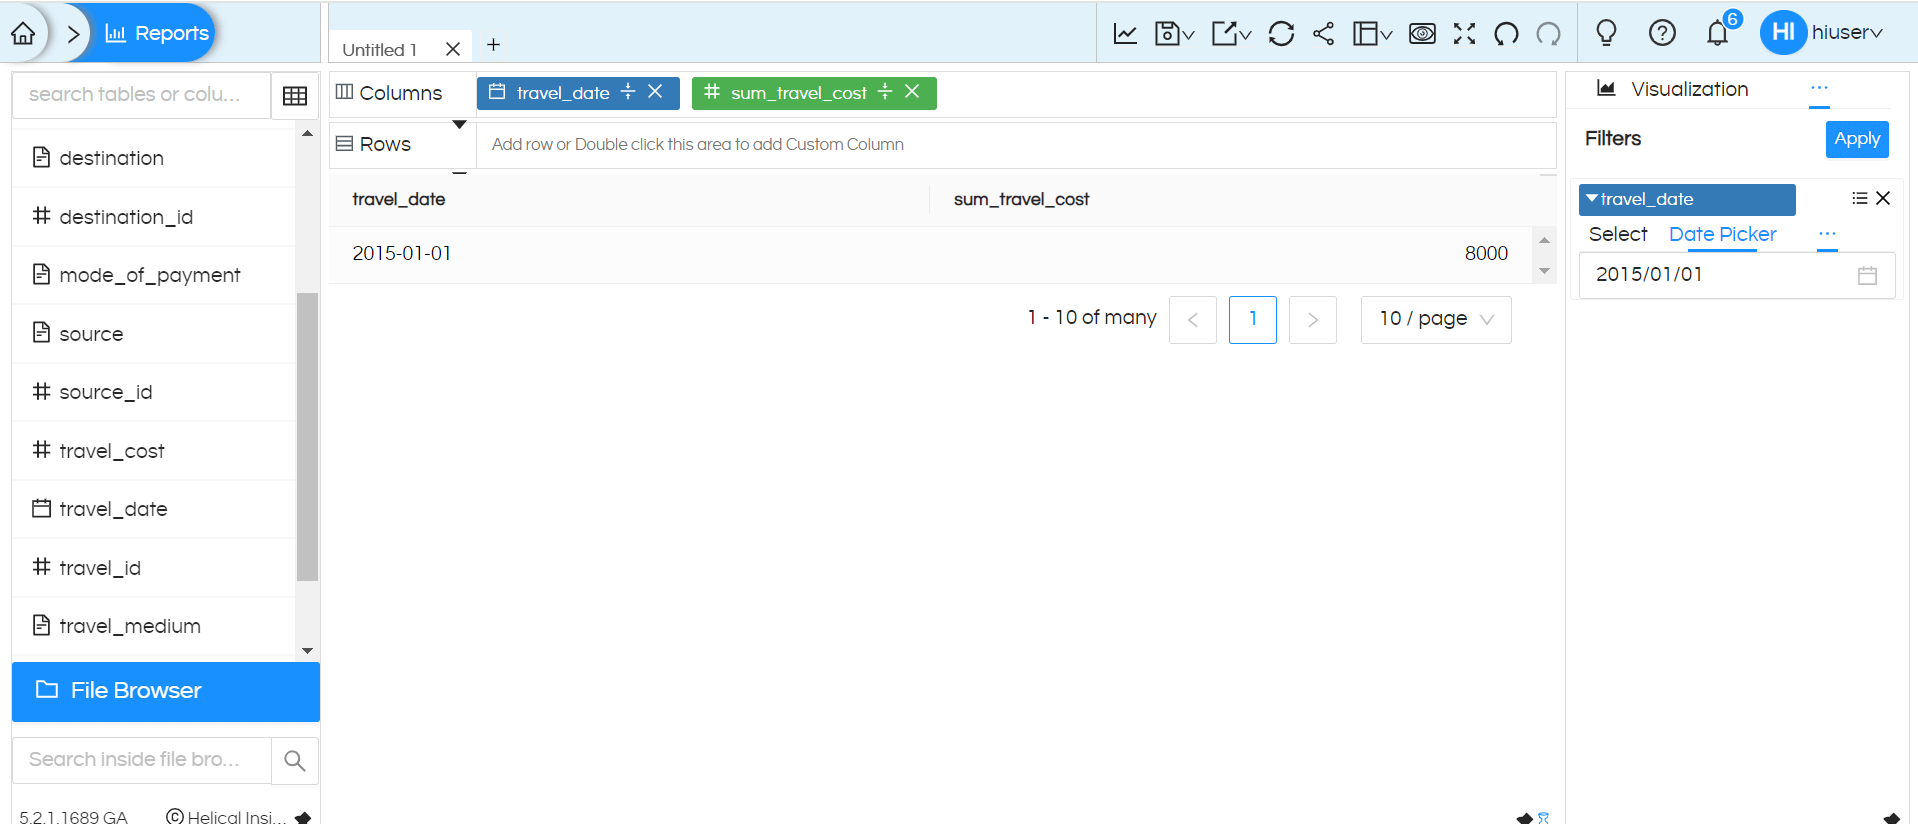
As we can see, the selected filter formatting has changed according to our selection
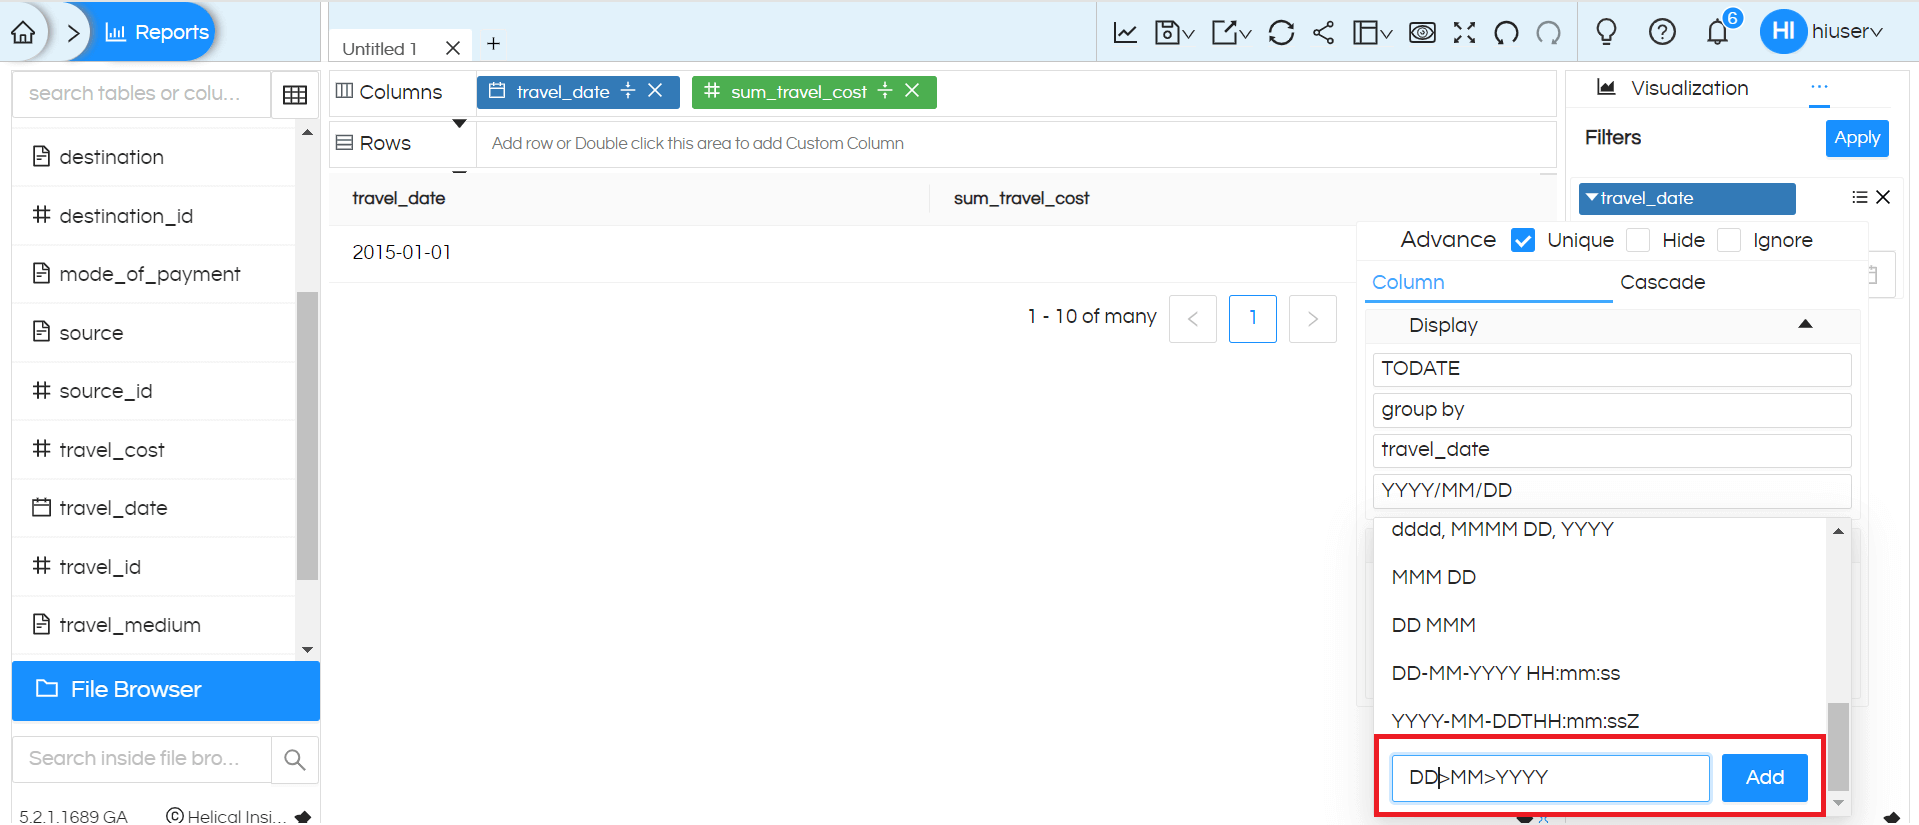
Note: We have the option to add custom formatting as well. Once added, it appears in the drop-down menu so that we can select it
Thank You,
Helical Insight
