This article explains usage of HTML component in the Dashboard Designer module of Open Source BI product Helical Insight application. This feature is available starting from Helical Insight version 5.2.2.
Just like report/image/text, now it is possible to add a HTML component also. That component can be dragged into any place, re-sized, re-positioned, given any kind of styling using the right click operations.
You can also can format and style content of this HTML, use templating languages like Liquid template language, you can dynamically display data. This flexibility allows you to create personalized layouts that suit your needs within the Helical Insight dashboards. Read below to learn how to add and use HTML component
Steps to create an HTML component and use it:
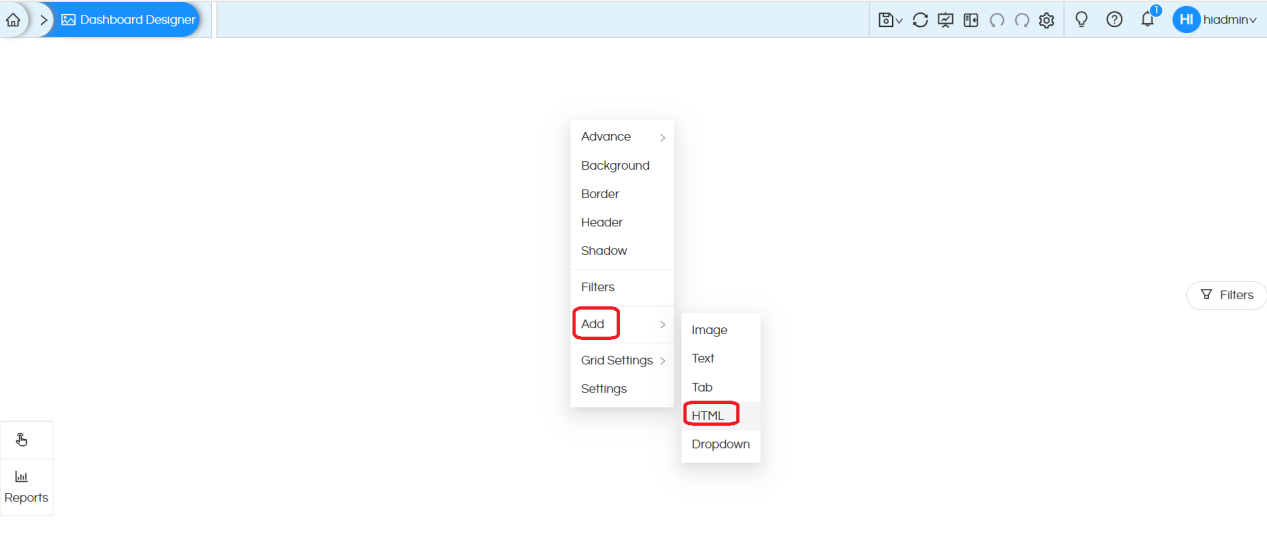
Step1: Open the Dashboard Designer and right-click on an empty space (as shown in below image). Choose Add > HTML

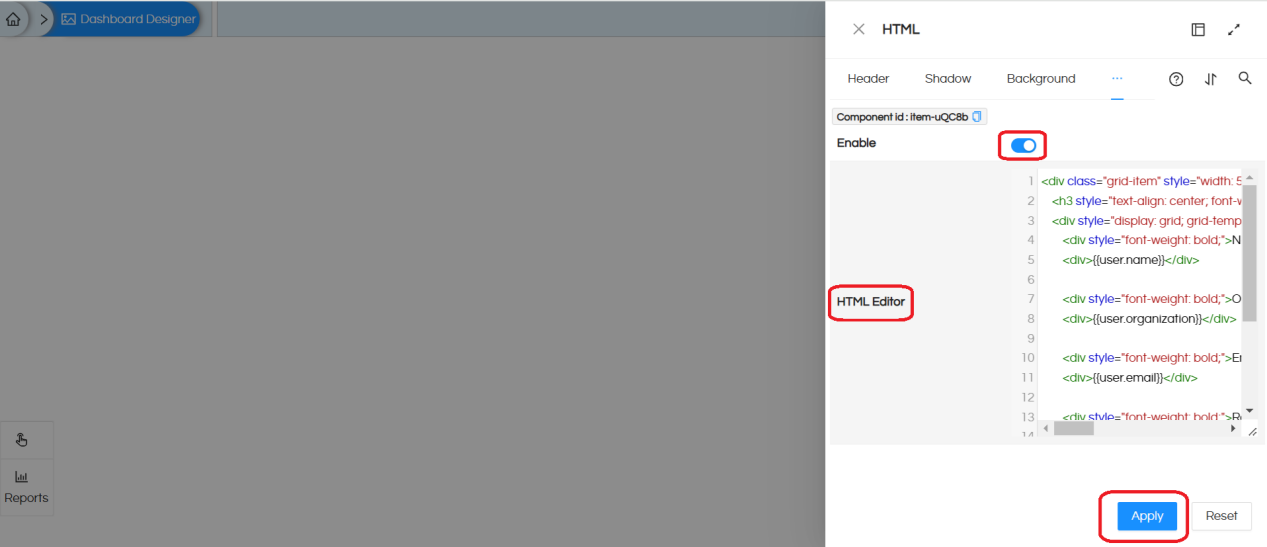
Step2: It opens the HTML editor; toggle the Enable and inject the HTML code

Step3: Click on ‘Apply’ to view how this HTML code is affecting the output in the Dashboard Designer.
Example: Below is the HTML code that we have put.
HTML code :
<div class="grid-item" style="width: 50%; margin: auto;">
    <h3 style="text-align: center; font-weight: bold;">User Information</h3>
    <div style="display: grid; grid-template-columns: 150px 1fr; gap: 10px; padding: 20px; border: 1px solid #ddd; border-radius: 8px; background-color: #f9f9f9;">
        <div style="font-weight: bold;">Name:</div>
        <div>{{user.name}}</div>

        <div style="font-weight: bold;">Organization:</div>
        <div>{{user.organization}}</div>

        <div style="font-weight: bold;">Email:</div>
        <div>{{user.email}}</div>

        <div style="font-weight: bold;">Roles:</div>
        <div>{{user.roles|join:","}}</div>

        <div style="font-weight: bold;">Profiles:</div>
        <div>{% for var1 in user.profile %} {{var1.profileName}} : {{var1.profileValue}}<br> {% endfor %}</div>
    </div>
</div>
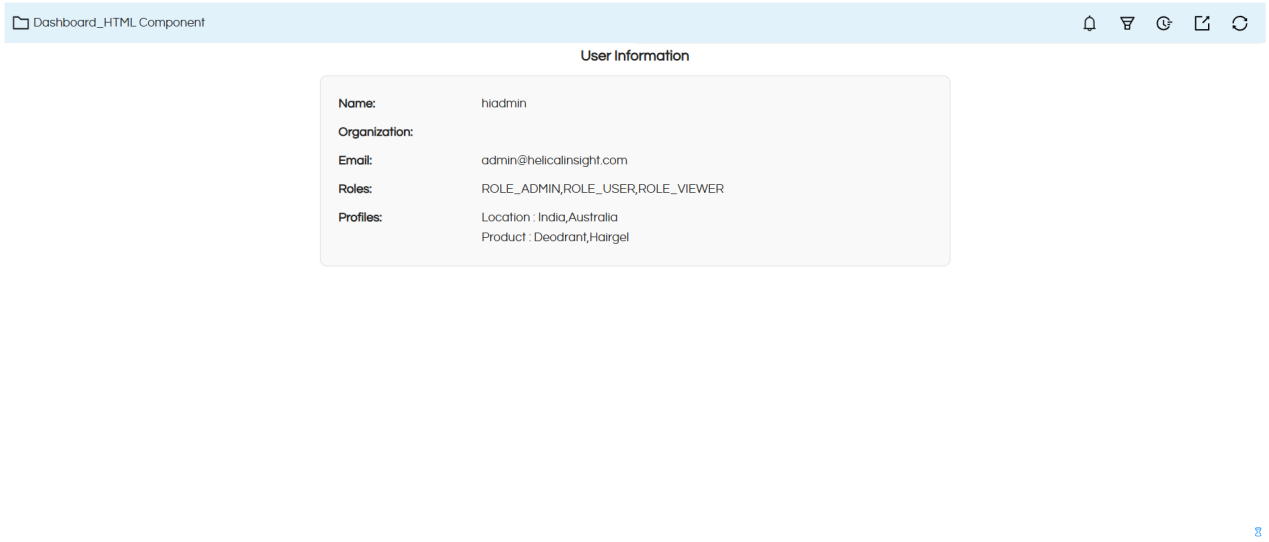
This HTML code creates a styled grid displaying a user’s name, organization, email, roles, and profiles. The user object is dynamically populated using liquid template language syntax and within that we are calling our Helical Insight variables which are exposed, ensuring that the user data is fetched and displayed correctly. The use of inline styles ensures that the layout is responsive and visually appealing.
Step 4: Align the HTML component properly on the dashboard and save it. In open mode, it looks like below :

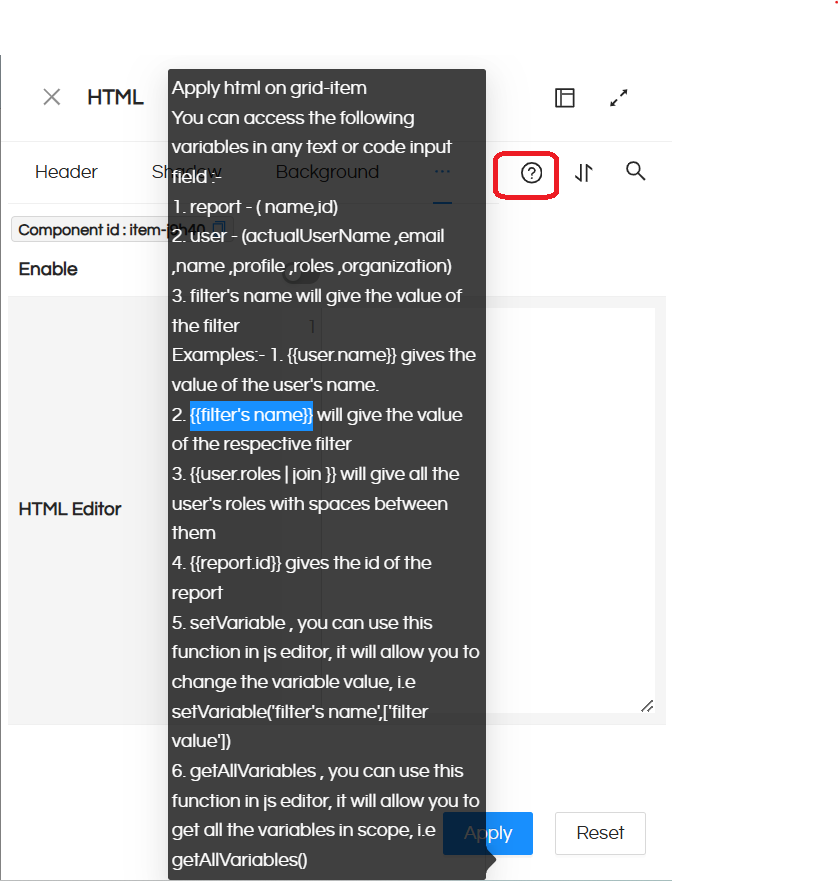
Note: We can also display information for selected parameters by writing it like this: {{filter’s name}}. When you hover over the help icon, you can view information about all the dynamic variables

Based on your requirement, you can accordingly make use of this HTML component, put required code, size, placement etc and use it.

