Helical Insight dashboard designer allows you an extensive settings options allowing you to define various kind of configuration while you are exporting the dashboard as PDF.
Click on the Settings button at the end of the toolbar.
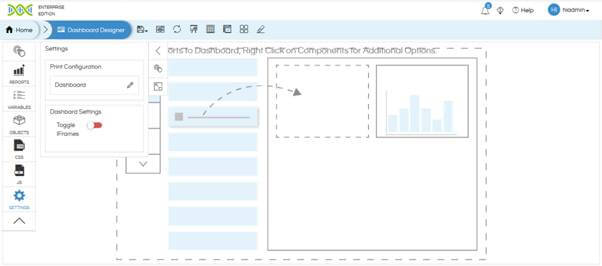
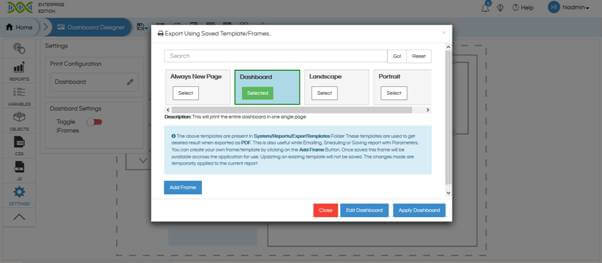
- Click on Edit icon next to Dashboard. You will see the various frames that are available by default. The following frames are available by default:
- Always new page extracts all the reports from dashboard and prints each report on a new page.
- Dashboard prints the entire dashboard as a single page. This is the default selection.
- Landscape exports the reports in landscape mode. By default, it uses A4 as paper size.
- Portrait prints the reports vertically. By default, it uses A4 as paper size.
- Click on “Add Frame” button in order to customize the Frame.
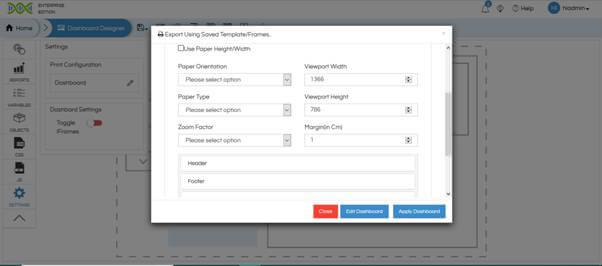
- Define the various parameters of the frame for export template.
- Paper Orientation: Select whether reports should be printed in landscape or portrait mode.
- Paper Type: Select the size of paper being used. (A3, A4, A5, Legal, Letter, Tabloid)
- Viewport Width & Height: Select the width and height of the export.
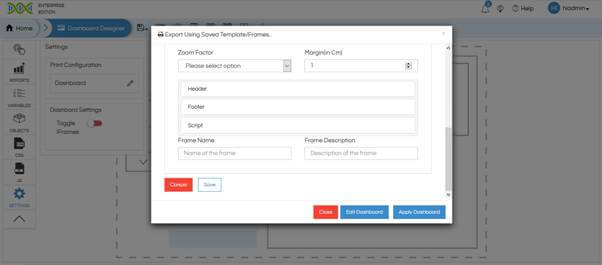
- Zoom factor: Define the zoom factor of the reports while exporting.
- Margin: Define the margin of the paper.
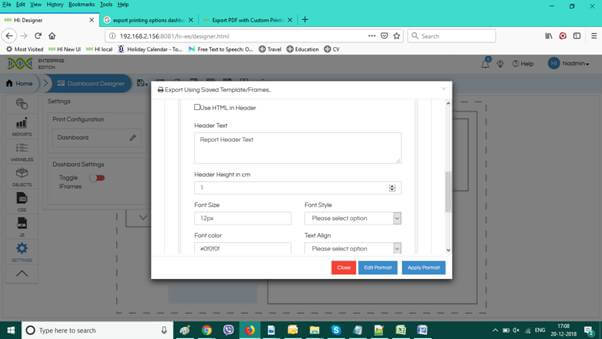
- HEADER: Under this tab there are 2 options to define the header:
- You can input the header text and define the height, font size, font style, font colour & alignment in the space provided.
- Click on “Use HTML Header” and input the HTML code in the editor.
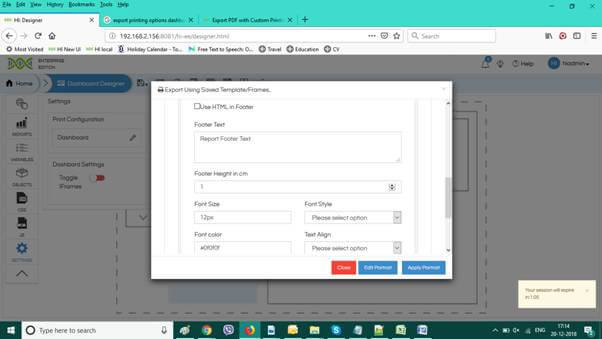
- FOOTER: Under this tab there are 2 options to define the footer:
- You can input the footer text and define the height, font size, font style, font colour & alignment in the space provided.
- Click on “Use HTML Footer” and input the HTML code in the editor.
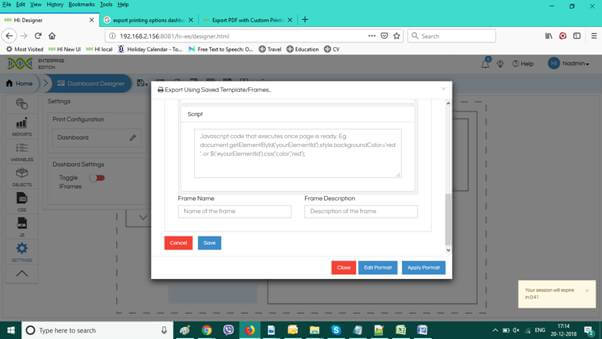
- SCRIPT: Under this tab, you can define any particular CSS that you want to add while printing a particular element
- Frame Name: Enter the name that you want to give to the customized frame. You can create multiple frames.
- Frame Description: Enter the description that will be displayed when you select this particular frame.
- Click on Save. Close the popup.
- You can also click on Edit Dashboard to change the frame settings of the dashboard style of printing. Apply Dashboard after editing is done.
NOTE: After implementing redirection at your webserver level it might happen that the exporting might not work. In case if it does not work please try these steps. The reason for exporting not working might be that redirection uses some differnt port and then exporting method will not be able to communicate on that redirected URL. In order to solve this add HTTP connector port inside server.xml file of Apahce Tomcat’s conf folder. You can add this below text at the line number 60
< Connector port="8080" protocol="HTTP/1.1"
               connectionTimeout="20000"
               redirectPort="8443"  relaxedQueryChars='^{}[]|"' />
Here port 8080 should be changed to whatever port number which is not being used at any other place.
After the above step, open the file setting.xml present at ‘..hi-repository/System/Admin” and search for baseURL tag. Change it from its previous value to http://localhost:8080/hi-ee/hi.html
We have put 8080 since in the previous step we had used 8080 port only. In case if you had used some other port number like 7080 at server.xml then here also please use 7080 only.
Restart the server and then test.
For more information you can email on support@helicalinsight.com
