Cascading Parameter is the input parameters which are interlinked and upon selecting the first parameter’s value the selected value is passed as a filter in the cascaded parameter and accordingly, the second input parameter values will be changed. For example we might have two input parameters i.e. Country Name and State Name. Whatever is the country that we select the State Name filter only shows the state names for the selected country.
In this blog we are covering how canned reports can be created with cascading input parameters. Make sure that you have gone through the “Introduction to Canned Reporting” blog.
STEP 1: Create a connection

Configuration :

To know more about the types of datasource connections that can be established, refer to this blog.
STEP 2: Write a query without using parameter/where clause
- After providing the connection details, click on + button next to Queries.
- Select the connection to be used for the query.
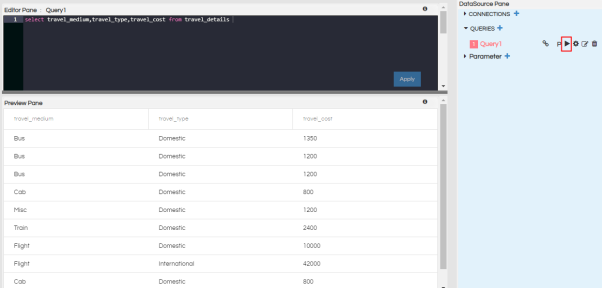
- Click on Configuration icon and write the query without where clause or any input parameters in the editor pane.
- Save the query by clicking on Apply or using keyboard shortcut Ctrl+S.
- Click on Run to execute the query. This will return the top 10 rows of the resultset.


STEP 3: Creating Cascading parameters
Here we are creating cascading parameters for travel_type and travel_medium. If we change travel type parameter value then travel medium parameter data will be filtered accordingly.
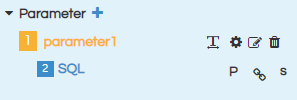
- Click on + icon next to parameter. You can add as many parameters as required.
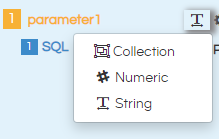
- Select the type of input parameter. For multi-select parameters, the type should be set to Collection.
- Edit the name of the parameter by clicking on the pencil icon.
- Select the connection for the query of the input parameter.
- Write the query that will return the input parameter column in the SQL section. If the query is of groovy or adhoc type, select the correct type by clicking on S and selecting the type.
- Click on Apply or Ctrl+S to save the query
- Go to configuration section and give the configuration that you desire. Please note that the variable name, name specified within the configuration and the name of the parameter should match exactly.
- Name: Give the name of the parameter in double quotes in this section
- displayName : Name of the parameter that should appear on the report
- type: Type of input parameter. The various options are select, searchable select, datepicker, daterangepicker, input, button and checkbox.
- parameters: This is an optional section and to be used while using cascading input parameters. Name the columns that this parameter is dependent on.
- listeners : This is an optional section and to be used while using cascading input parameters. Name the columns that this parameter should listen to.
- requestParameters : name of components acting as input.
- triggers : add component names to trigger on change
- multiple: whether the parameter is multi-select or not. Default is false (single select)
- display : value to be displayed. Give name of the column whose values are to be displayed
- value: column name whose value should be returned
- all: true – this is used only for checkbox
- displayFormat : used for date/datetimepicker
- outputFormat : used for date/datetimepicker
- executeAtStart: whether the parameter values are to be populated during report load
- map: this is the number of the SQL that is to be used for the filter. Ensure that this value is correct.
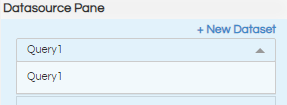
- We need to select dataset to see the resultant field to be used on the report :
- We should drag the requiredf fields to show on the report
- We should align and provide required properties for look and feel of the report


Configuration :
Dashboard.setVariable('travel_type','Domestic'); //setting default value
var travel_type = {
name: "travel_type",
type: "select",
parameters:["travel_type"],
options:{
multiple:false,
value : 'travel_type',
display : 'travel_type',
placeholder: 'Select travel_type'
},
htmlElementId : "__efwd_file_name__",
executeAtStart: true,
map:3
};
Adding Parameters : travel_medium :
Create and provide the parameter configuration and query as we did for above parameter.

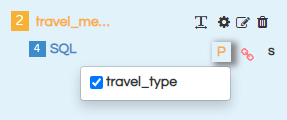
Since we are implementing cascading parameter this parameter should listen to travel_type.
For that we need to select the parameter as listener , should provide in parameter where clause and parameter configuration.
Configuration code :
Dashboard.setVariable('travel_medium','Bus');
var travel_medium = {
    name: "travel_medium",
    type:  "select",
    parameters:["travel_medium"],
    listeners:["travel_type"],   // this this listen parameter travel_type
    requestParameters :{
travel_type : "travel_type"

},

  options:{
        multiple:false,
        value : 'travel_medium',
        display : 'travel_medium',
        placeholder: 'Select travel_medium'
    },
  htmlElementId : "__efwd_file_name__",
    executeAtStart: false,  // the filter data will not show first time , after selection of 1st parameter it will show by listening to it
   map:4
};
SQL :
select distinct travel_medium from travel_details where travel_type = ${travel_type}
The following options are available in the configuration –
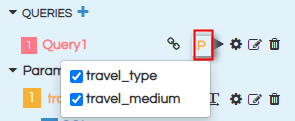
STEP 4: Add listener of parameter to query section
Click on P icon. You will see the added parameter list. Select the parameter(s) that you want to use in the query
STEP 5: Add where clause to the report query
Add where clause in the query section using the selected parameters. For using the values returned by the parameter, use the parameter name with $ sign and within {}. Syntax – ${parameter_name}.
Save the query and execute to get the resultset.
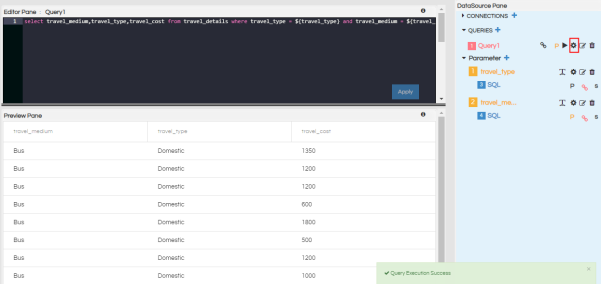
Report Query with where clause :
select travel_medium,travel_type,travel_cost from travel_details where travel_type = ${travel_type} and travel_medium = ${travel_medium}
STEP 6: Go to the Canvas to Use Parameters on the report

4. Parameters

By default, “Show Parameters” will be checked. If you do not want to show the parameters to end user, you can deselect this.
“Position” section defines where the parameter section should be visible with respect to the report. There are 4 options: right, top, left and bottom.
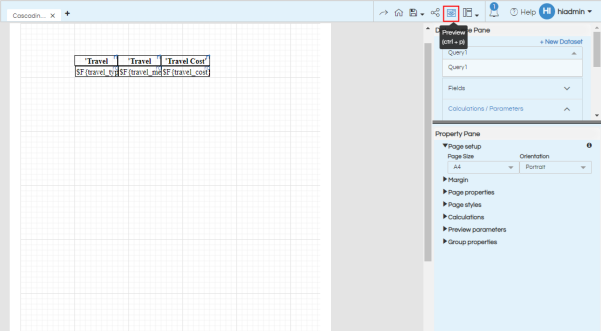
STEP 7: Preview the report
Click on Preview icon to preview the report. Click on the hamburger icon, after the report looks satisfactory then save the report .
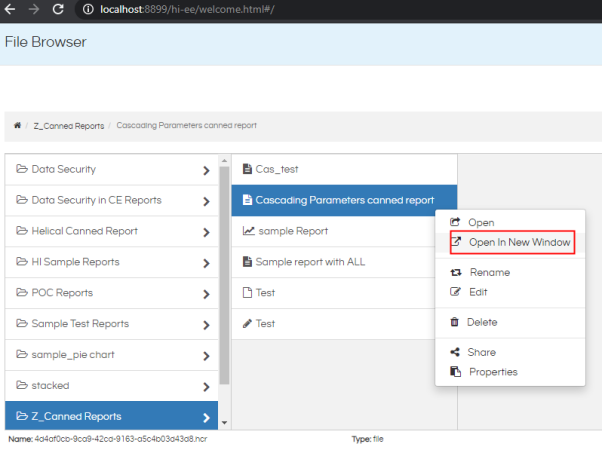
STEP 8 : Open the report in “new window “ from file browser
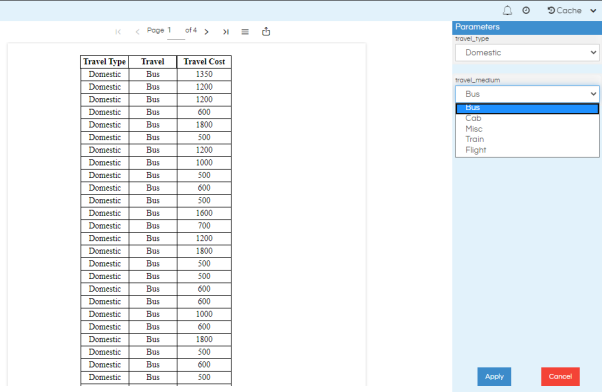
Report view1 : Test case for cascading filter , when we select travel_type as ‘Domestic’ the travel medium data will be fetched accordingly. Click on ‘Apply’ button the report data will be filtered based on the selected parameters values.
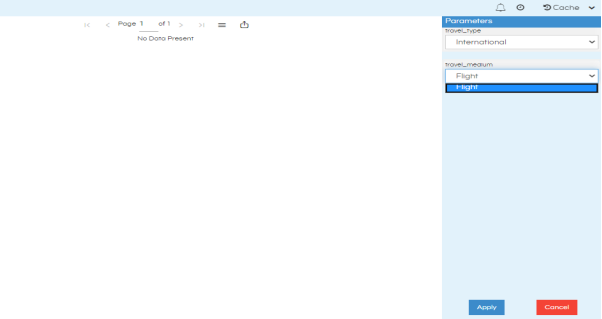
Report view2 : Test case for cascading filter , when we select travel_type as ‘International’
the travel medium data will be fetched accordingly. Click on ‘Apply’ button the report data will be filtered based on the selected parameters values.
For more info, contact us at support@helicalinsight.com
