This article explains Dropdown component in the Dashboard Designer using the Open Source BI Helical Insight enterprise version. This feature is available starting from Helical Insight version 5.2.2
This feature enables the creation of advanced custom use cases. For example, we can:
Create a custom dropdown with certain values and trigger define actions which happens based on values by end users, such as:
- Accessing the report via the JS editor.
- Opening the report in a tab component.
- Adding multiple reports into separate tabs.
- Positioning the report in a custom location.
- Displaying the report in a custom position within a tab.
Additionally, you can:
- Set and manage dashboard variables. Click here to learn more about dashboard variables
- Implement custom JavaScript functionality and invoke methods, such as showing or hiding components, or modifying properties like colors.
We will usage of Dropdown component with a use case by creating two values in the dropdown: “Emp Report” and “Travel Report”. On selecting a dropdown value, the corresponding report opens at a defined position in the Dashboard Designer
Steps to be followed :
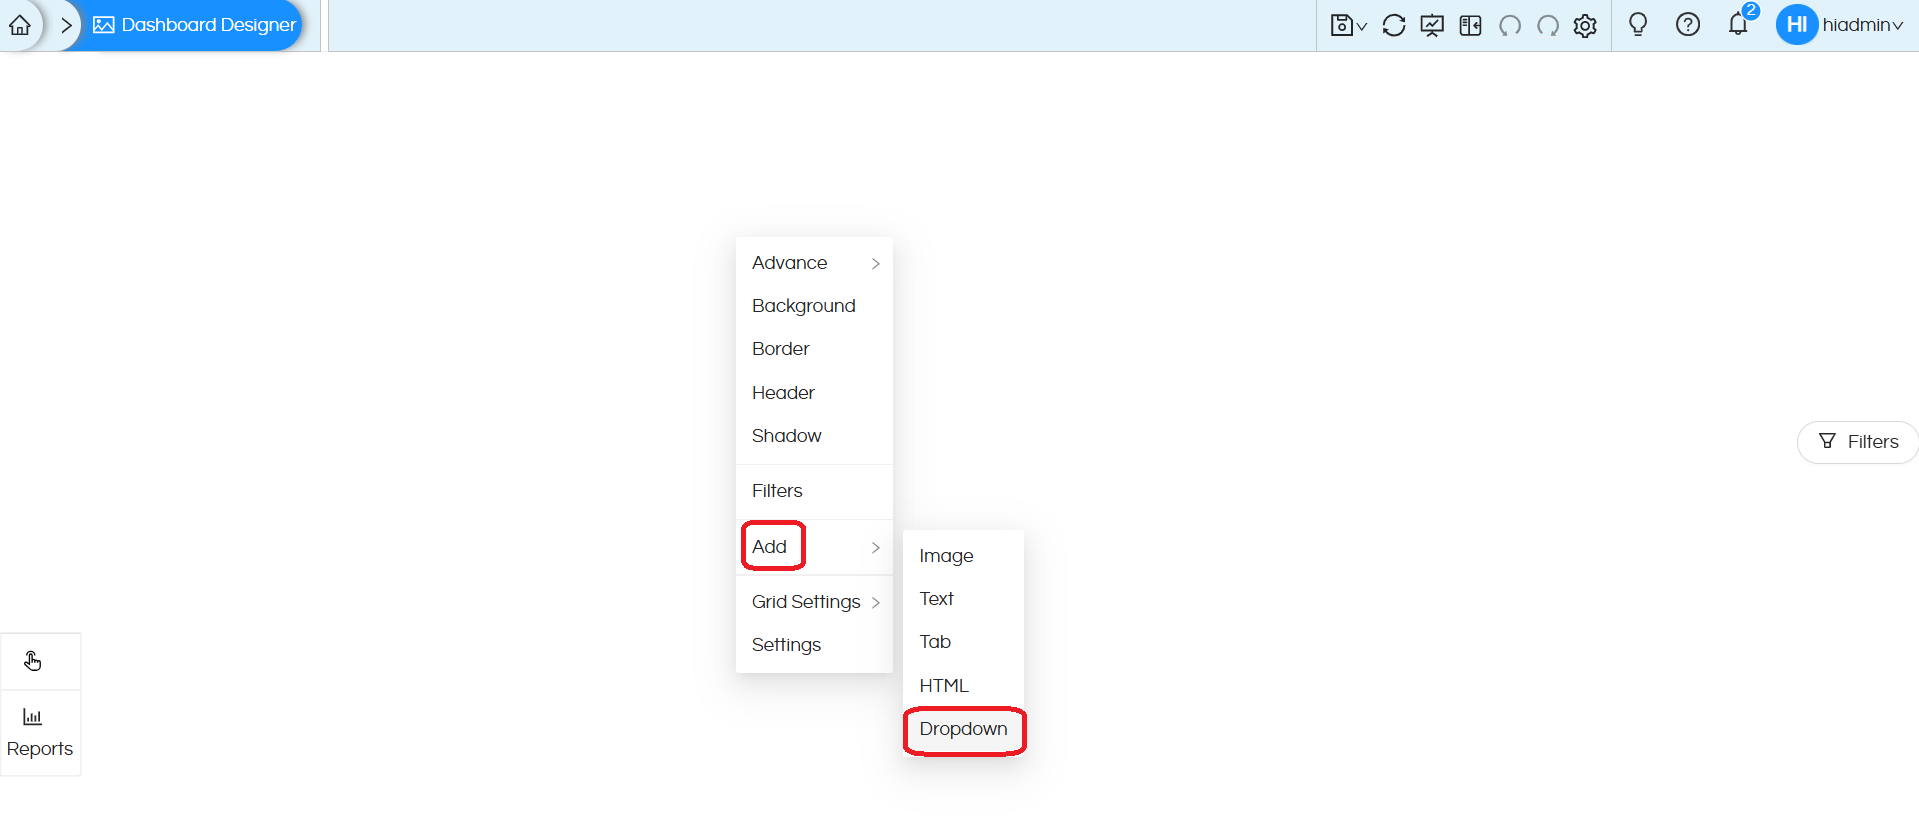
Step 1: Open the Dashboard Designer and right-click on an empty space. Choose Add > Dropdown
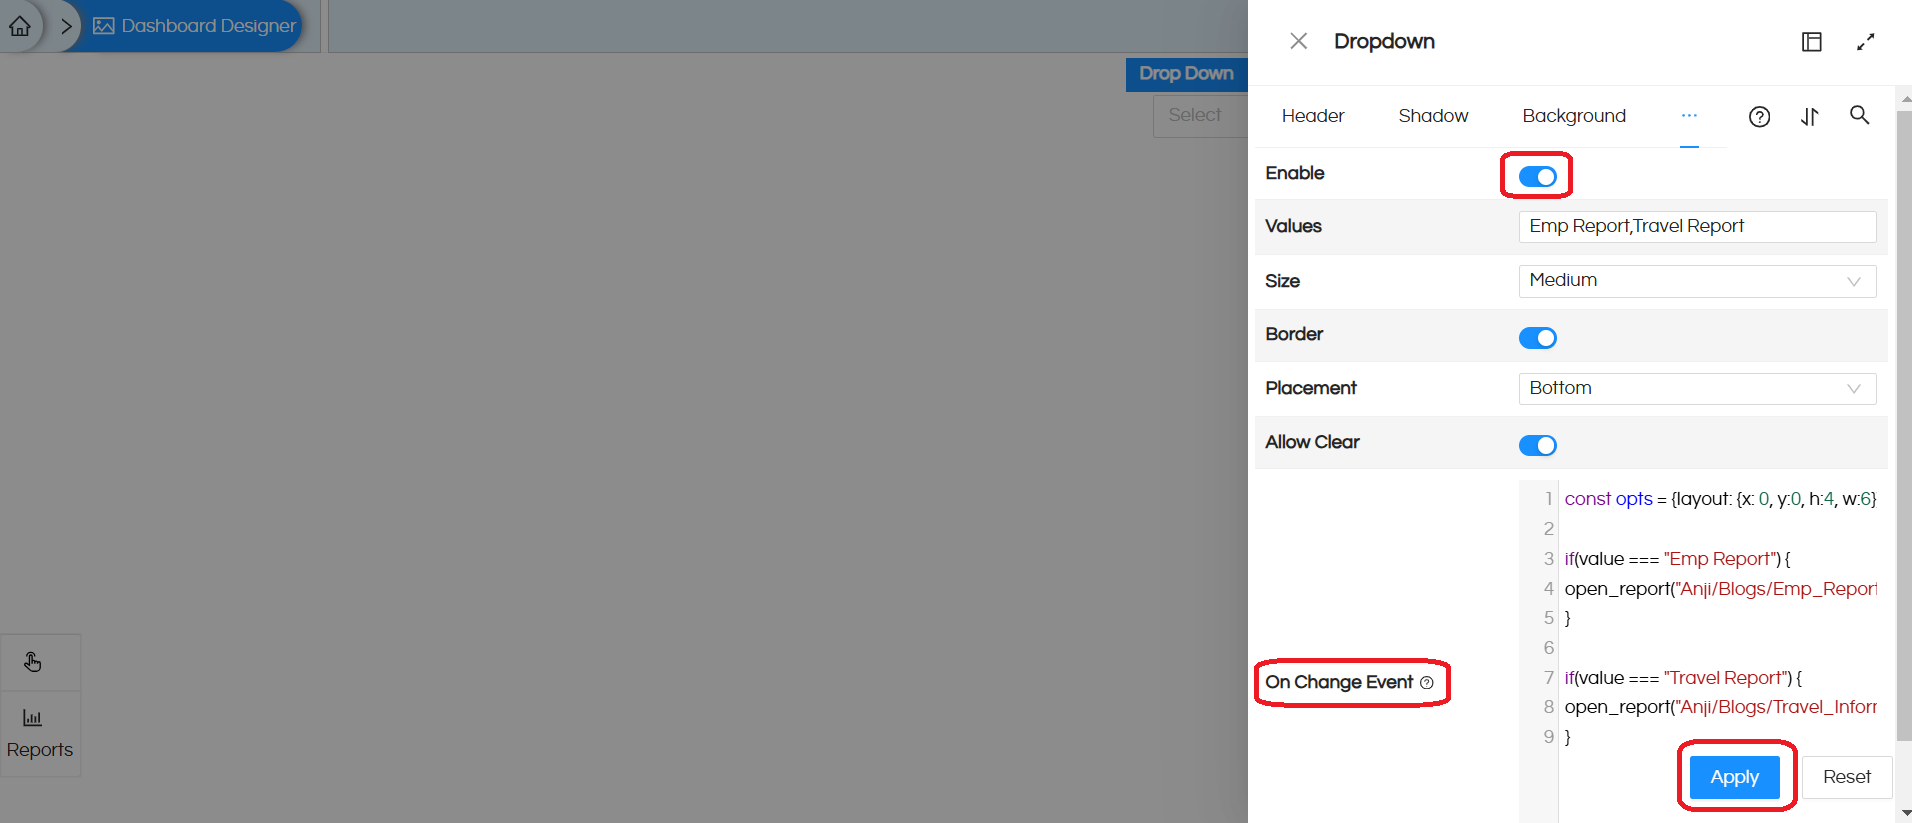
Step2: It opens the drop-down configuration. Enable it to be able to use this.
In the “Values” you can mention the list of all the values comma separated. The values mentioned here will appear as drop down values.
Size – This will be the size of the drop down component which will appear. It has got 3 values – Small, Medium and Large.
Border – This property applies border to the drop down.
Placement – This property sets the position of the drop down list.
Allow Clear – This property when enabled will allow a close button in front of selected values.
We should inject the required login in the JS code ‘On Change Event‘ placeholder.
JS Code :
const opts = {layout: {x: 0, y:0, h:4, w:6}}  // defined the position of the component
if(value === "Emp Report") {
open_report("Anji/Blogs/Emp_Report.hr", opts);
}

if(value === "Travel Report") {
open_report("Anji/Blogs/Travel_Information.hr", opts);
}
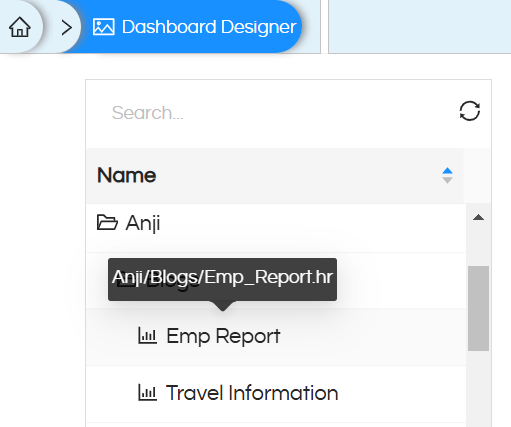
Note: In order to copy the exact path of the reports to be displayed, click on the file browser of the dashboard and navigate to the particular folder. Hover over the report to copy the path from the tooltip information.
Step 3: Click on ‘Apply’ to view the Dropdown code output in the Dashboard Designer.
Step4: Enabled the header for the Dropdown component and provided a name for the component. Align the Dropdown component properly on the dashboard and save it. In open mode, it looks like below :
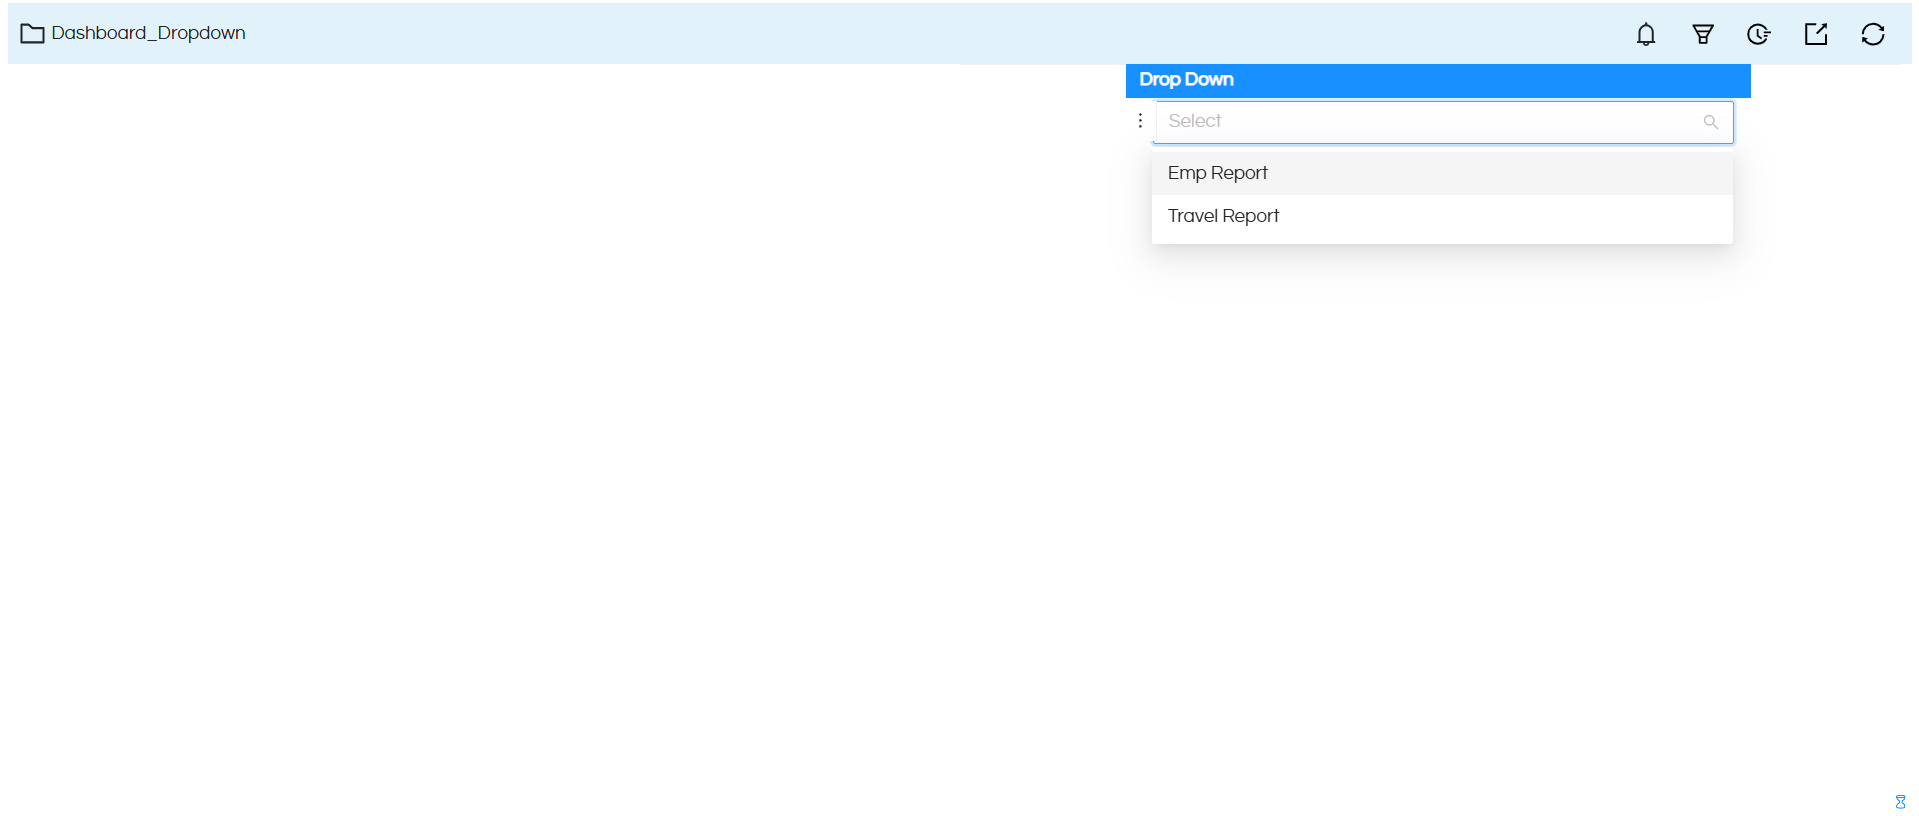
Step4 : Now, select the dropdown value ‘Emp Report.‘ It opens in the position defined in the dropdown configuration.
Refer to the screenshot below.
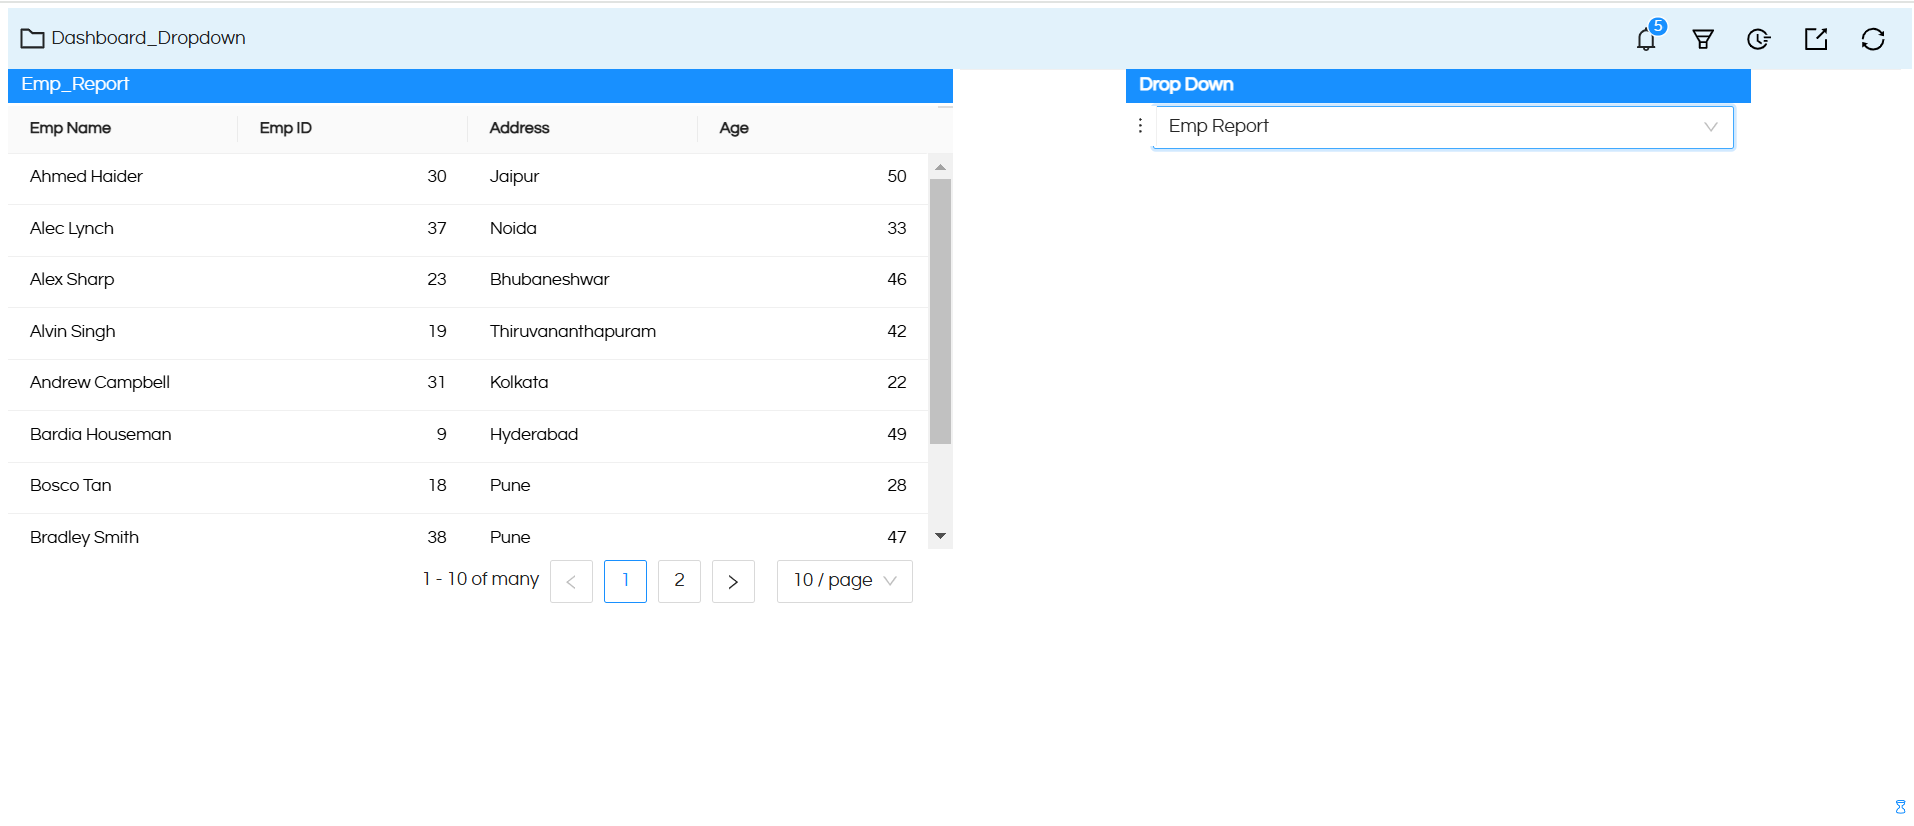
In a similar way, if we select ‘Travel Report‘ it renders in the same position
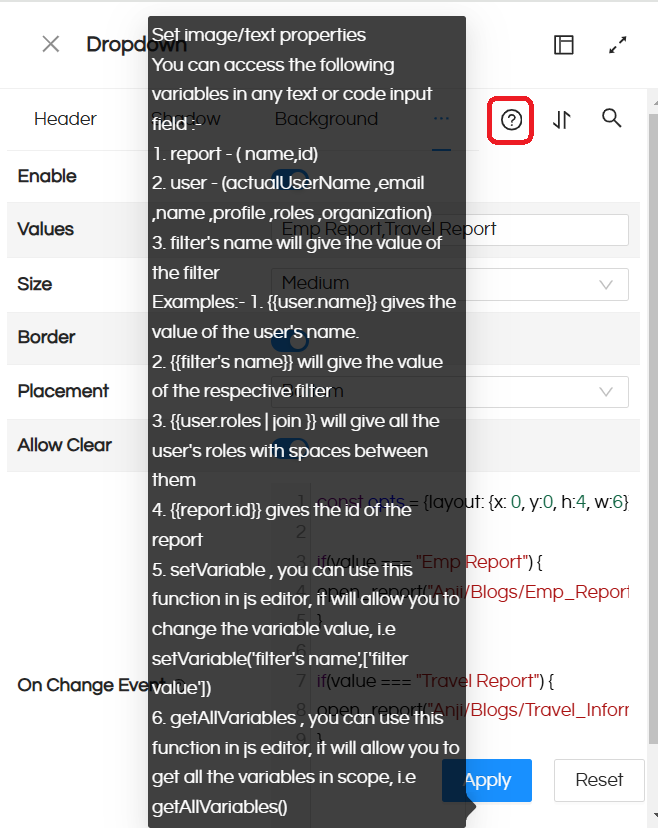
Note: We can use session variables such as username, organization name, roles, profiles, and filter values in the JS editor of the dropdown when working with custom requirements. When you hover over the help icon, you can view information about all the dynamic variables
