Till now, from version 5.0 till version 5.2.1 of Open Source BI Helical Insight Enterprise edition the added filters were coming up as a popup box from which a user can select the values. Read here to learn about adding filters in dashboard designer. This is a more recommended approach since in this case real estate is used for visualizations. Person can come, select the filters and then those filters goes away, thus allowing maximum of the real estate for charts and visualizations.
However from version 5.2.2, we have added another option called Free Float Filter which can allow you to keep the filter at any position in the dashboard as well as Apply & Reset buttons. This can give you more flexibility of putting filter at any component.
How to Add Free Float Filters :
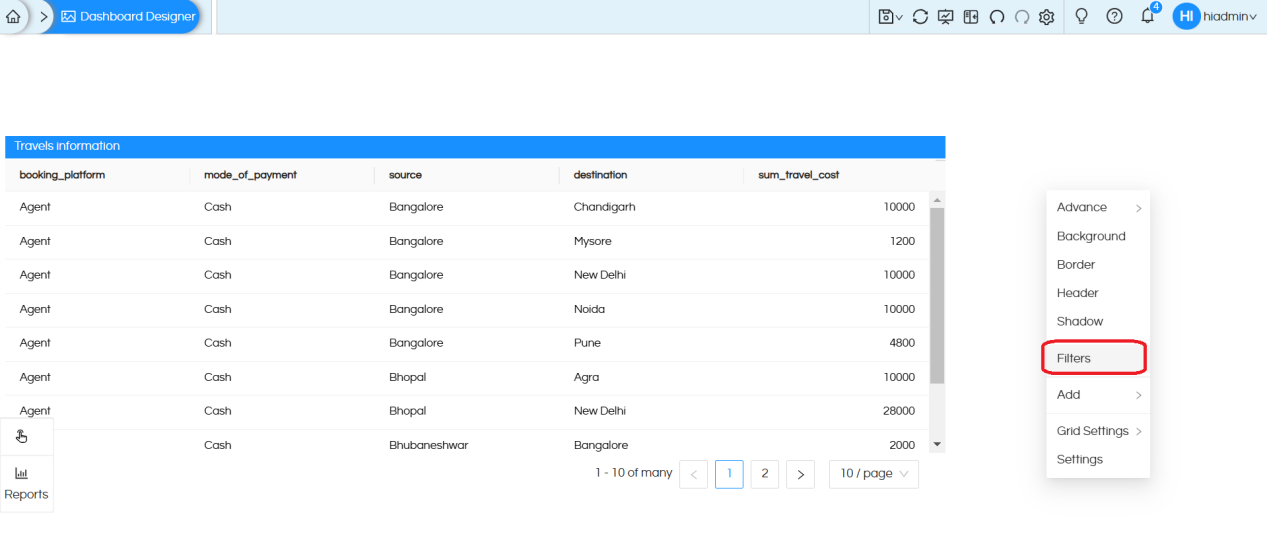
1. Right-click on an empty space in the dashboard and select ‘Filters‘
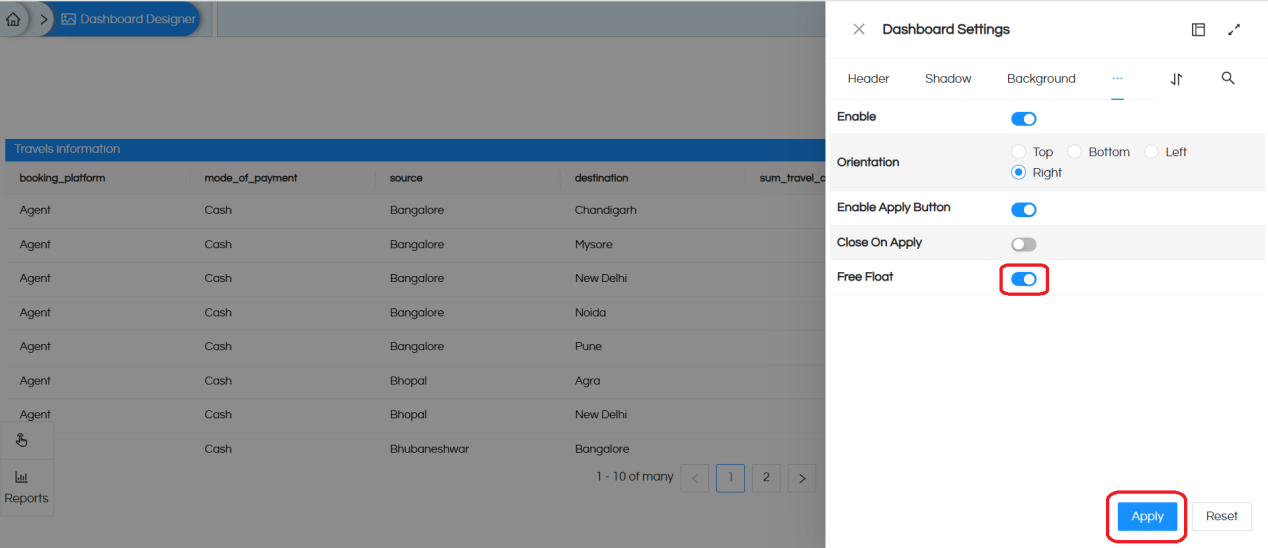
2. Enable the Free Float toggle and click on ‘Apply’.
3. Hover over the report and the filters icon will appear. Then if you hover over the filters icon, it will display the list of filters/parameters that specific report is having.
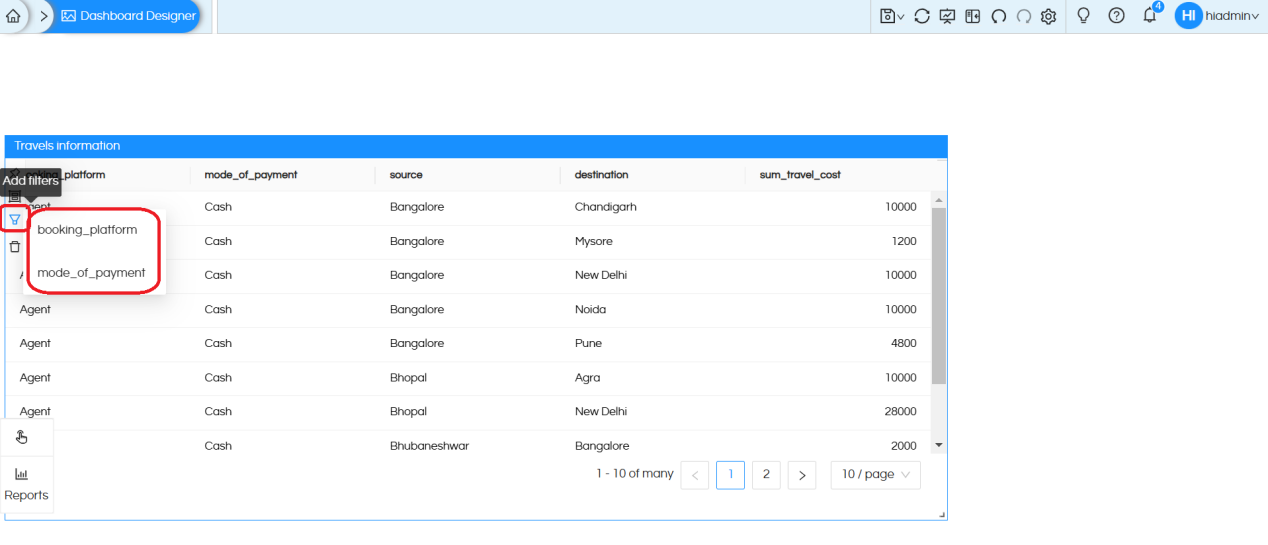
4. Click on the filter/parameter names to add them as free-floating components in the dashboard.
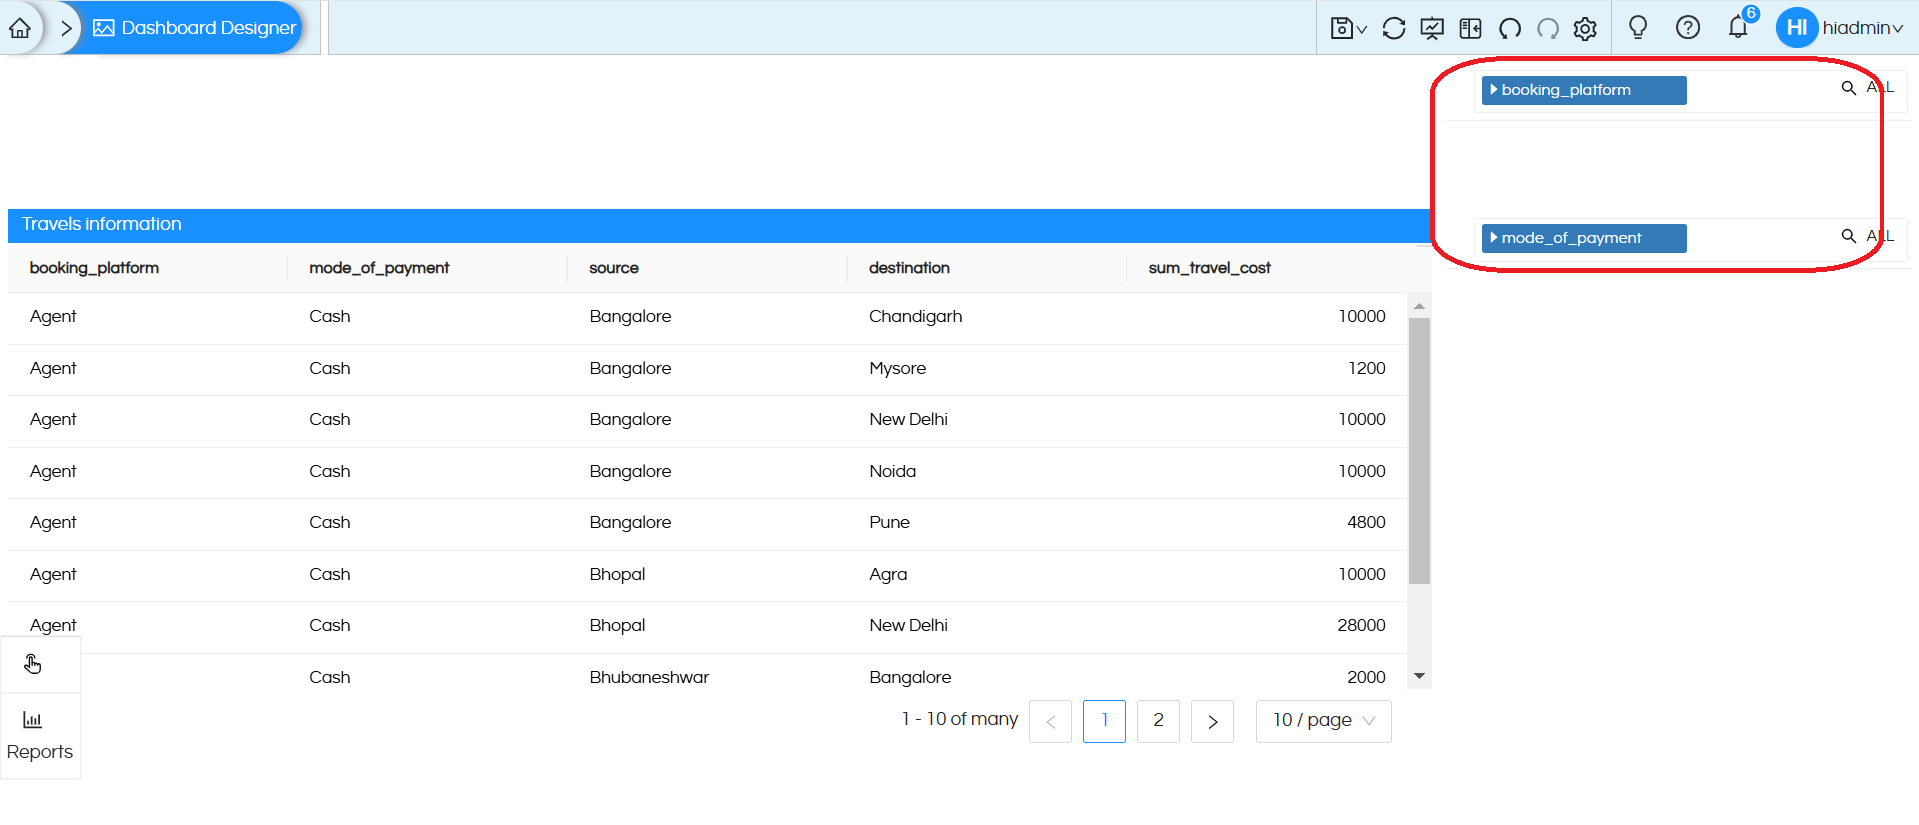
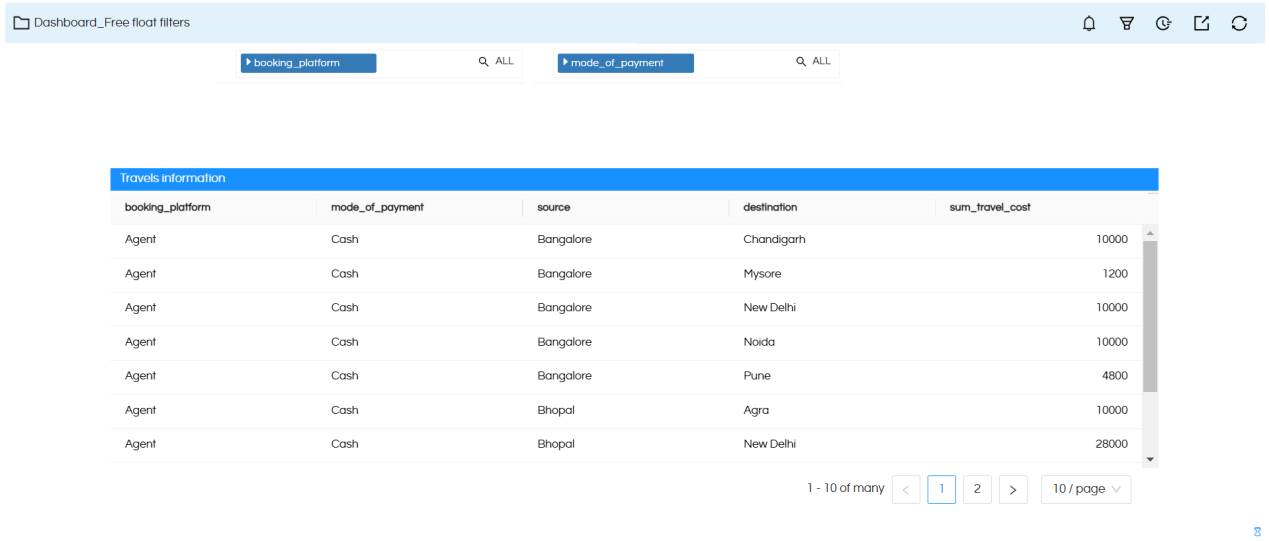
5. Align the free-floating filters to the desired positions on the dashboard and save it. You can resize, reposition and you can apply any of the right click operations. In open mode, it appears as shown below
Apply and Reset Filter Buttons in Free Floater Mode:
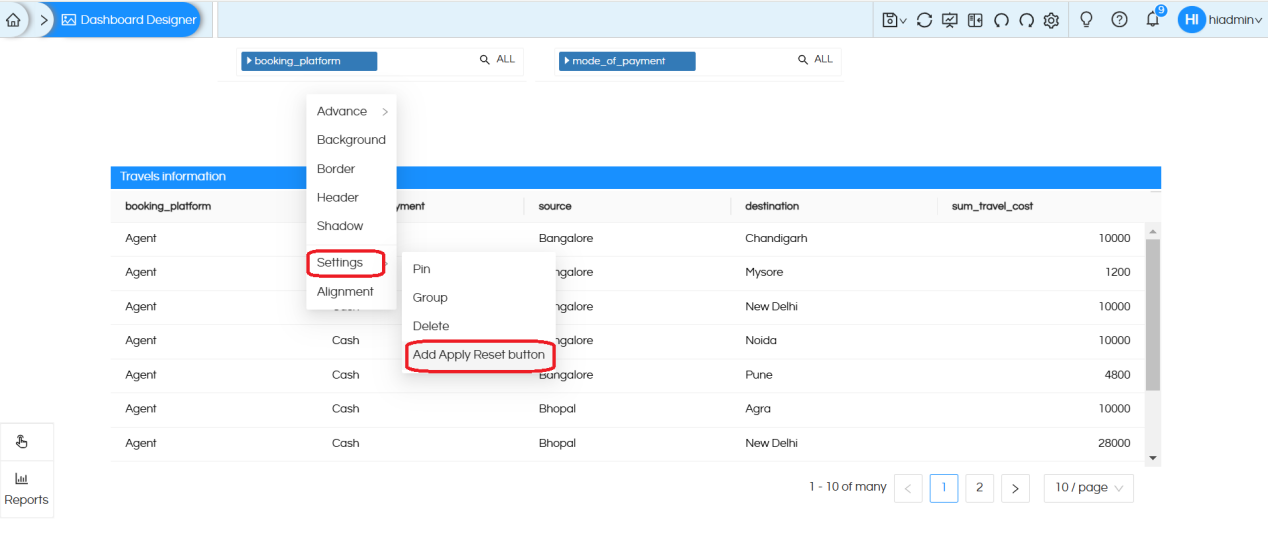
1.In the dashboard designer, right-click on any filter component which you have added and choose Settings > Add Apply Reset button
Note: If you right click on any other component, then in the settings you will not get this option. You have to enable Free Float mode, add a filter and then on that filter when you right click this option will appear.
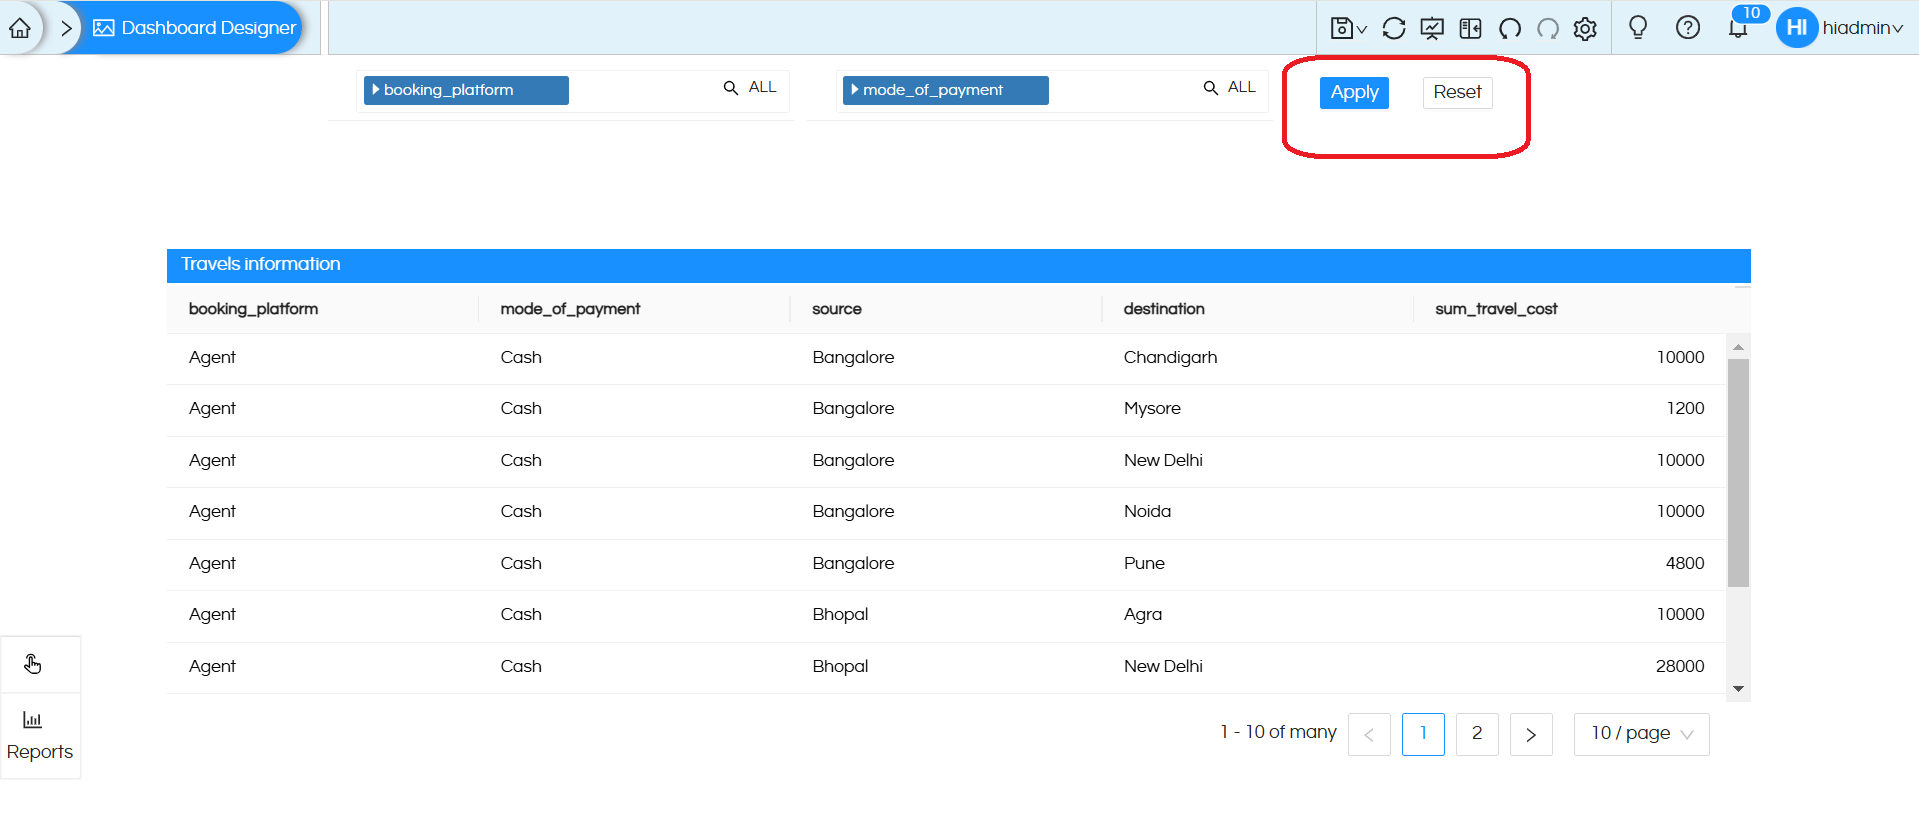
2. The Apply and Reset buttons will be added. Place them in the desired position and save the dashboard. All the other functionalities like resize, reposition, right click operations are also applicable on these buttons which gets added.
3. Select filter values and click on ‘Apply’ to reflect the data for the selected values
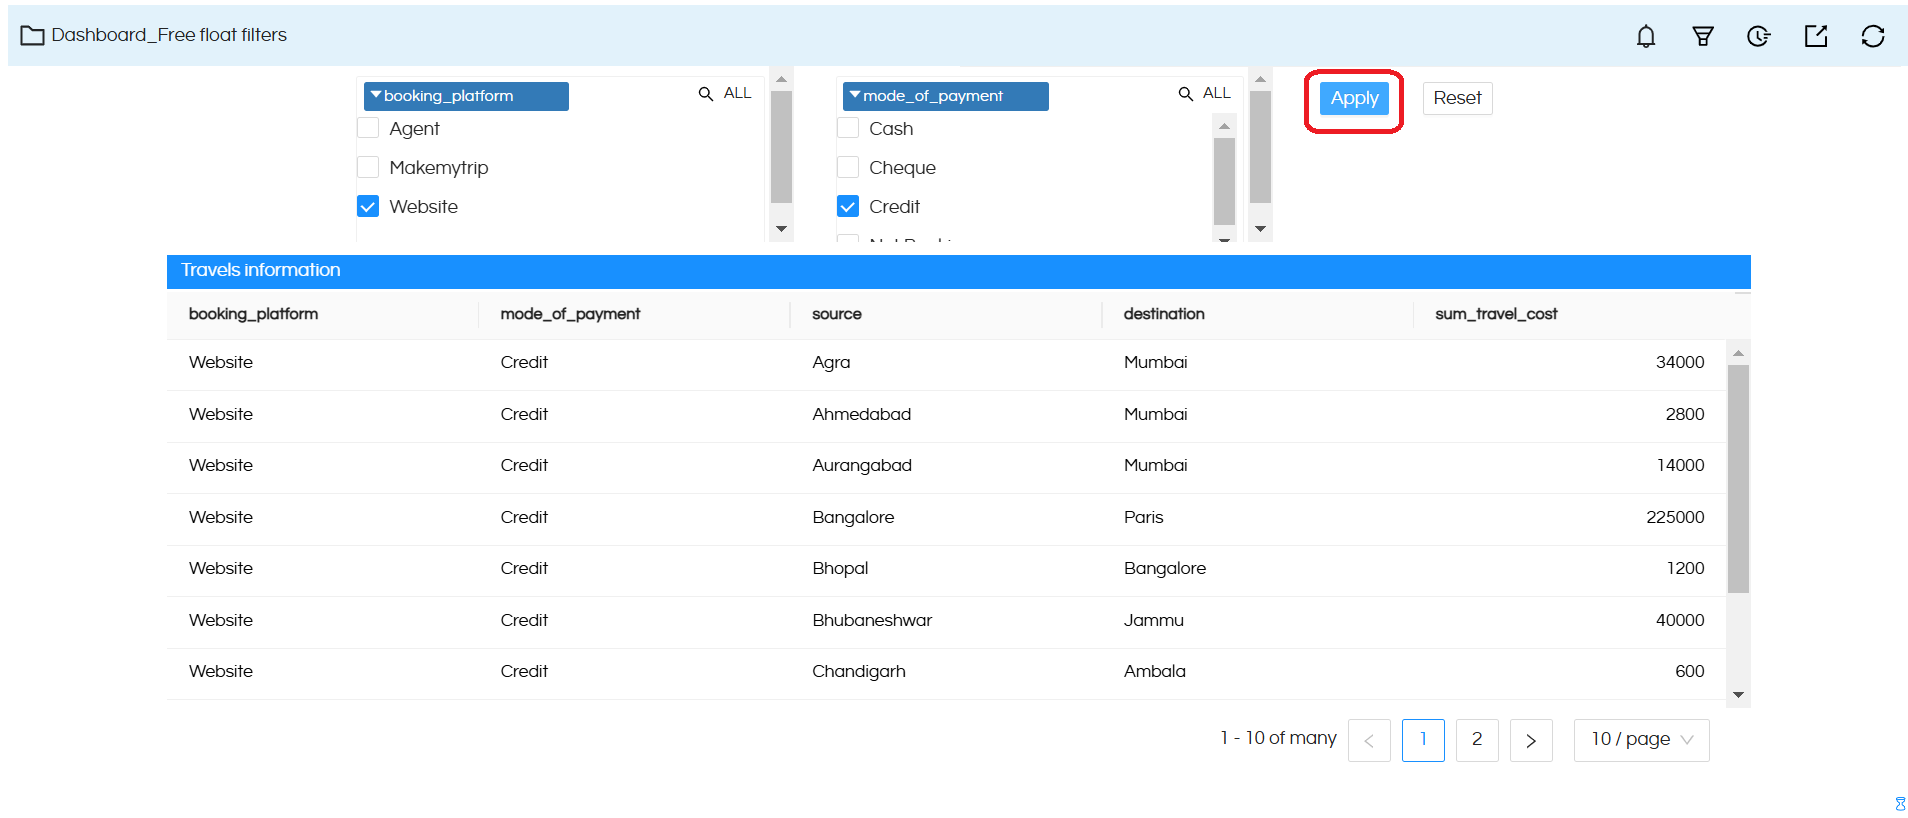
4. If you click on the ‘Reset‘ button, it will reset to the default filter values
Note: If we add the ‘Apply’ and ‘Reset’ buttons, they will work for all the filter components in the dashboard. The values of the filters values always comes on top for easier readability.
