In this blog we are going to cover the points related to the usage of text component. Text is the most used component in creating canned report and can be used for creating dynamic as well as non dynamic content like label, heading, titles, static text etc.
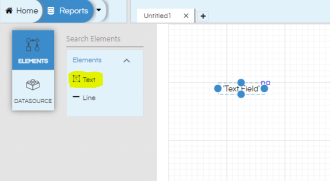
A text field can be dragged from left field and text can be added.
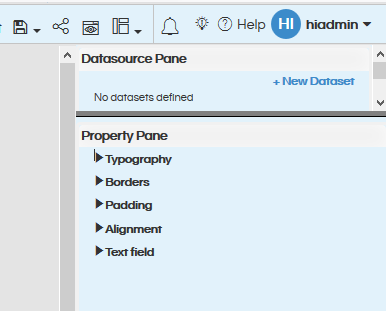
When a text component is selected, on the right side, various kind of configuration options of text appears which are explained below.
The various kind of text configuration options are described below
-
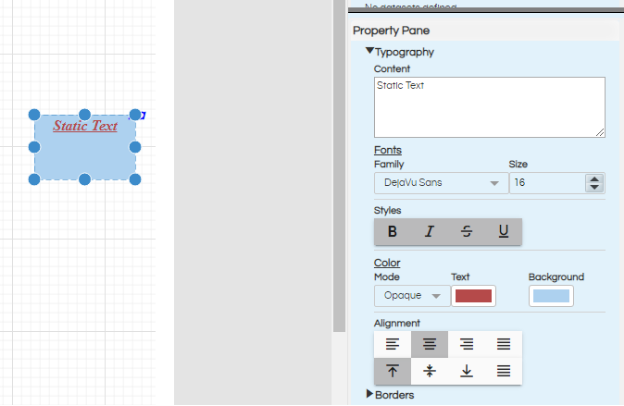
- Typography: The first property in typography is “Content”. In the content you can write the text what you would like in the text field to display. Here the content can be static text (like Name, Class, Sales etc) or it could be dynamic also.
Static text can be directly written in text box. Any static text which you wish to write should be within quotes like as shown here “Sample Static Text”.
The text field can also be dynamic by using the expression like “$F{TravelID}, $V{TravelID}, $P{TravelID}”.
$F{FieldName}: Whatever query we have written that field output can also be directly called like this. So for example if your query returns a column names Travel_Id you can also write that into text box as $F{Travel_Id}.
In a similar way $V contains the name of any group count function or custom calculation which you might have created. You can refer to our other blogs to learn more about the quick calculations as well as adding custom calculations.
In a similar way $P contains the name of the input parameters.Refer t this blog to learn more about input parameters usage. Example $P{startdate}.
A single text box can contain static text + dynamic text also. For example “No Data Found for the period”+”:”+$P{startdate}+” “+”To”+” “+$P{enddate}
In the text field it is also possible to write dynamic expression also like this DATEFORMAT($F{inserted_date},”dd-MMM-YYYY”) wherein the data is being fetched from the field ($F{inserted_date} and on top of of that it is using Java function and the data type conversion is happening. Any sort of Java functions can be invoked here.
There are various kind of other customizations using Typography section which you can do which includes
-
-
- Change the font type
- Change the font size
- Font styling (bold, italic, underline, strikethrough etc)
- Defining the text color
- Defining the background color of the text box (for having this make sure that the mode is set to Opaque. If mode is transparent then the background color will not affect)
- Alignment option will allow to specify the horizontal alignment (Left Align, Center Align, Right Align, Horizontal Justify) as well as vertical alignment (Top Align, Center Align, Bottom Align, Vertical Justify) of the text within the text box which is created
-
-
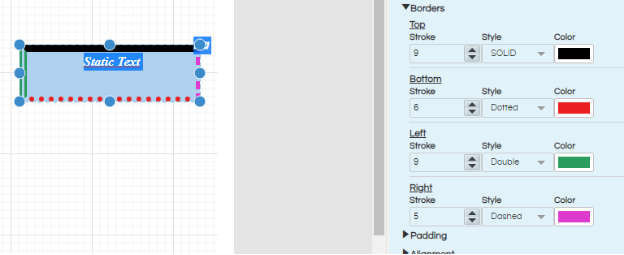
- Border: The next property is the border property. For that specific text component you can specify all the below properties individually for all the 4 borders i.e. Top Border, Bottom Border, Left Border and Right Border.
- Border width via Border Stroke option
- Border Style: Various options present here are Solid, Dotted, Doubled and Dashed
- Color of the border: You can select the color as well as provide RGBA or HEX value also.
- Border: The next property is the border property. For that specific text component you can specify all the below properties individually for all the 4 borders i.e. Top Border, Bottom Border, Left Border and Right Border.
-
- Padding: With padding you can specify the padding of the text from the left side, right side, bottom side and left side in terms of pixels.
-
- Alignment: With alignment you can specify the pixel perfect position of the text component along with its size. Position and sizing can also be done by directly clicking on the component and the dragging it to reposition as well as resize. Keyboard arrows can also be used to reposition the components. However these alignment options can give the best kind of pixel perfect control.
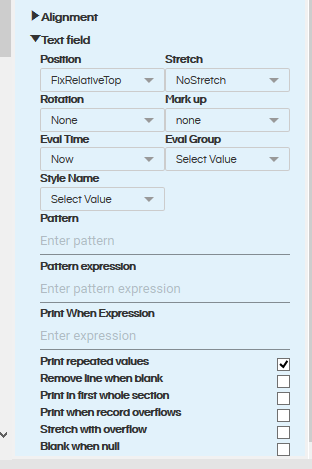
- Text Field: There are other kind of additional options which are present in the text field section.
-
- Position: Position can have values FixRelativetoBottom, FixRelativetoTop and Float. When the component height is changed then where exactly that specified text will be present is specified via this specific component.
- Stretch: Stretch property specifies the behavior of the text present inside when the component has been stretched. The values which it can have includes ContainerBottom, ContainerHeight, ElementGroupBottom, ElementGroupHeight and NoStretch.
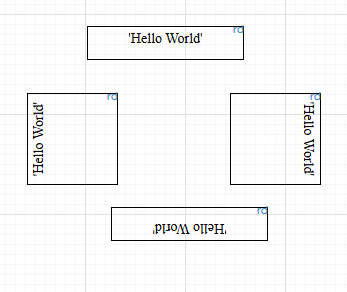
- Rotation: This property can help in specifying the rotation of the text inside the container. It can be none (default), left of the component, right of the component or upside down at the bottom.
-
- Markup: This allows you to add further code and do further kind of styling. The options supported are none (Plain Text), styledtext, rich text format and HTML.
- Eval time: In case if we would like this component to be executed only at a specified time then those conditions can be specified here.
- Pattern: In case if we would like to format the output which is getting printed on the report then the required pattern can be specified over here. So things like thousand separator, prefix, suffix, date /date time formatting, currency and a lot of other kind of formatting can be done here.
Example: When data is numeric and the expression put is “#,##0.###” the data appears like “1,234.00”. When expression put is “MMM d, yyyy” then output appears like “Jan 01, 2020”. When expression put is “h:mm:ss” then output appears like “4:14:46 PM IST”. When expression put is “$#,##0” then output appears like “$1,234”. When expression put is “#,##0.##%” then output appears like “84%”. When expression put is “0.0##E0” then output appears like “1.001E3”.
-
- Pattern expression: In case if the value returned from the component is a specific value and accordingly you would like to apply one pattern or the other pattern those things can be specified here.
Example :$F{travel_cost}.equals(1350)? “#,##0.##%”:”#,##0.### : as you can see if the value equals 1350 then it will print on the report in the first format or otherwise in the second format.
- Print When Expression: If we would like to print this specific cell on to the report only when a specific condition is met then we should use this specific property. Example : (($F{meet_cancellation_status}.equals(“Yes”))) : This expression will print the cell only when its returned value is “Yes”.
There are also further more certain advanced options which can be used which includes below
- Print repeated values: This property enables or disables printing repeated values from dynamic data.
- Remove line when blank: This property will collapses that section if the element is not printing and no other element is occupying the same horizontal space.
- Print in first whole section: The element gets printed in the first section of a new page or column that is not an overflow from a previous page or column.
- Print when record overflows: The element will be printed when the record overflows to a new page or a new column
- Stretch with overflow: This property will stretch element downwards in order to display all its text when it doesn’t fit in the defined text field height
- Blank when null: This property when used displays blank character instead of null when the field contains null value
For further assistance, kindly contact us on support@helicalinsight.com or post your queries at Helical Forum

