Starting from Helical Insight Enterprise Edition 5.2.2 onwards, we are providing an in-built driver to connect to and use flat files like Excel, CSV, JSON, and Parquet. Hence, without the need of using any middlewares (like Drill etc) now you can directly connect and use Excel within Helical Insight
We are providing detailed information on how to connect to and use Excel files :
1. Log in to your Helical Insight application and go to the “Data Sources” module.
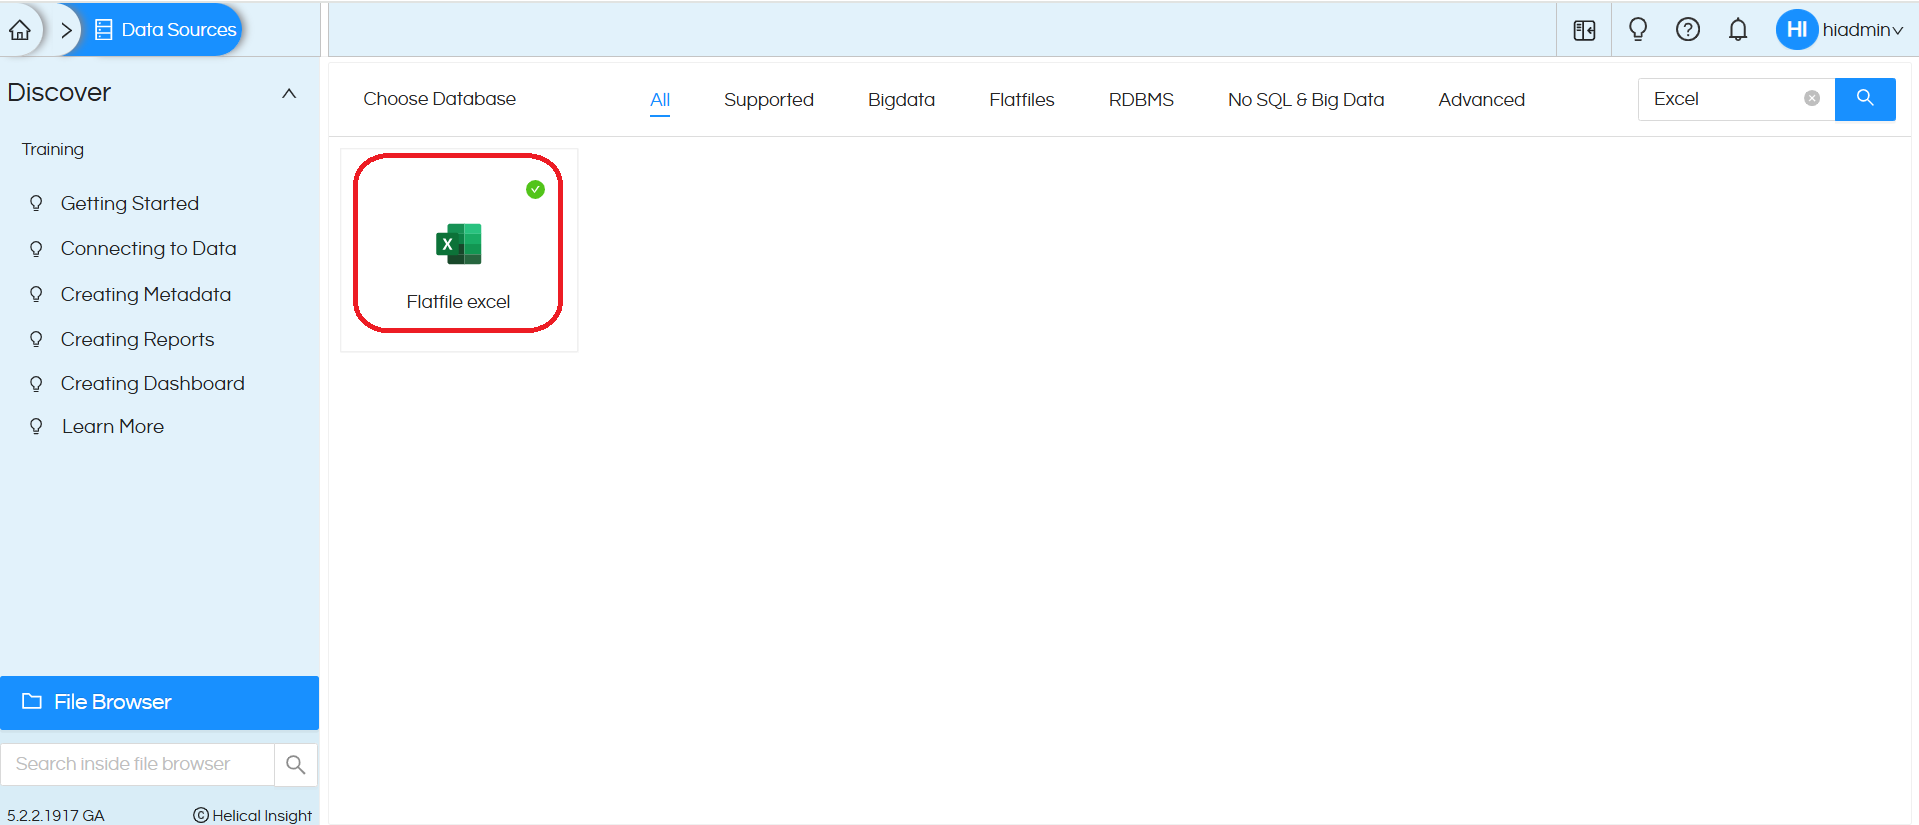
2. Once you are on “Data Sources” module, you will see many options to connect to different databases. Out of that you need to choose “Flatfile excel”. You can also use the Search box at the right side to search for that relevant driver. Reference image is provided below:
3. Once you click on ‘Flatfile Excel‘ and choose ‘Create‘ a popup will open. A reference image is provided below
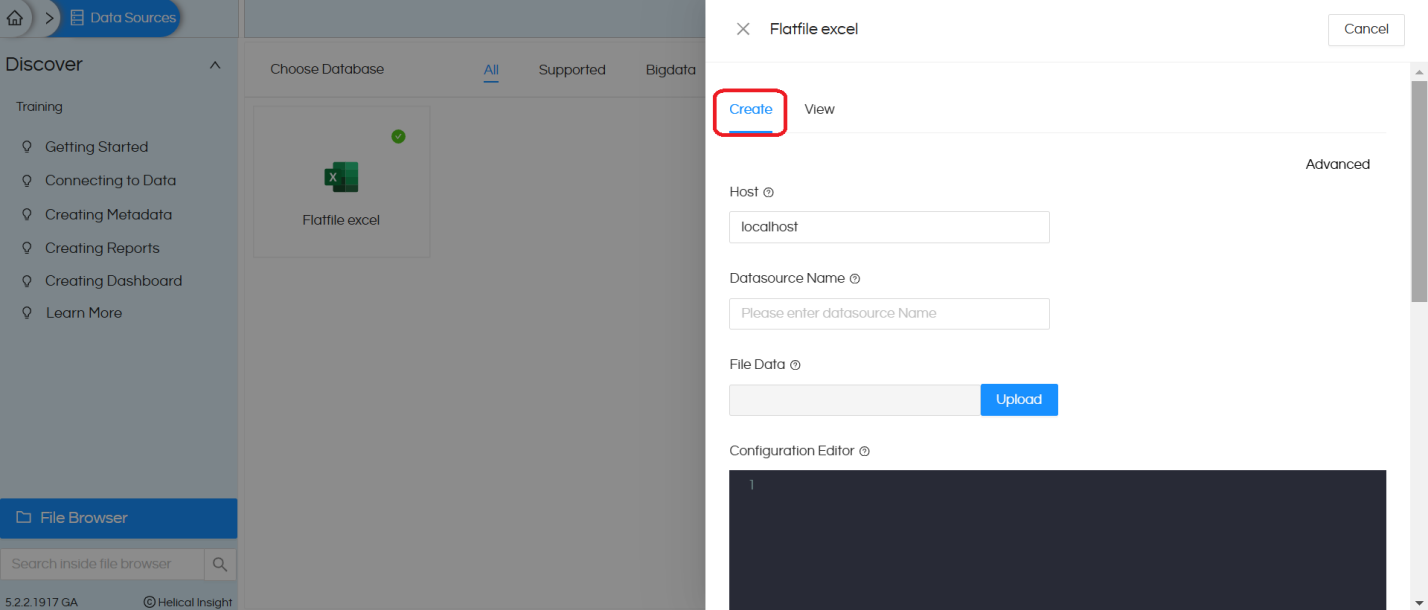
4. Host: It can be provided in two ways:
- Upload the file: If we upload an Excel file using the upload option, that file will get uploaded at a specific location in the Helical Insight server and this host section will automatically get filled with that path.
- Manually provide the Excel file path: In this case, the Excel file must be uploaded and present on the same server where the Helical Insight server is installed and then in the host you will put something like below.
Example for linux path: /usr/local/traveldata.xlsx
We recommend using the file Upload option
5. In the “Datasource Name” section, we can provide any name of our choice with which the connection name will be saved and listed.
6. In the ‘Configuration Editor‘ we need to provide the configuration details. These details generally change based on the type of flat file being used. In most cases your connection to Excel will work as it is without even the need to go here and make any changes. In most cases you can give Connection Name, Test Connection, Save Connection. And then you can “Create Metadata” and further use Helical Insight.
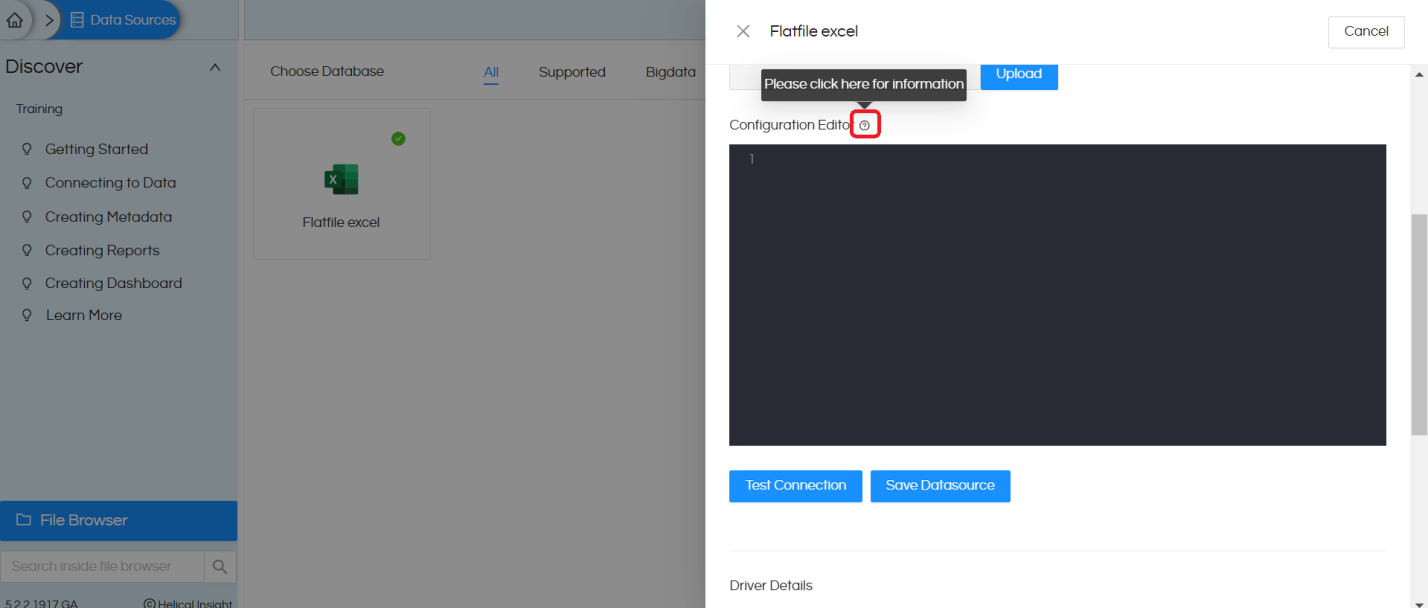
7. Once you click on this icon, it will open a pop up with all the configurations for different flat files.
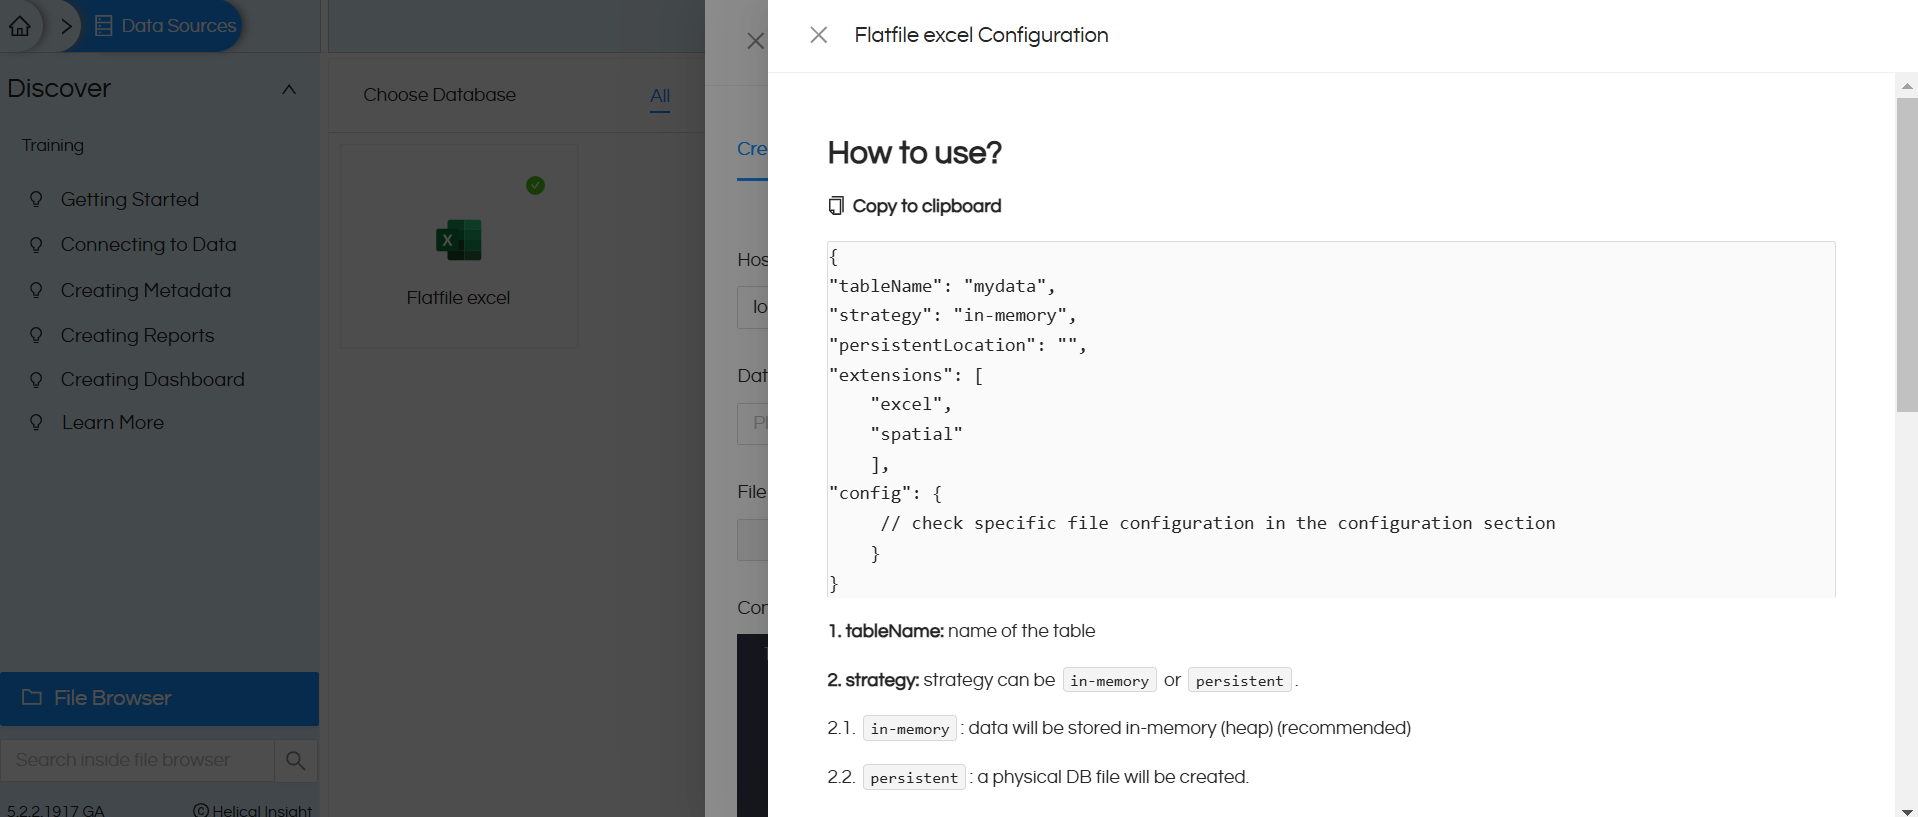
You will get direct “Copy to clipboard”, option which you can use to copy the content. You need to make some necessary changes based on your details.
Explanation of configuration options :
1. tableName:
	Value: "mydata"
	Explanation: This specifies the name of the table that will be created or referenced in the metadata. In this case, the table will be named mydata.
2. strategy:
	Value: "in-memory"
	Explanation: Specifies the data processing strategy.
	"in-memory": Data will be processed and stored temporarily in memory, without persistence to a physical location( Recommended)
	"persistent": Data will be persisted to a physical database file for storage.
3. persistentLocation:
	Value: "" (empty string)
	Explanation: Indicates the location for persistent storage when the strategy is set to "persistent".
	If the strategy is "persistent", a valid file path must be specified here (e.g., C:\\dbs\\test.duckdb).
	This is to be left empty when, no persistent storage is configured.
4. extensions:
Value: ["excel", "spatial"]
	Explanation: Specifies the supported file types or processing extensions.
	"excel" enables the configuration to handle Excel files.
	"spatial" may indicate support for spatial
When using excel, we can keep both excel and spatial here.
5. config:
This section contains additional configuration details for processing the flat file like mentioned below.
a. layer:
	Value: ["sheet 1", "sheet 2"]
	Explanation: Specifies the sheet(s) in the Excel file to be processed. Excel file can have multiple sheets and you can specify which all sheets (their names) should be used like the above. If some sheet name is not provided that will get ignored.
b. open_options:
	Value: ["HEADERS=FORCE", "FIELD_TYPES=AUTO"]
	Explanation: These are options for interpreting and processing the data.
	"HEADERS=FORCE" ensures that the first row of the sheet is treated as headers, even if this is not explicitly set in the Excel file.
	"FIELD_TYPES=AUTO" enables automatic detection and assignment of field types (e.g., string, integer, date).
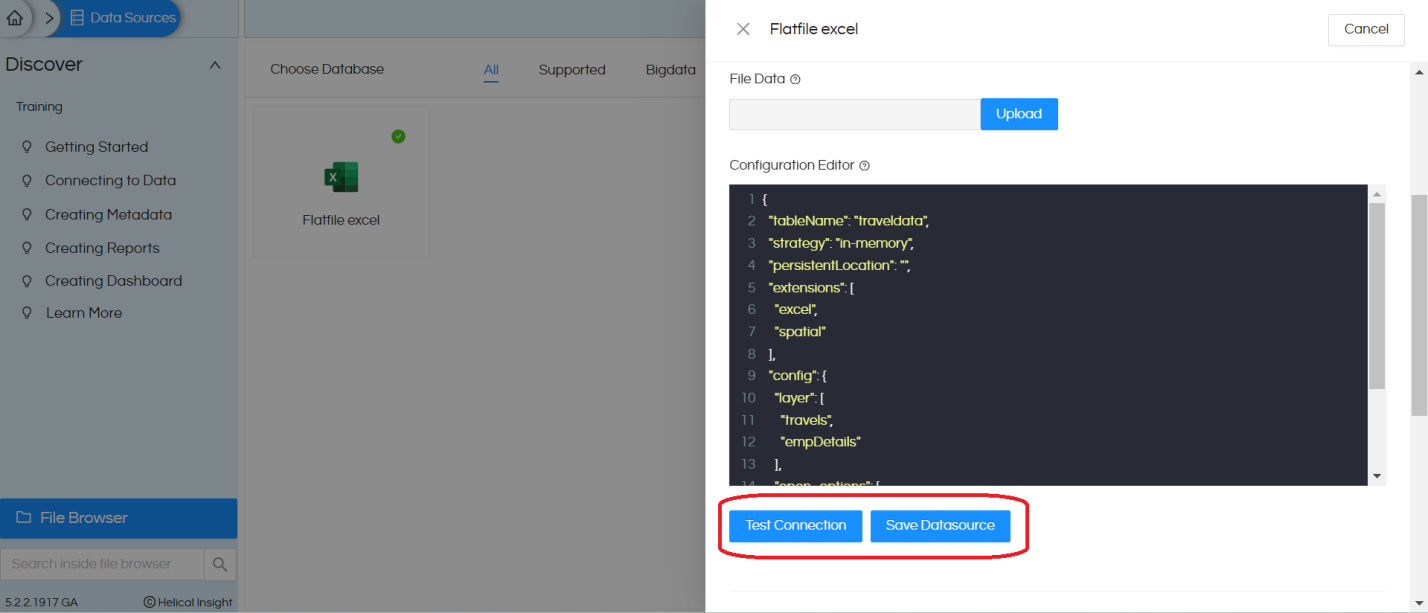
8. We have uploaded the “Travel_Details.xlsx” file using the ‘Upload‘ option and provided the below required configuration in the Configuration Editor
{
  "tableName": "traveldata",
  "strategy": "in-memory",
  "persistentLocation": "",
  "extensions": [
    "excel",
    "spatial"
  ],
  "config": {
    "layer": [
      "sheet 1"
    ],
    "open_options": [
      "HEADERS=FORCE",
      "FIELD_TYPES=AUTO"
    ]
  }
}
9. Click on Test Connection, it gives The connection test is successful
(If there are no issues with configuration) click on Save Datasource
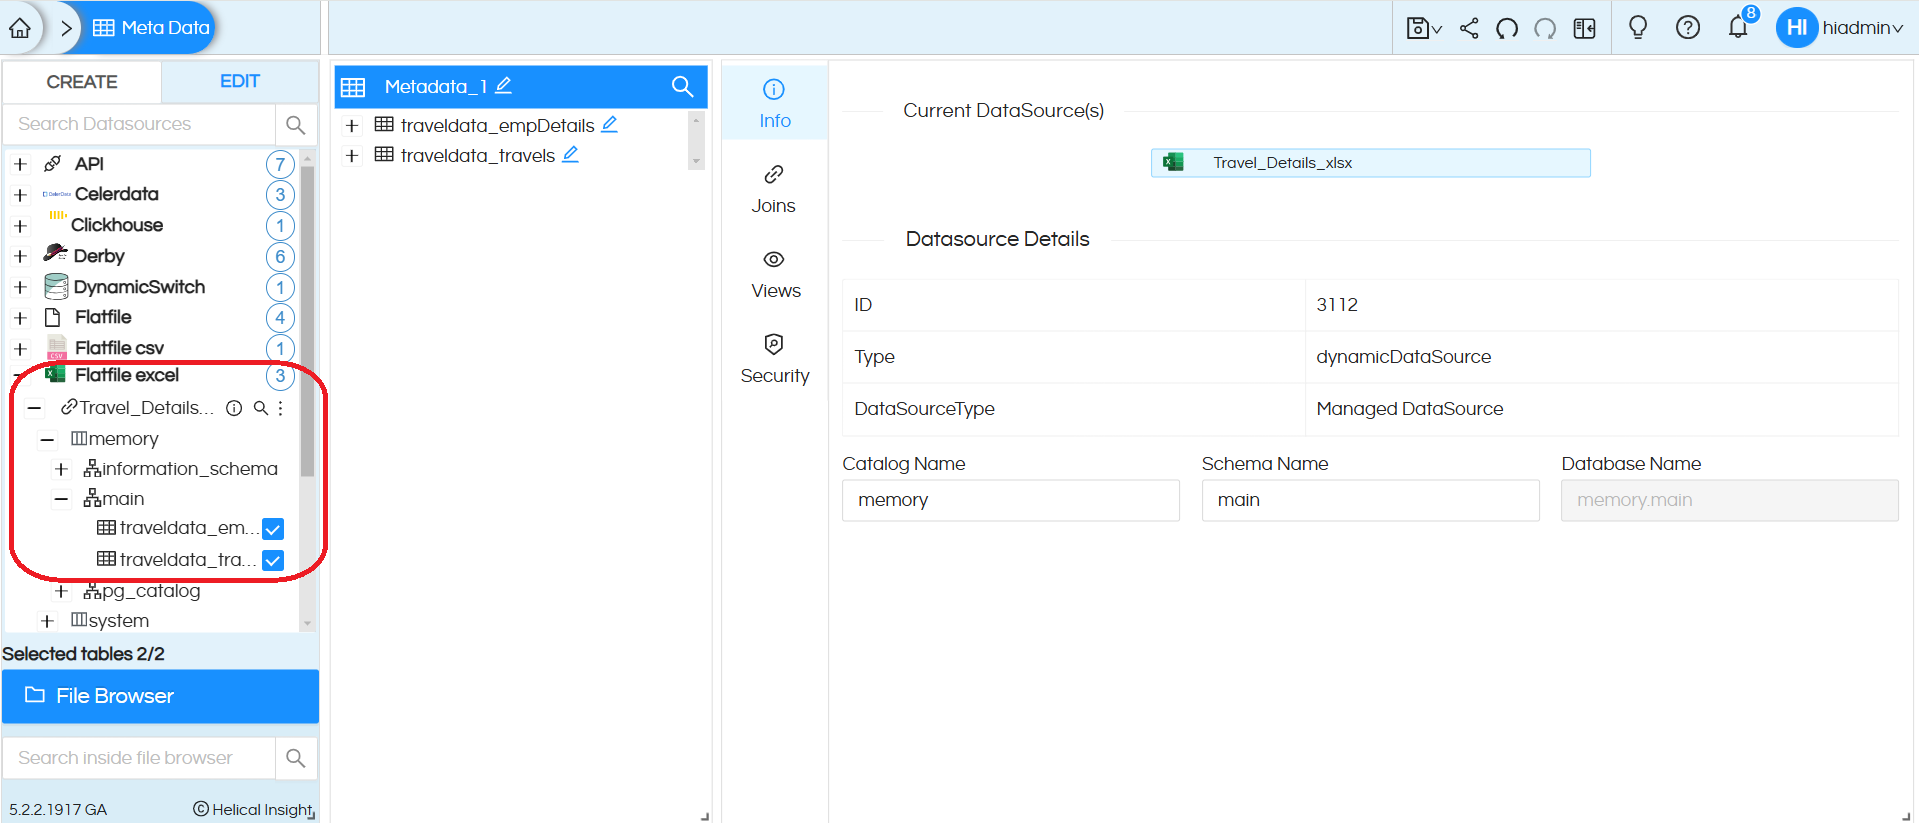
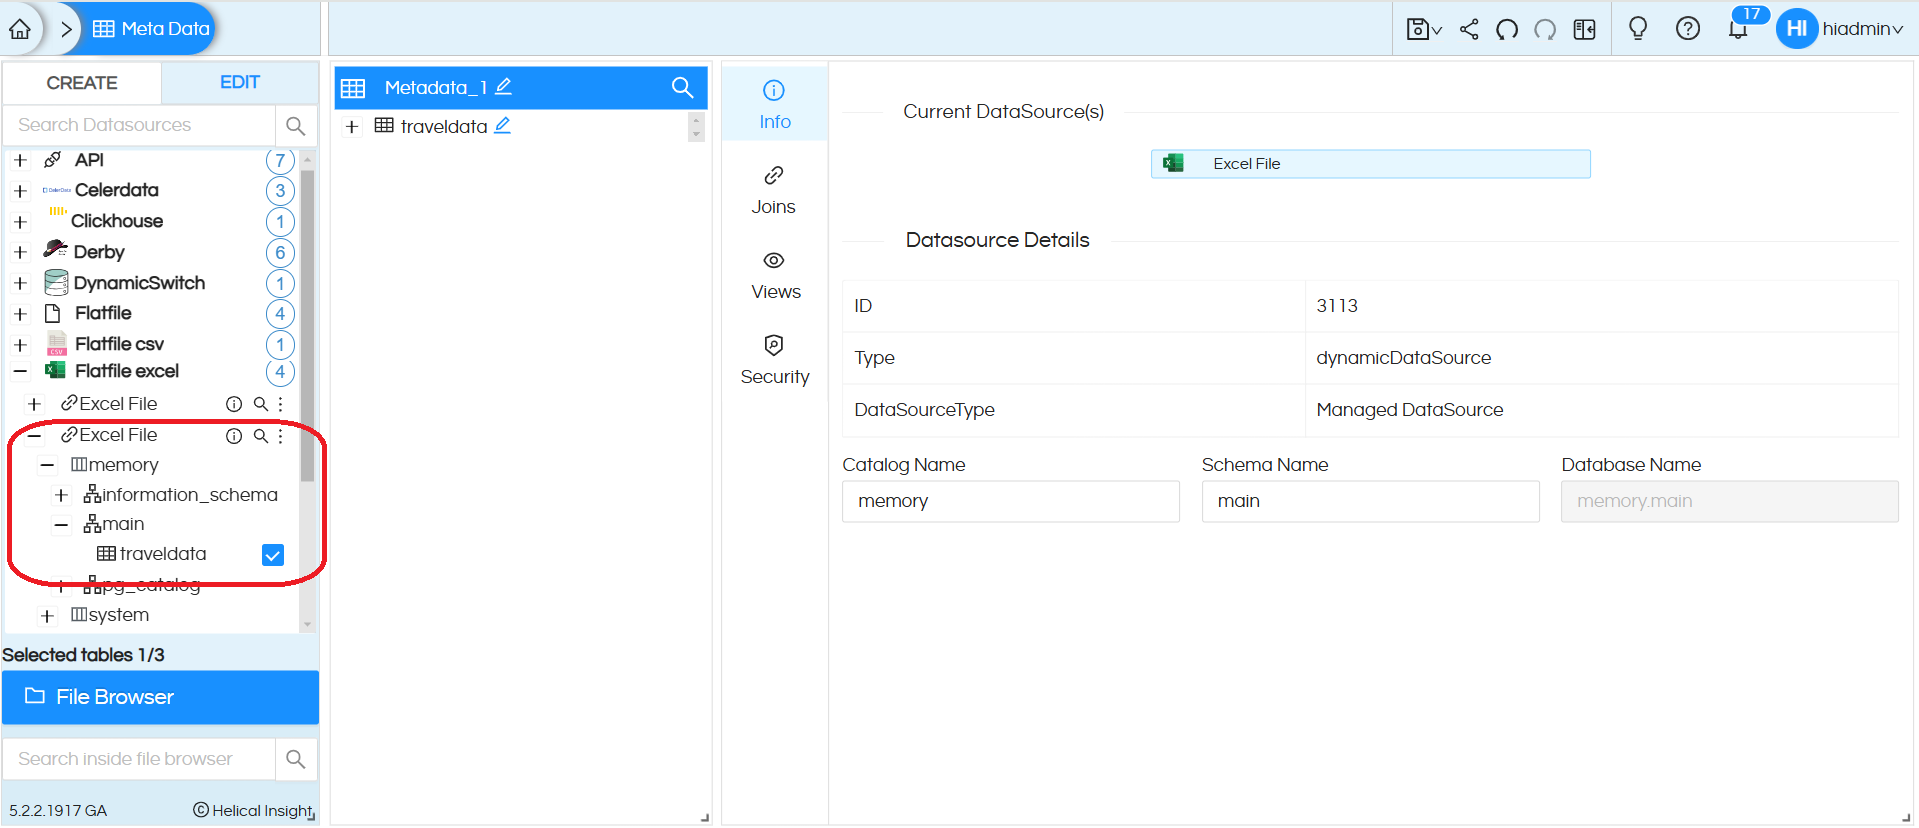
10. Go to the metadata page and expand the Flatfile excel data source. Then expand the Excel File connection. Expand ‘memory‘ and then ‘main’ and it will show the table name that we provided in the data source connection configuration. Drag the table into metadata
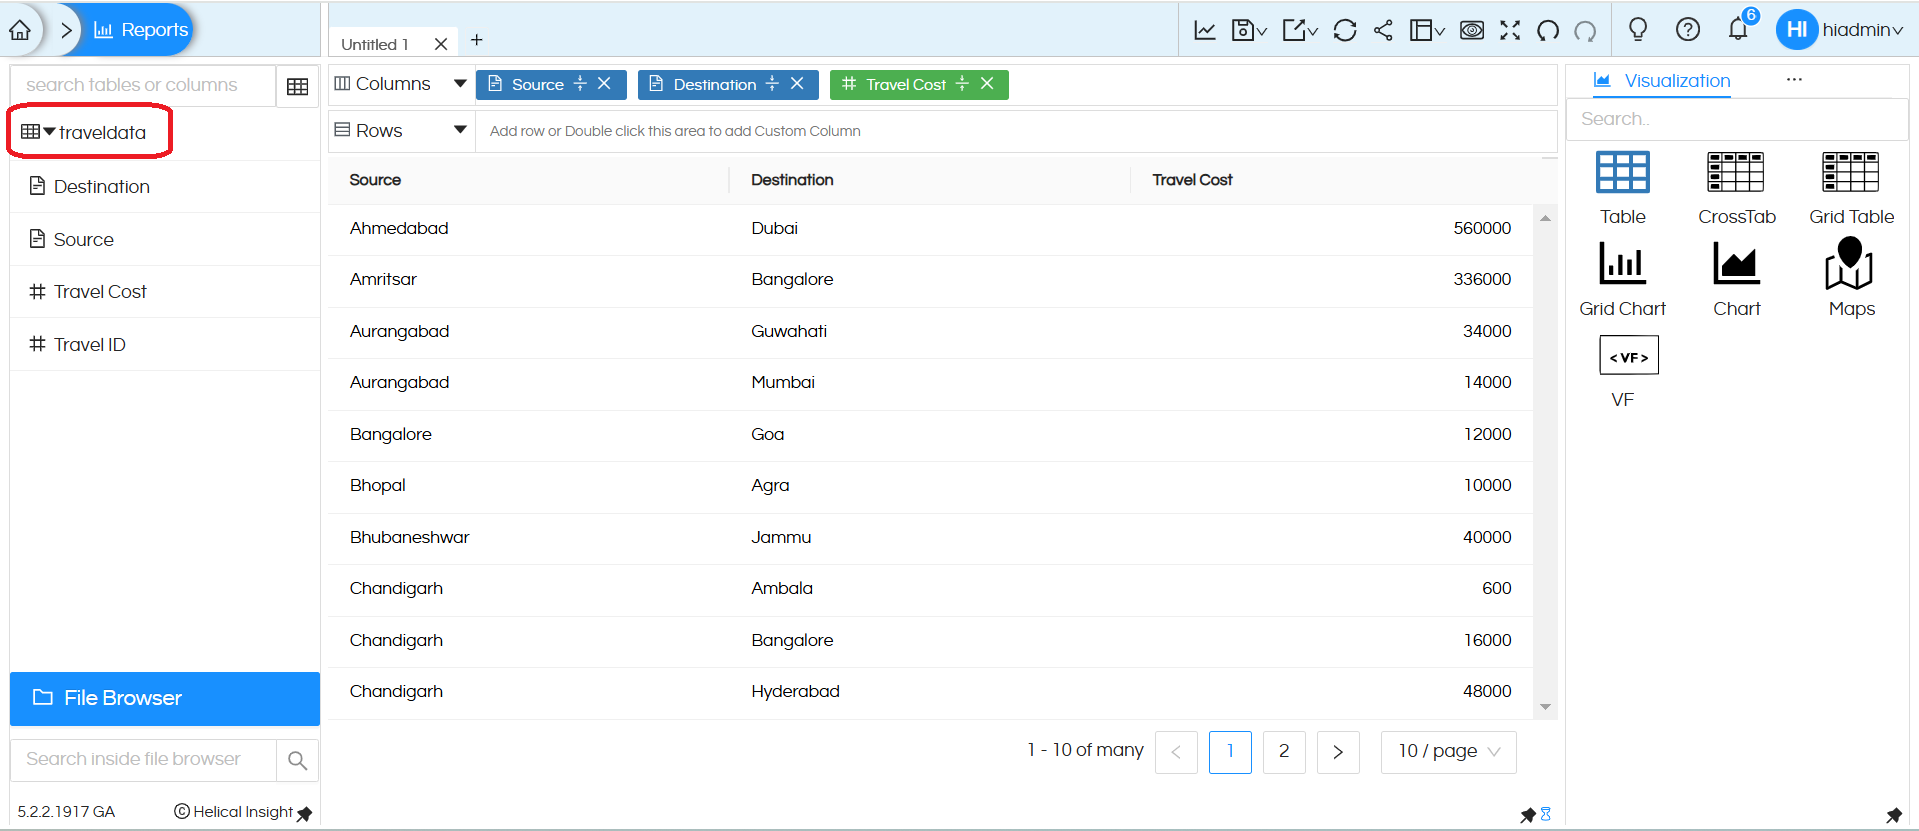
11. Create a report using the metadata and save it
Note : If we have multiple sheets in the Excel file, we need to mention it as below
{
  "tableName": "traveldata",
  "strategy": "in-memory",
  "persistentLocation": "",
  "extensions": [
    "excel",
    "spatial"
  ],
  "config": {
    "layer": [
      "travels","empDetails" // sheet names from excel
    ],
    "open_options": [
      "HEADERS=FORCE",
      "FIELD_TYPES=AUTO"
    ]
  }
}
In the metadata, it lists two separate tables by appending ‘table‘ to the sheet name. A table is created for each sheet.
